Windows Subsystem for Linux + DistroLauncher
TL;DR: 利用 DistroLauncher 在 WSL 上运行自己喜欢的 GNU/Linux 发行版。
复习(?):Windows Subsystem for Linux 是个啥玩意?
从 Windows 10 Insider Preview 开始,加入了 Windows Subsystem for Linux (适用于 Linux 的 Windows 子系统) 功能.
Windows Subsystem for Linux(简称WSL)是一个为在Windows 10上能够原生运行 Linux 二 进制可执行文件(ELF 格式)的兼容层。 它是由微软与 Canonical 公司合作开发,目标是使纯正的 Ubuntu 映像能下载和解压到用户的 本地计算机,并且映像内的工具和实用工具能在此子系统上原生运行。
时光荏苒, WSL 本身也有了第二次演进。 最初的 WSL 提供了一个微软开发的 Linux 兼容内核接口(不包含Linux代码),来自 Ubuntu 的用户模式二进制文件在其上运行。
WSL 2 中的 Linux 内核是根据最新的稳定版分支(基于 kernel.org 上提供的源代码)在内部 构建的。此内核专门针对 WSL 2 进行了优化。 (汝大概可以当作 M$ 专门整了个 Linux 内核 然后再塞进一个专门的虚拟机里来运行 WSL 和下面的一堆发行版)。
有关 WSL 1 和 2 的区别可以看 M$ 官方的对比图。
WSL 的具体应用就是 Bash on Ubuntu on Windows 啦,在 Windows 上实现了一个 Ubuntu 子 系统。(当然后面也支持了几个别的发行版)
开始之前
这不是一篇教授如何使用 WSL 的教程,所以汝应该先把 WSL 装上,然后有一个可用的发行版。
接下来去把 Visual Studio 装上(担心空间不够就只先安装一个编辑器, 接下来打开 DistroLuncher 的时候应该会提醒汝装剩下的)
接着把 DistroLauncher 下载(或者克隆下来),在 Visual Studio 里打开解决方案。
准备发行版 tarball
考虑到 Microsoft Store 里有好几个打包好的发行版了(像是 Ubuntu/Debian/Fedora/ openSUSE 啥的),咱还是拿咱自己中意的 Arch 举例好了。
以及可以参考 ArchWiki 上从现有 GNU/Linux 发行版安装的那一节。
然后用汝手上现有的 WSL 发行版来完成接下来的操作。(咱个人比较中意 Debian)
首先下载 Bootstrap 用的 tarball ,并把它解压到哪里去。(例如 /tmp 或者 /root )
# tar xzf <path-to-bootstrap-image>/archlinux-bootstrap-*-x86_64.tar.gz
用文字编辑器打开 /root.x86_64/etc/pacman.d/mirrorlist ,选取一个镜像仓库。
如果汝所使用的发行版有 Bash 4,而且 unshared 支持 --fork 和 --pid 选项的话,可以 直接用 tarball 里面的 arch-chroot 命令进入 chroot 环境:
# 为了避免 error: could not determine cachedir mount point /var/cache/
  pacman/pkg 错误,要把 tarball 的目录原地绑定挂载一遍。
  (当然汝也可以通过修改 /etc/pacman.conf 关掉安装前的剩余空间检查来绕开
  这个问题,不过不推荐就是了……)
# mount --bind /tmp/root.x86_64 /tmp/root.x86_64
# /tmp/root.x86_64/bin/arch-chroot /tmp/root.x86_64/
不然传统的方法也是能用的,例如:
# mount --bind /tmp/root.x86_64 /tmp/root.x86_64
# cd /tmp/root.x86_64
# cp /etc/resolv.conf etc
# mount -t proc /proc proc
# mount --make-rslave --rbind /sys sys
# mount --make-rslave --rbind /dev dev
# mount --make-rslave --rbind /run run
# chroot /tmp/root.x86_64 /bin/bash
初始化一下 pacman 的密钥环:
# pacman-key --init
# pacman-key --populate archlinux
更新,和安装一些别的软件包,看汝自己的需要啦(--needed 选项会跳过已是最新的 软件包而不是重新安装它们):
# pacman -Syu base base-devel nano --needed
如果有需要的话,汝也可以在这个时候干些别的,例如修改 /etc/sudoers 或者把 linux 包卸载掉之类的 (反正也用不上嘛……)
接着把修改好的 tarball 打包:
# tar --numeric-owner -cvzf /path/to/your/arch.tar.gz /tmp/root.x86_64/
然后把 tarball 复制到汝的 DistroLauncher 下面备用,名字起作 install.tar.gz 。
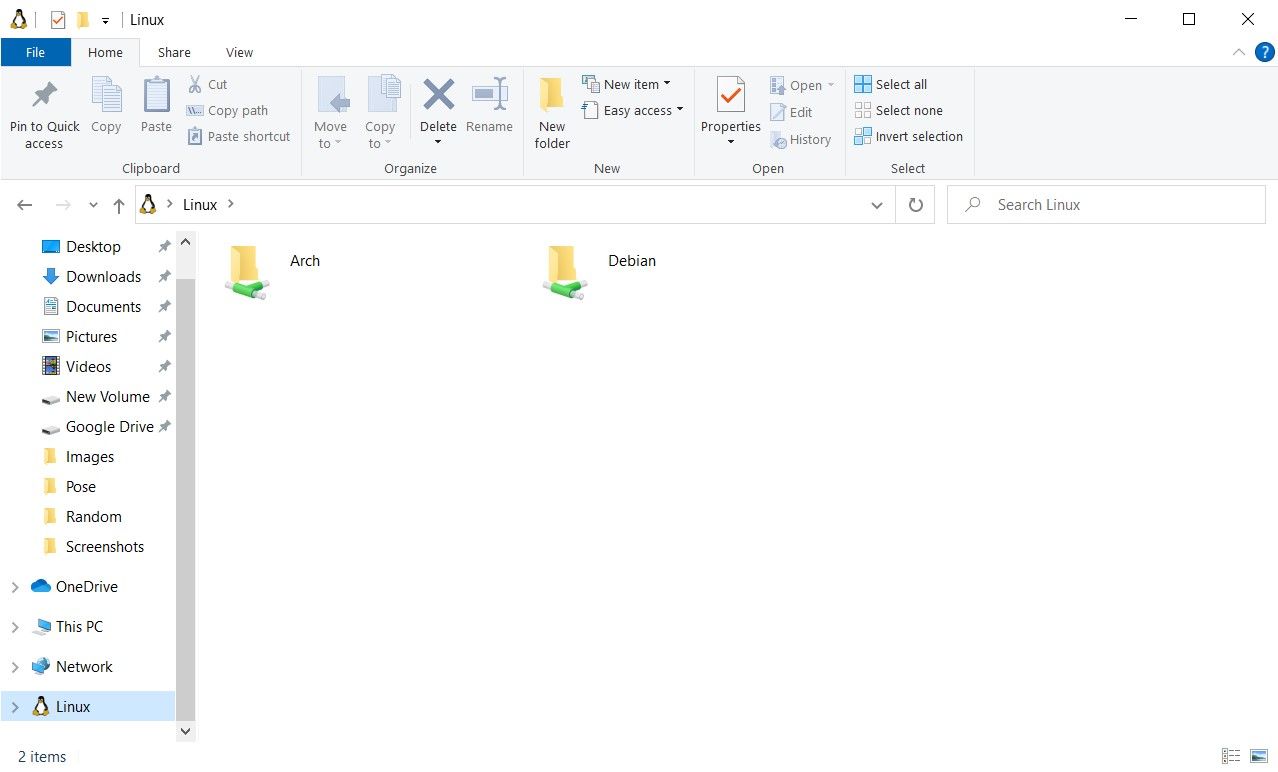
- 比较新的 Windows Insider Preview 的话能通过文件资源管理器直接访问 WSL 的 文件系统,大概像这个样子:
- 不然的话,在 WSL 里复制出来也是 OK 的:
# cp arch.tar.gz /mnt/c/Users/Horo/source/repos/WSL-DistroLauncher/x64/install.tar.gz
修改 DistroLauncher
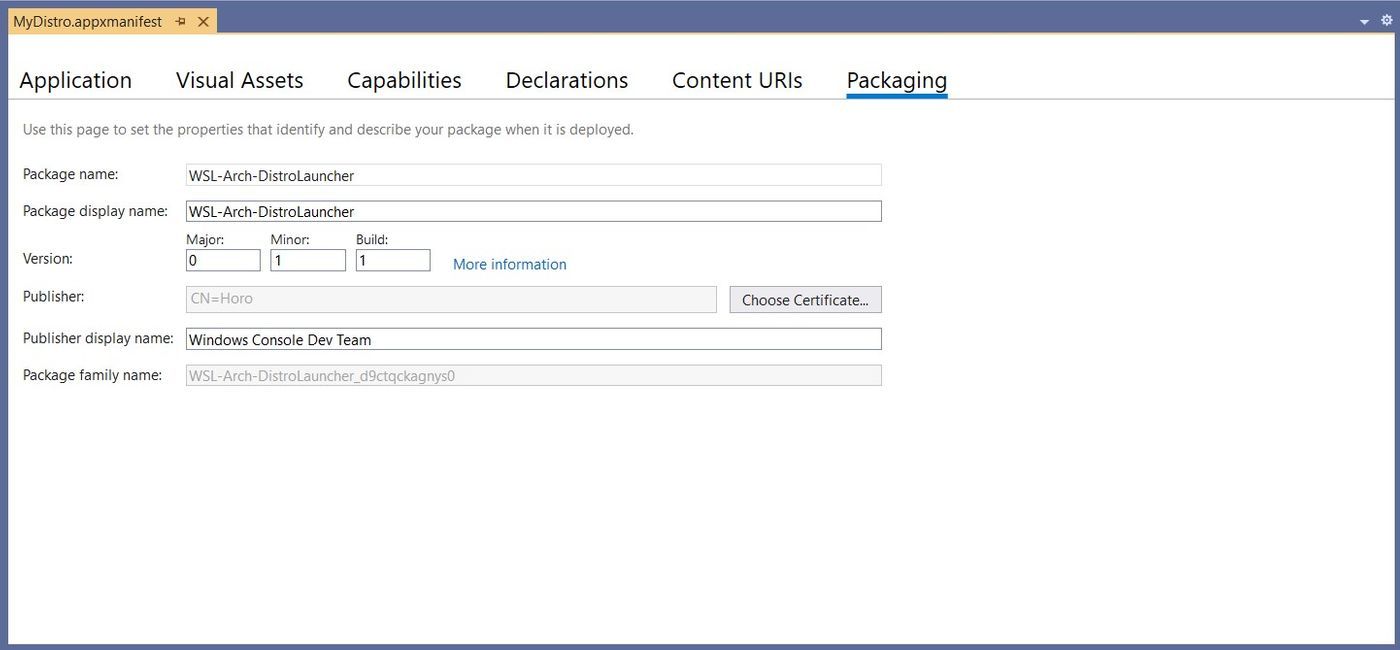
在 Visual Studio 里打开 DistroLauncher-Appx/MyDistro.appxmanifest , 、 修改一些基本属性(像是名字啥的)。不过别忘了在 Packaging 那里选择一个 打包用的测试证书(不管是现成的还是临时创建一个都 OK)
打开 Launcher 下面的 DistributionInfo.h ,修改一些和汝的发行版相关的信息:
namespace DistributionInfo
{
    // The name of the distribution. This will be displayed to the user via
    // wslconfig.exe and in other places. It must conform to the following
    // regular expression: ^[a-zA-Z0-9._-]+$
    //
    // WARNING: This value must not change between versions of your app,
    // otherwise users upgrading from older versions will see launch failures.
    // 在 WSL 中区别汝的发行版的名称,如果汝有计划分发自己制作的发行版,记得之后
    // 不能修改它。
    const std::wstring Name = L"Arch";

    // The title bar for the console window while the distribution is installing.
    // 在运行时命令提示符窗口上方的标题。
    const std::wstring WindowTitle = L"Arch Linux";

    // 下面两个函数在 DistributionInfo.cpp 里,默认是适合类 Ubuntu 系统的,
    // 稍后也会修改。

    // Create and configure a user account.
    // 初始化时创建新用户的函数。
    bool CreateUser(std::wstring_view userName);

    // Query the UID of the user account.
    // 查询 UNIX 用户 ID 的函数
    ULONG QueryUid(std::wstring_view userName);
}
打开 Launcher 下面的 DistributionInfo.cpp ,接着修改和汝的发行版相关的信息: (关键大概就是上面有提到的那个 CreateUser 函数)
bool DistributionInfo::CreateUser(std::wstring_view userName)
{
    // 创建用户账户的函数。
    DWORD exitCode;
    // std::wstring commandLine = L"/usr/sbin/adduser --quiet --gecos '' ";
    // Arch 这边没有 adduser ,所以用 useradd 和 passwd 代替。
    // 记得 commandLine 是要和用户名拼起来的,所以最后面要有个空格。
    std::wstring commandLine = L"/usr/bin/useradd -m -s /bin/bash ";
    commandLine += userName;
    HRESULT hr = g_wslApi.WslLaunchInteractive(commandLine.c_str(), true, &exitCode);

    commandLine = L"/usr/bin/passwd ";
    commandLine += userName;
    hr = g_wslApi.WslLaunchInteractive(commandLine.c_str(), true, &exitCode);
    if ((FAILED(hr)) || (exitCode != 0)) {
        return false;
    }

    // 把用户添加进合适的组中,这个也要看不同的发行版调整。
    // commandLine = L"/usr/sbin/usermod -aG adm,cdrom,sudo,dip,plugdev ";
    commandLine = L"/usr/bin/usermod -aG wheel ";
    commandLine += userName;
    hr = g_wslApi.WslLaunchInteractive(commandLine.c_str(), true, &exitCode);
    if ((FAILED(hr)) || (exitCode != 0)) {

        // 如果前面的两条命令失败的话,如何删除用户?
        // commandLine = L"/usr/sbin/deluser ";
        commandLine = L"/usr/bin/userdel ";
        commandLine += userName;
        g_wslApi.WslLaunchInteractive(commandLine.c_str(), true, &exitCode);
        return false;
    }

    return true;
}
如果汝有意愿换个图标的话,把图标放进 /images 文件夹里。
编辑 DistroLauncher-Appx/DistroLauncher-Appx.vcxproj 文件,修改汝的发行版 的可执行文件的名称(例如 arch.exe ?)
<PropertyGroup Label="Globals">
 ...
    <ProjectName>mydistro</ProjectName>
</PropertyGroup>
检查 DistroLauncher-Appx/MyDistro.appxmanifest 文件,确保……
- <desktop:ExecutionAlias Alias="mydistro.exe" /> 是汝刚刚决定的名字,例如 <desktop:ExecutionAlias Alias="arch.exe" />
- 以及每一个 Executable 的值也是那个名字,例如 <Application Id="mydistro" Executable="arch.exe" EntryPoint="Windows.FullTrustApplication">
构建和测试
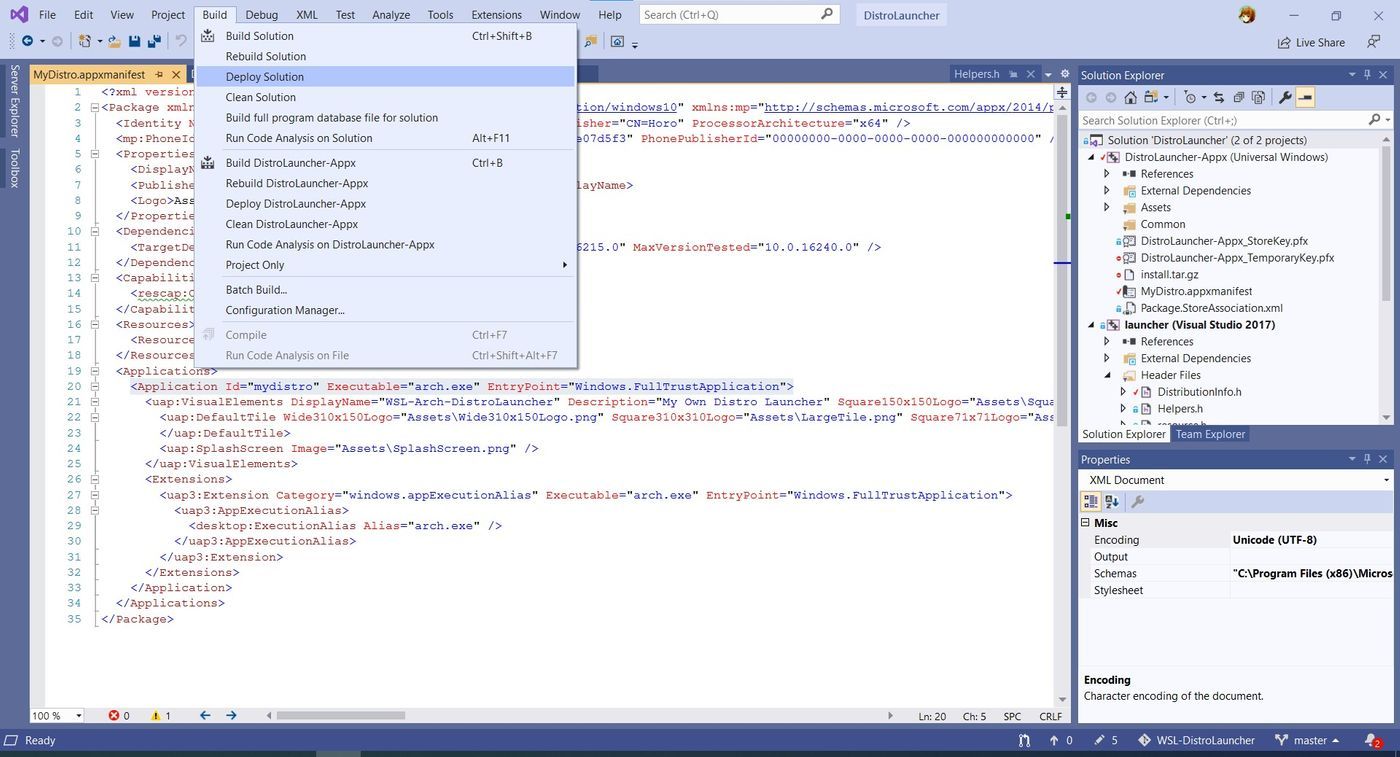
用 Visual Studio 的“部署解决方案”生成 Appx:
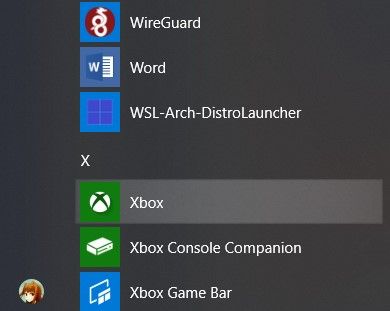
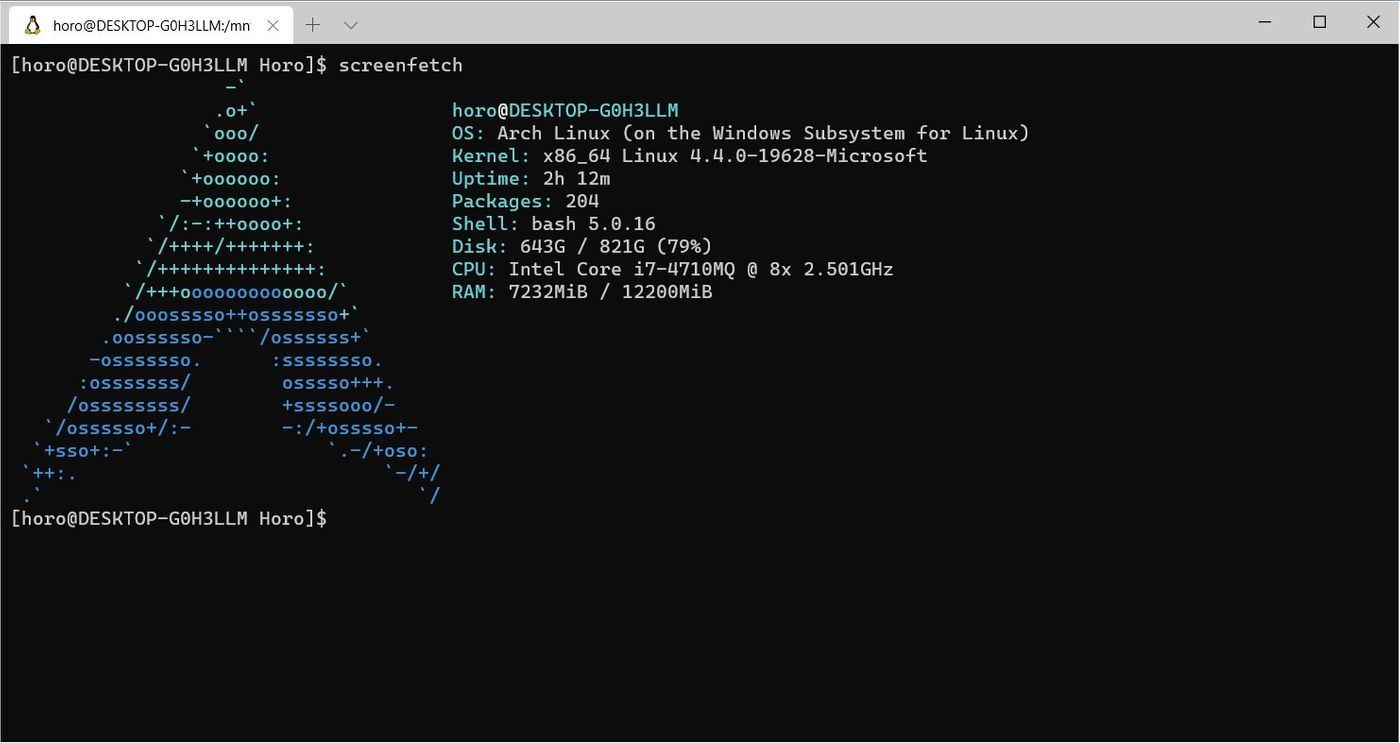
假如一切顺利的话,新的应用会出现在汝的开始菜单里面:
打开然后创建 UNIX 用户试一下?
喜欢我的作品吗?别忘了给予支持与赞赏,让我知道在创作的路上有你陪伴,一起延续这份热忱!


- 来自作者
- 相关推荐