Unity Lightmapping 光照貼圖烘焙設定筆記
原始文章連結:https://tedliou.com/archives/unity-light-baking/
光照貼圖這一塊的設定不論是初學者或進階玩家都需花費大量時間不斷進行修正的開發環節。恰巧在這次期末專題有機會學習到光照貼圖的烘焙 (Bake),趁剛進入寒假的空閒時間,來整理一下開發筆記。
本文使用 Unity 2018.4.14f1 Personal 版本
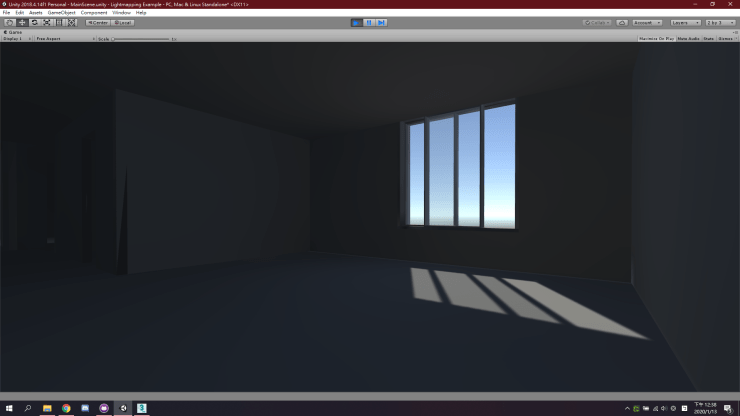
首先,我們用兩張圖來比較一下有烘焙光照貼圖與沒有烘焙的畫面:
有烘焙 Bake
沒有烘焙 Realtime
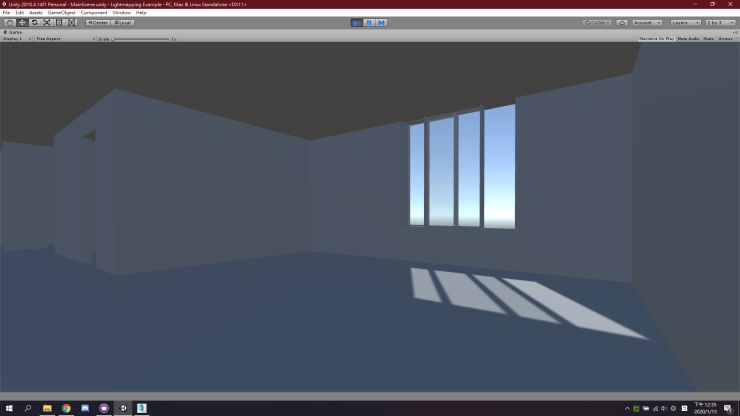
以結果來說,烘焙過後的畫面精細度與真實度會大大提升!
其實這只是一個很簡單的概念,沒有烘焙的畫面是 Unity 在遊戲執行中持續重複計算而產生即時光影,因為必須短時間產生畫面,所以不能計算過於複雜的光線反射;相對的,我們在開發過程中先花時間將複雜的光線反射計算出來,之後在遊戲中就可以直接使用擁有接近真實光線的畫面。
廢話好像太多了,我們趕快進入正題:
本文範例專案已上傳至 GitHub
一、生成 3D 模型 Lightmap UVs
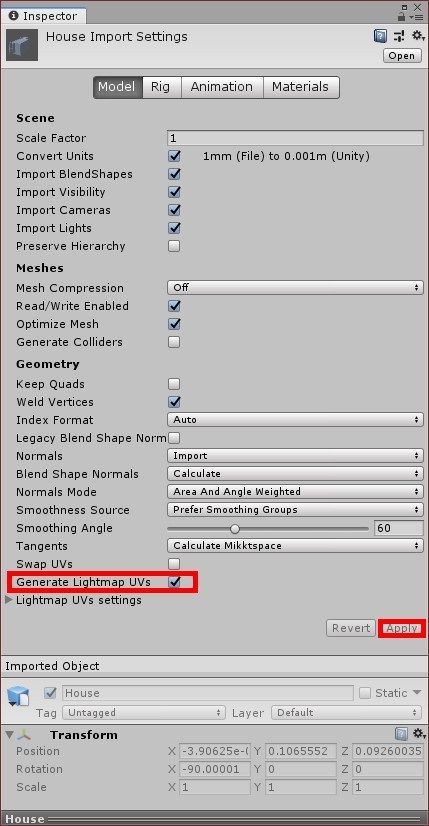
為了要讓 Unity 能順利將烘焙好的數據貼到模型上面,我們必須為 3D 模型生成 Lightmap UVs。如果沒有先生成這東西,在烘焙時 Unity 有可能會閃退 ……
開啟 3D 模型的屬性面板 (Inspector),勾選畫面中的 Generate Lightmap UVs 並按下 Apply 套用。
二、轉換模型為靜態物件
接下來將 3D 模型拉入場景 (Scene),並開啟此物件的屬性面板 (Inspector)。點開右上角的下拉式選單來啟用 Lightmap Static 或直接勾選 Static 都可以。
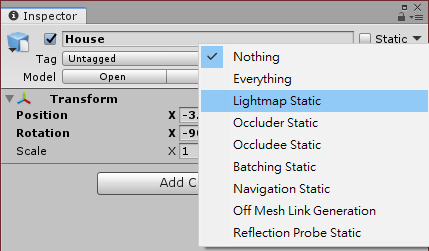
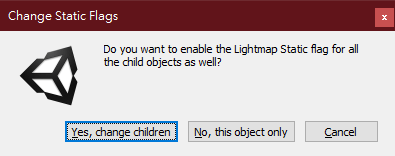
如果出現 Do you want to enable the Lightmap Static flag for all the child objects as well? 訊息,代表這個模型有子物件,請選擇 Yes, change children。
三、調整光源作用模式為 Mixed
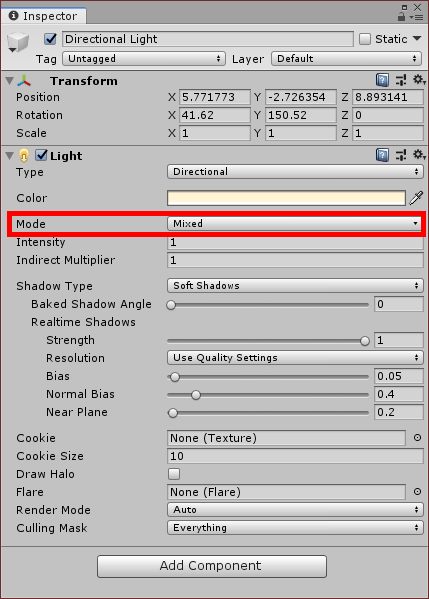
開啟場景中所有作用中且不會動的光源的屬性視窗 (Inspector),將 Light Component 下的 Mode 調整為混合模式 Mixed,混合模式可以同時產生烘培過後的精細光影與預設的 Realtime 即時光影。一般來說會使用這個模式,除非有特殊需求。
四、光照烘焙設定
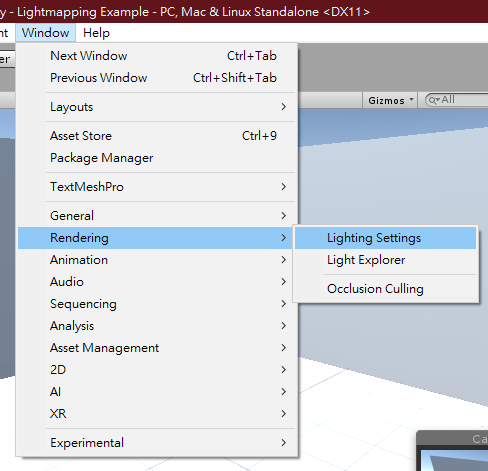
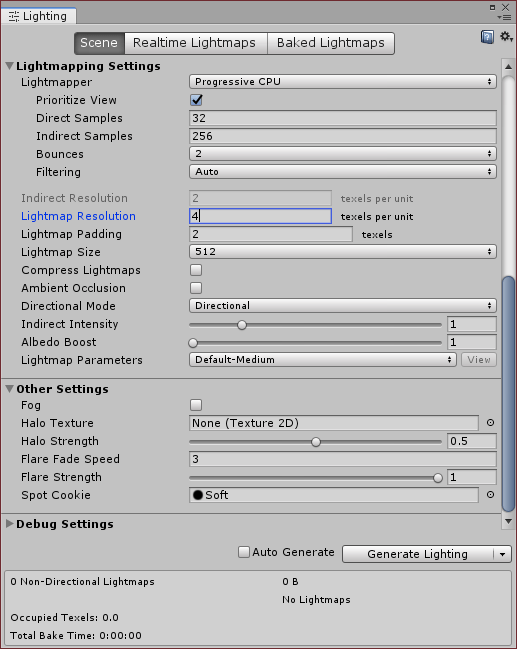
準備進入最終階段,從上方選單中開啟 Window > Rendering > Lighting Settings 面板。
在開發階段,為了盡可能縮短烘焙花費的時間,我們必須調整以下關鍵設定:
- Lightmapper 調整為 Progressive CPU 或 Progressive GPU。
- Lightmap Resolution 修正為 4。
- Lightmapp Size 修正為 512 或更低。
- Compress Lightmaps 容易出問題,在開發階段時 取消勾選。
- Auto Generate 取消勾選。
四、烘焙
當場景上的物件與相關選項設定完成後,點擊 Light Settings 面板中的 Generate Lightings 即可開始烘焙。
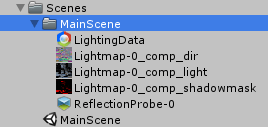
烘焙完成的光照貼圖會出現在場景檔案旁的同名資料夾中。
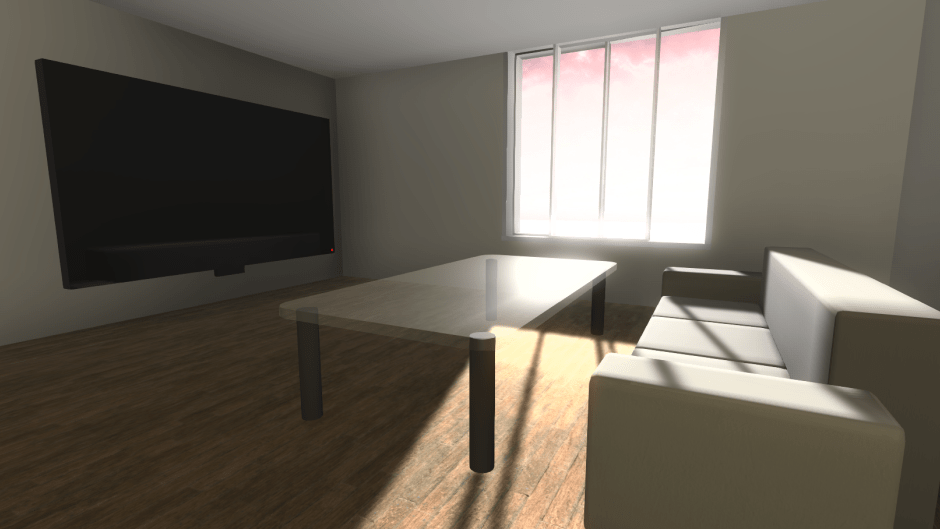
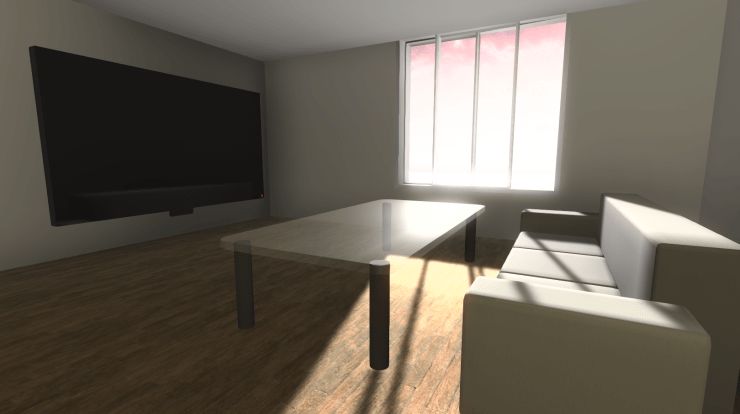
加上材質貼圖後,烘焙完成的畫面會更加精美。
喜欢我的作品吗?别忘了给予支持与赞赏,让我知道在创作的路上有你陪伴,一起延续这份热忱!

- 来自作者