Coding Life | react 三種派發事件的方式
本文提供三種react派發事件的方法,其中第一種為react原生方式,第二、三種為redux-observable的事件派發,開發者可依據不同情境使用:
1. 用useState在component內部做輕量級的變數改動
2. 在component內部派發事件到reducer,影響全局變數
3. 派發事件需經過特殊處理後(經epicmiddleware)到reducer
第一種方式適用於單純變數,只在component內部改動,不會需要透過全局改動的變數;第二種方式適用於變數不單只在component改動,更會受全局影響、或受全局調用;第三種方式在於派發事件本身需要做額外處理的狀況,像是要去打某支API。
來看看實例吧!
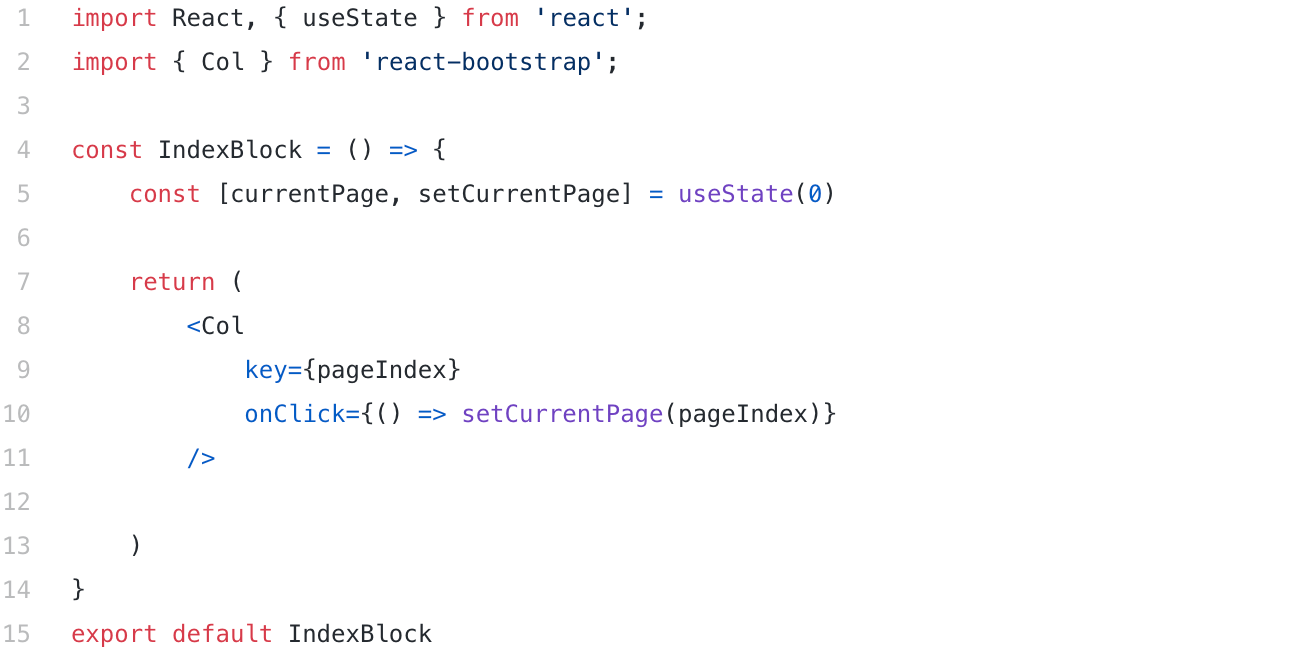
1. 用useState在component內部做輕量級的變數改動
使用useState的方式只要在component內部初始化跟調用即可:
1. 要定義事件行為(action)
2. 需要一個reducer來觀察事件行為
3. component的呼叫

2. 在component內部派發事件到reducer,影響全局變數
在方法二中引入redux-observable, 會使用reducer作為觀察者,觀察事件的派發。這個方法會較為複雜一些,需要以下步驟:
1. 要定義事件行為(action)
2. 需要一個reducer來觀察事件行為
3. component的呼叫
個人習觀多使用一個const.ts來定義事件本身

以下依序為action.ts, reducer.ts 及component本身:
export const actionSetCurrentPage = (current_page: any) => ({
	    type: actionTypes.SET_CURRENT_PAGE,
	    current_page: current_page,
	})
從const.ts引入SET_CURRENT_PAGE, export出去變成一個function
const initState = {
	    currentPage: 0,
	}


	const reducer = (state = initState, action: AnyAction) => {
	    switch (action.type) {
	        case actionTypes.SET_CURRENT_PAGE: {
	            const { current_page } = action
	            return {
	                ...state,
	                currentPage: current_page,
	            }
	        }
	        default: {
	            return { ...state }
	        }
	    }
	}
reducer觀察到事件發生,事件符合SET_CURRENT_PAGE,就update state.
const PaginationBlock = () => {
	    const { currentPage } = useSelector((state: RootStateType) => state.home)


	    const setCurrentPage = (page: any) => {
	        dispatch({
	            type: "SET_CURRENT_PAGE",
	            current_page: page
	        })
	    }


	    return (
	        <Col
	            key={pageIndex}
	            onClick={() => setCurrentPage(pageIndex)}
	            active={pageIndex === currentPage}
	        />


	    )
	}
在component內部dispatch SET_CURRENT_PAGE 這個事件
以上就完成了一次全局的事件派發。
3. 派發事件需經過特殊處理後(經epicmiddleware)到reducer
除了action.ts, reducer.ts, component本身之外,還需要有epic.ts要設置
1. 要定義事件行為(action)
2. 定義一個middleware來處理action (epic)
3. reducer來觀察事件行為
4. component的呼叫
以一個實際的行為為例,假設這裡要派發一個事件,這個事件會發出一個請求,請求成功後,對拿到的response payload處理過後放入store。
一樣,個人習觀多使用一個const.ts來定義事件本身
export const actionType = {
	  'GET_API':'GET_API',
	  'GET_API_SUCCESS':'GET_API_SUCCESS',
	  'GET_API_FAIL':'GET_API_FAIL',
	}
下依序為action.ts, epic.ts , reducer.ts 及component本身
export const actionGetAPI = () => ({
	    type: actionTypes.GET_API,
	})


	export const actionGetAPISuccess = (payload: any) => ({
	    type: actionTypes.GET_API_SUCCESS,
	    payload: payload,
	})


	export const actionGetAPIFail = () => ({
	    type: actionTypes.GET_API_FAIL,
	})
經過epic時,打API的行為有可能會成功也有可能會失敗,因此定義了entry的action, 也多定義success及fail的action
import { ofType } from "redux-observable";
	import { from, of } from 'rxjs';
	import axios from 'axios';
	import { switchMap } from "rxjs/operators";


	const getAPI = (action$: any, store: any) => {
	    return action$.pipe(
	        ofType(actionTypes.GET_API),
	        switchMap((action: any) => {
	           return from(
	                axios.get(`https://example.com/`)
	            ).pipe(
	                map(response => response.data),
	                map(payload => actionGetAPISuccess(payload)),
	                catchError(error => of(actionGetAPIFail(error))),
	            )
	        })
	    )
	}
epic像是後端的middleware, 會先抓到GET_API的事件,請求網址後,依據response status code, 回應success action或是fail action
const initState = {
	    url_payload: any,
	}


	const reducer = (state = initState, action: AnyAction) => {
	    switch (action.type) {
	        case actionTypes.GET_API_SUCCESS: {
	            const { payload } = action
	            return {
	                ...state,
	                payload: payload,
	            }
	        }
	        default: {
	            return { ...state }
	        }
	    }
	}
過epic的成功行動才去reducer改寫store
import React, { useEffect } from 'react';
	import { useDispatch, useSelector } from "react-redux";


	const useGetAPI = () => {
	    const dispatch = useDispatch()
	    useEffect(() => {
	        dispatch(actionGetAPI())
	    }, [dispatch])
	}


	const ExampleGetAPI = () => {
	    const { payload } = useSelector((state: any) => state)
	    useGetAPI()
	    return (
	        <div>
	            {payload}
	        </div>
	    )
	}


	export default ExampleGetAPI
最後從component觸發GET_API這個行為就可以了
以上也完成了在redux-observable最困難的事件派發。
謝謝大家的觀看,有筆記錯誤的地方在請大家協助指正!
也可以到我的medium看好讀版呦 !
喜欢我的作品吗?别忘了给予支持与赞赏,让我知道在创作的路上有你陪伴,一起延续这份热忱!
