AWS S3+Media Converter+CloudFront for video file streaming CDN service
Although the final calculation of the price and the consideration of the usage situation should not adopt such a solution, let’s record it.
Main idea
The S3 bucket will be limited by the region, so if users travel all over the world, the network speed will become the biggest bottleneck of the service. Unless you sync all the data, but that doubles the storage cost, it's fine for a small number of files that don't change very much, but it can be horrible if it's user-generated data.
So the idea is to open two s3 buckets, one of which is used as the storage for users to upload videos, and the other is used as the storage for the converted files. Then use cloudfront to read the data as a CDN, and provide users everywhere for video file streaming.
Open S3 bucket to store files
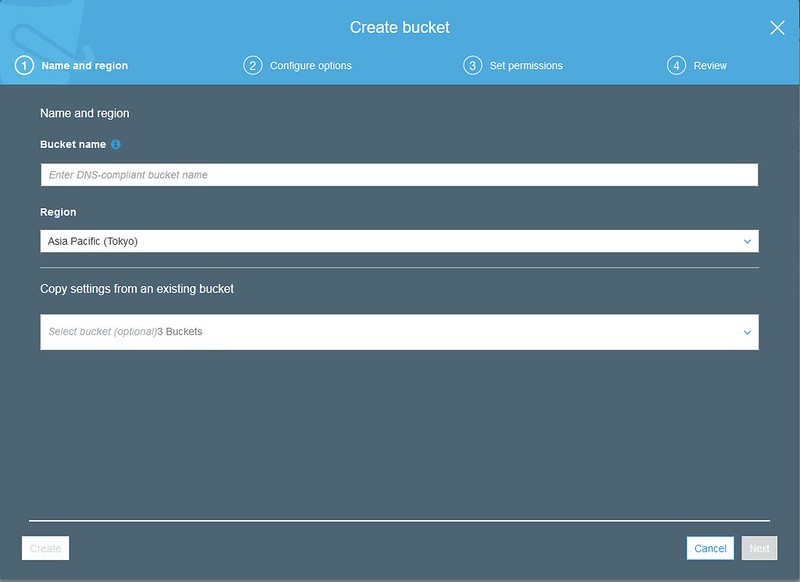
When opening a bucket, it is necessary to decide which region the file should be placed in, so it is still possible to face the user that it takes a lot of time to transfer from the bucket. Therefore, the simple solution is not to let users write files directly to the bucket, but to transfer files to the nearest EC2 instance first, and then transfer them faster through the internal water pipe of AWS.
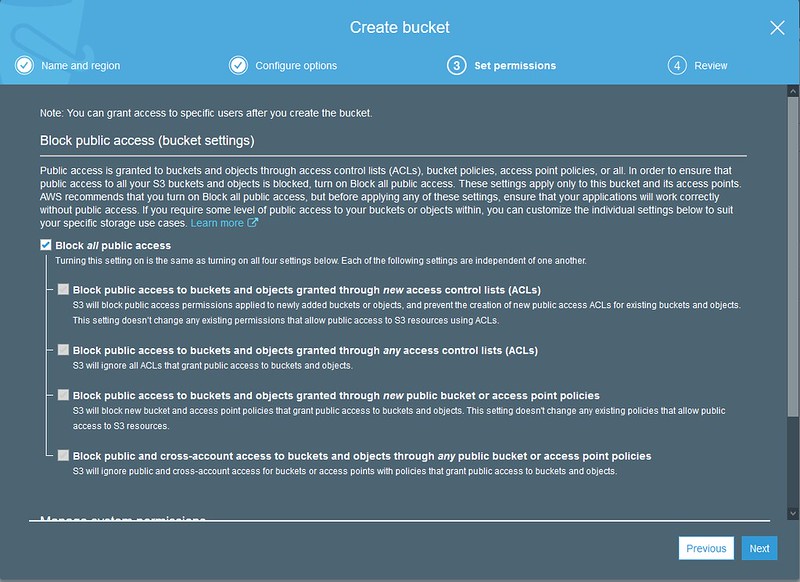
Then turn off public access to avoid security breaches.
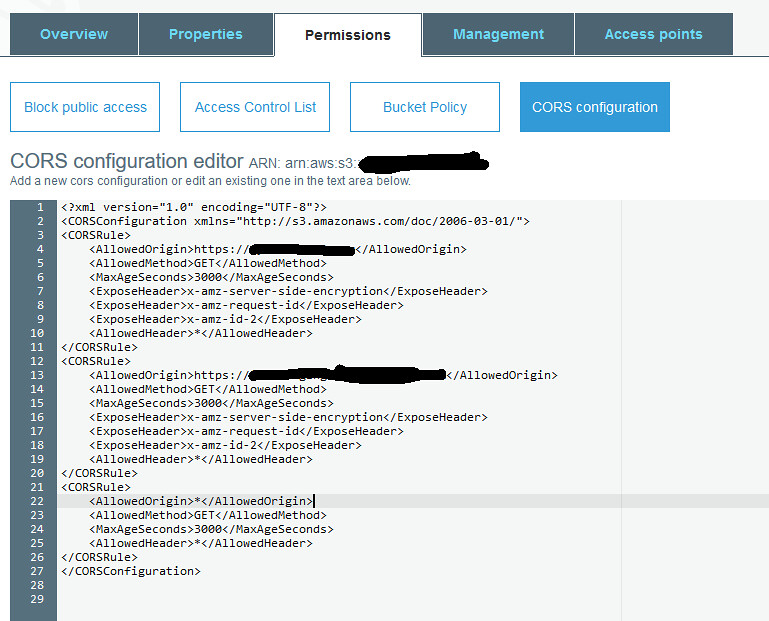
To play video file streaming in the web environment, HLS.js is often used, and the video is placed under the domain name of aws, so there must be a problem of cors. So remember to set the CORS policy. If it is allow * (as shown at the end of the above example), it will become that any website can access the data, which will not be a good thing, so you must obediently write the website that allows CORS.
In this way, the establishment of the s3 bucket is almost complete.
Create IAM role for Media Convert
Before starting to use Media Converter, please set up MediaConvert_Default_Role first, otherwise, Media Convert service cannot be used.
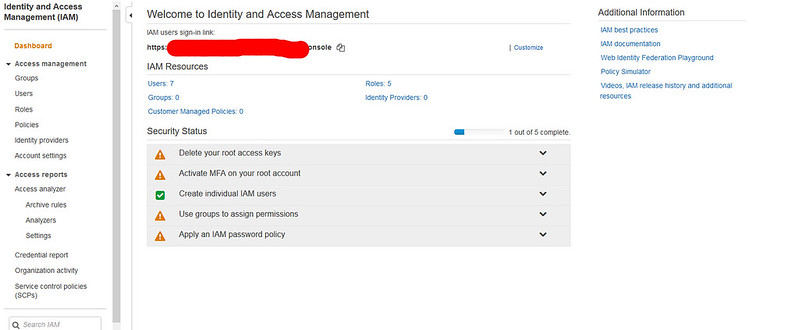
Go to the IAM page and click on Roles

Create Role

Look directly at the services below, you can find MediaConvert
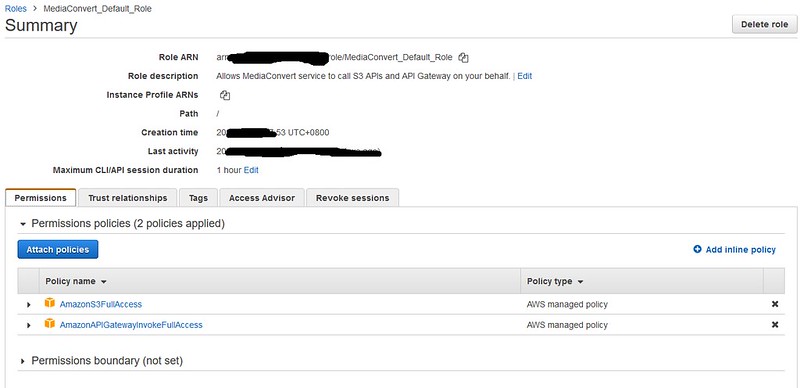
The default will bring in S3fullaccess and Apigetwayinvokefullaccess permissions, go directly to the next step until the final establishment.
Using Media Convert

The above picture is the job list, you can see the status of the previous job.
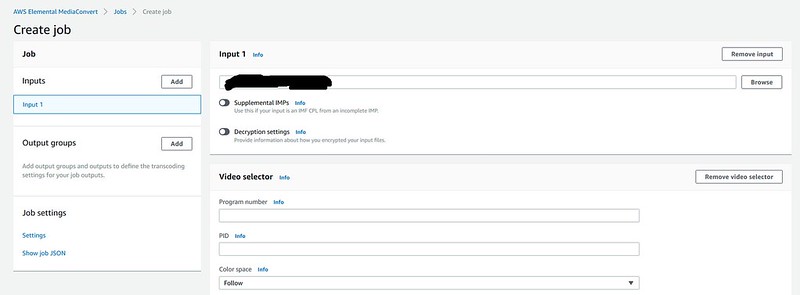
After creating a job, you must first select the file source. Then increase the output group (add output group)

The output group has a variety of formats, here I use apple hls
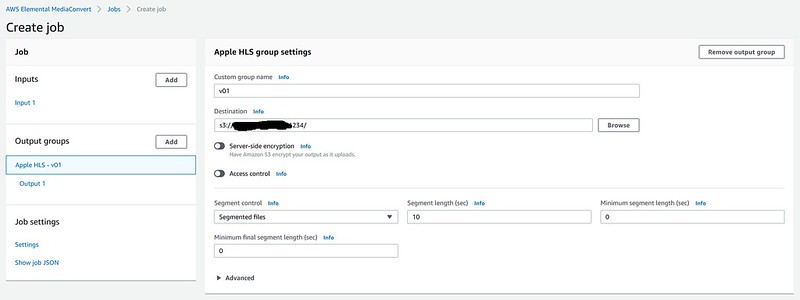
Then you need to specify which side the Convert result should be written to.

output1 is to specify the output format, bitrate and other data, which can be selected in the preset or filled in manually. Here I use 16:9 1280*720 5.0Mbps. If you want multiple outputs, you can continue to press add output group.
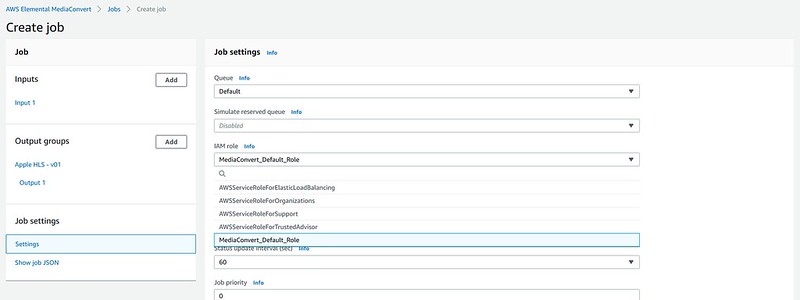
In the Job setting, remember to assign it to MediaConvert_Default_Role to execute, otherwise it will be similar to the following figure.

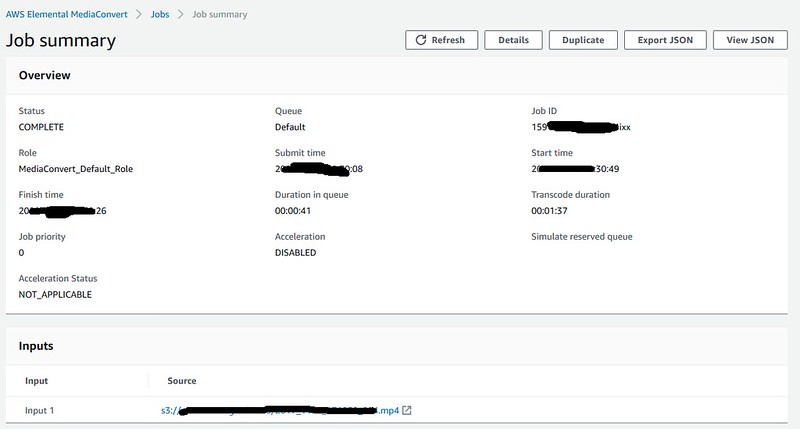
If successful, there will be no error message

The segmented video file can also be seen in the s3 bucket, and the .m3u8 file is the play list during streaming.
CloudFront CDN

The above picture shows the page of entering cloudfront, and you can see the status of each distribution. It should be noted that due to CDN caching, any modification will not immediately see the modified appearance.

After modification or newly created distribution, you will see that the status is in progress, you have to wait for a while

Create a new distribution, use the Web, and RTMP is about to end its service.

Select the source of data, in addition to s3 bucket, you can also use services such as Load balancer, anyway, there is really something behind it.

Then read the bucket with read permission (especially when the bucket was created with public access closed).

If a new access identity is established, it can be checked later.
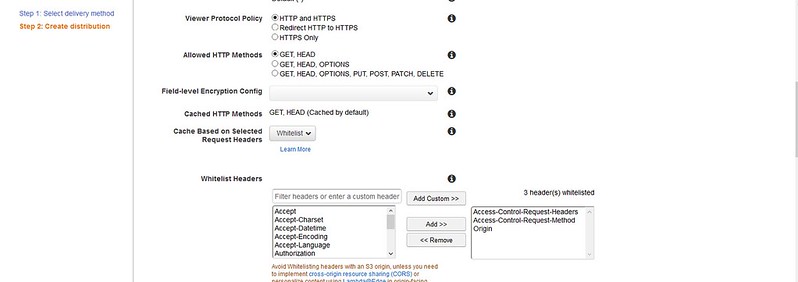
Then you need to whitelisting headers, especially those related to CORS, or you won't be able to get anything across domains.

After the establishment, you can see the domain name, and you can go to http/https through this domain name to get the data.
In addition, signed url/signed cookie can also be set to restrict access, which can be used when there is a need to allow certain data to be browsed only by logged-in users.
HLS.js streaming
The last is to write web pages, the most commonly used should be HLS.js. The example provided by the official website itself is also very clear, just rewrite it, like the following.
 <html>

  <head>
    <title>Hls.js demo - basic usage</title>
  </head>

  <body>
      <script src="https://hls-js-latest.netlify.app/dist/hls.js"></script>

      <center>
          <h1>Hls.js demo - basic usage</h1>
          <video height="600" id="video" controls></video>
      </center>

      <script>
        if(Hls.isSupported()) {
          var video = document.getElementById('video');
          var hls = new Hls({
              debug: true
          });
          hls.loadSource('https://YOUR_CLOUDFRONT_DOMAIN_NAME/PATH/TO_PLAY_LIST.m3u8');
          hls.attachMedia(video);
          hls.on(Hls.Events.MEDIA_ATTACHED, function() {
// video.muted = true;
            video.play();
        });
       }
       // hls.js is not supported on platforms that do not have Media Source Extensions (MSE) enabled.
       // When the browser has built-in HLS support (check using `canPlayType`), we can provide an HLS manifest (ie .m3u8 URL) directly to the video element throught the `src` property.
       // This is using the built-in support of the plain video element, without using hls.js.
        else if (video.canPlayType('application/vnd.apple.mpegurl')) {
          video.src = 'https://test-streams.mux.dev/x36xhzz/x36xhzz.m3u8';
          video.addEventListener('canplay',function() {
            video.play();
          });
        }
      </script>

  <!-- injected in netlify post processing step -->
<div style="position: absolute; top: 5px; right: 5px;">
  <a rel="noopener" href="https://www.netlify.com" target="_blank"><img src="https://www.netlify.com/img/global/badges/netlify-color -accent.svg" /></a>
</div></body>
</html>
Original link: Phanix's Blog
Like my work? Don't forget to support and clap, let me know that you are with me on the road of creation. Keep this enthusiasm together!
