[PS Tutorial] Use Photoshop to turn color pictures into black and white line drawings for painting
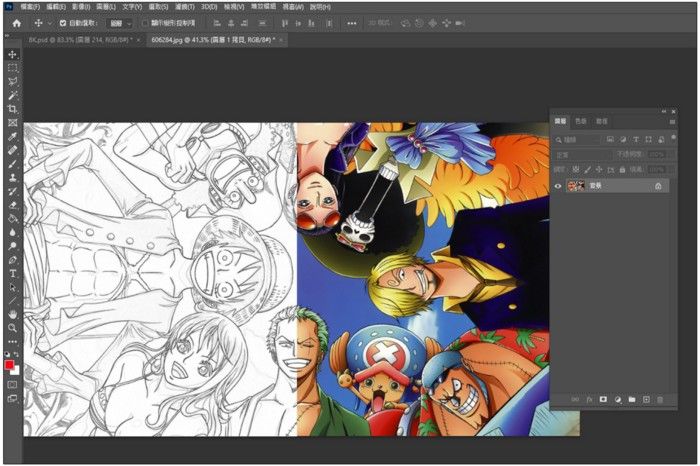
Hello everyone, I am Mr. Lard!
Not everyone can draw, but people always have dreams and want to draw something^^ All experts start by imitating, but if you can't even imitate, you can be like lard, through the most Practice basic coloring~! I remember that some time ago, doodling in coloring books was very popular on the Internet to relieve stress. The method taught today is also applicable. Just put your favorite pictures into Photoshop and follow a few simple steps to turn it into a coloring book! You can follow the steps and practice together to try it out. It is very simple.
STEP 1
Open Photoshop and insert a picture you like.
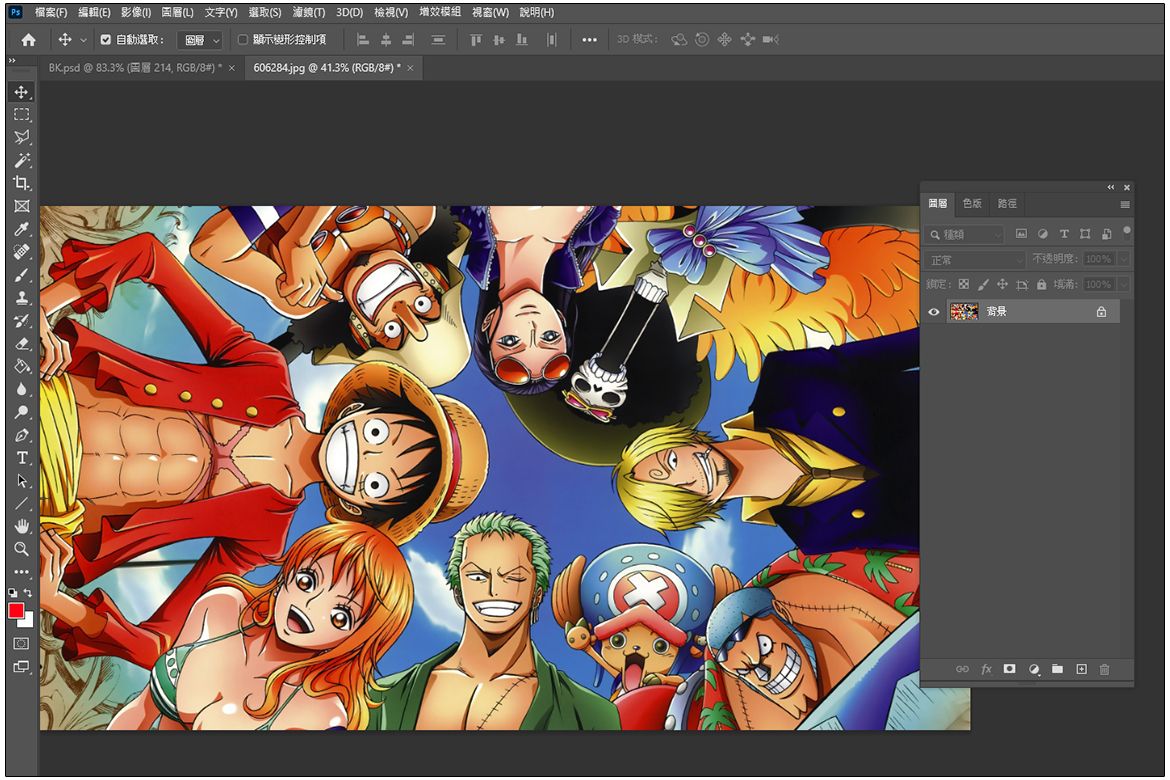
STEP 2
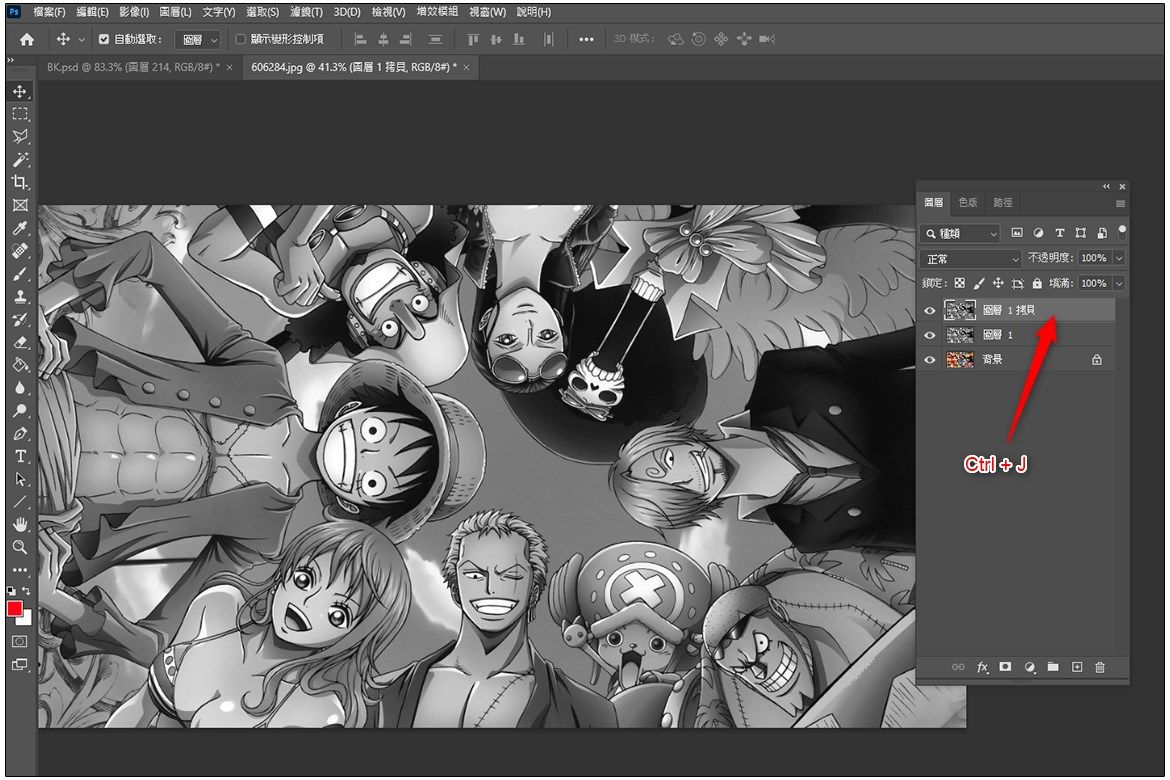
Copy the image and press [ Ctrl + J ] on the " Background" layer to copy it as " Layer 1".
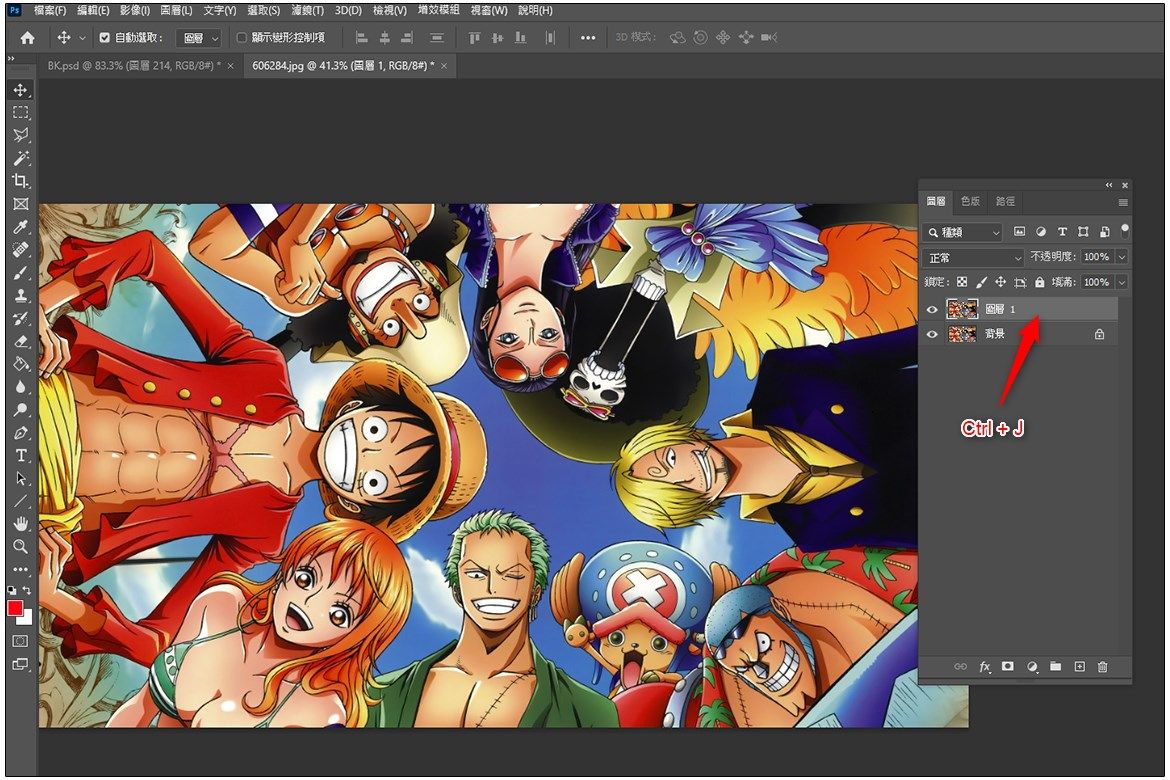
STEP 3
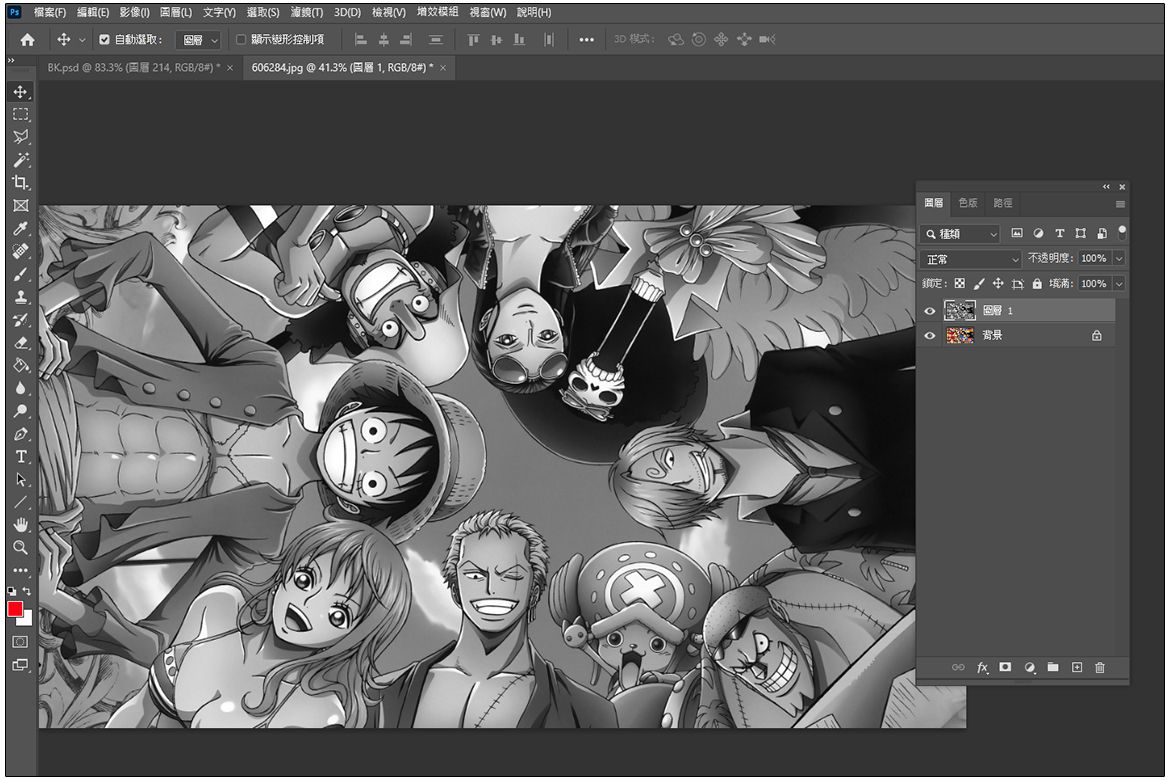
Next click " Layer 1 ", then press [ Image ] > [ Adjustment] > [Desaturation] or directly use the shortcut key [Shift+Ctrl+U]
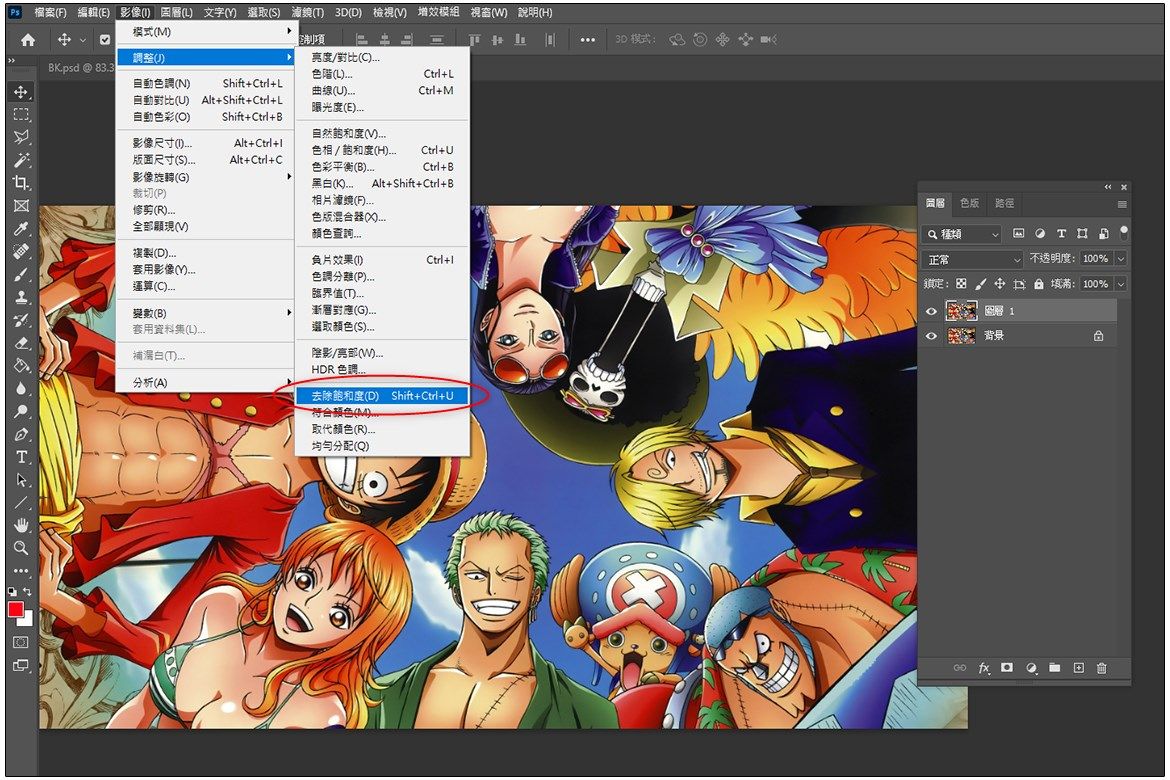
The original color of the picture will be removed and turned into gray scale.
STEP 4
Then make a copy of " Layer 1 " and press [ Ctrl+J ].
STEP 5
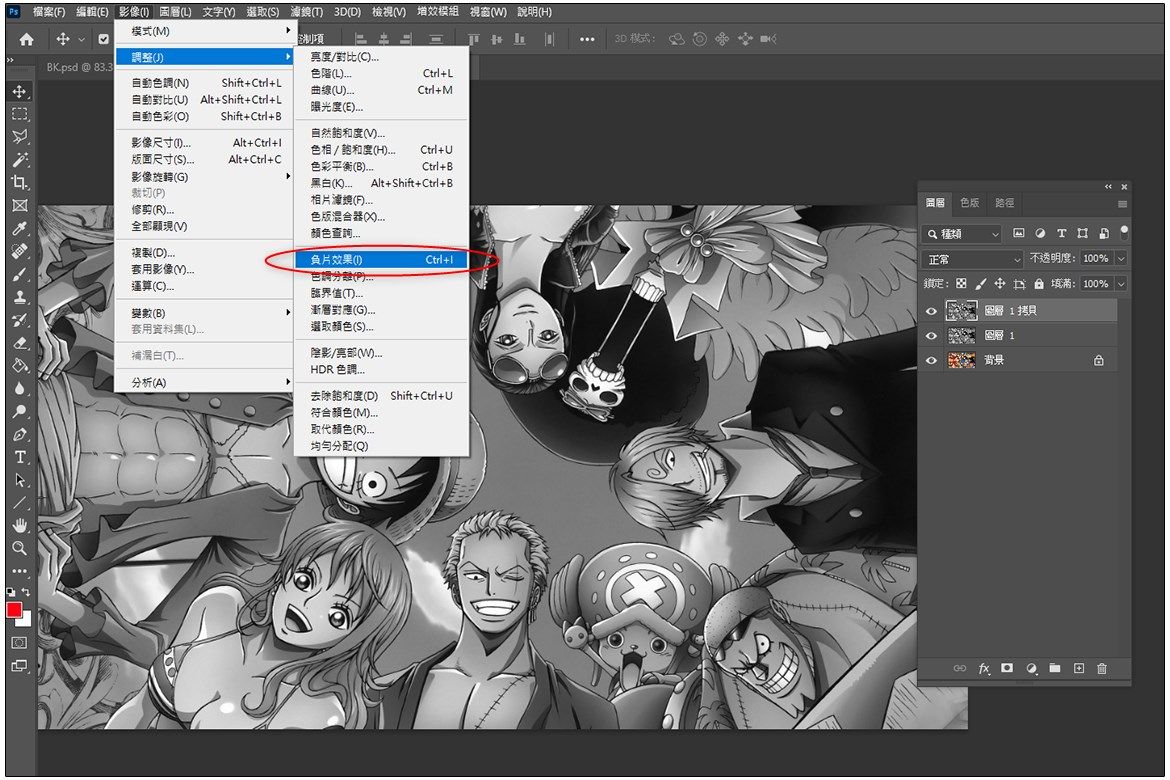
After selecting the " Layer 1 Copy " picture, go to [ Image ] > [ Adjustment ] > [ Negative Effect ] or directly use the shortcut key [Ctrl+I]
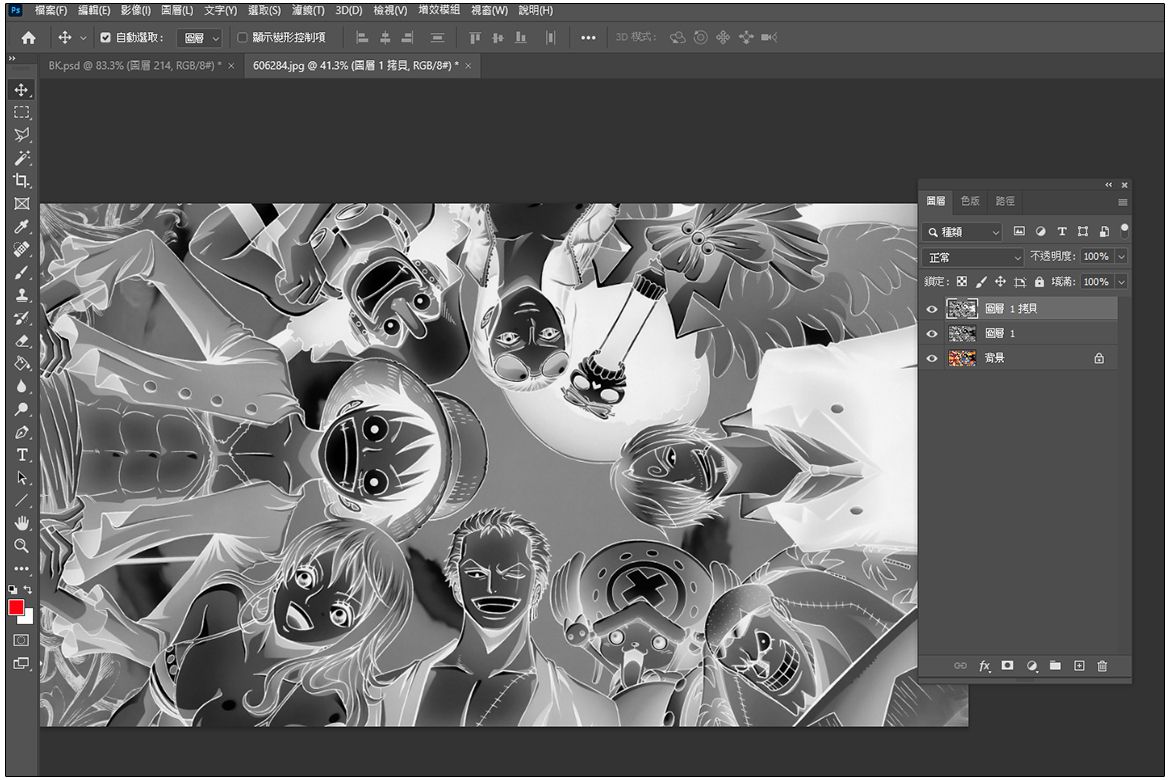
Next the image will turn into a negative format.
STEP 6
Go to the layer and select [ Highlight Color ].
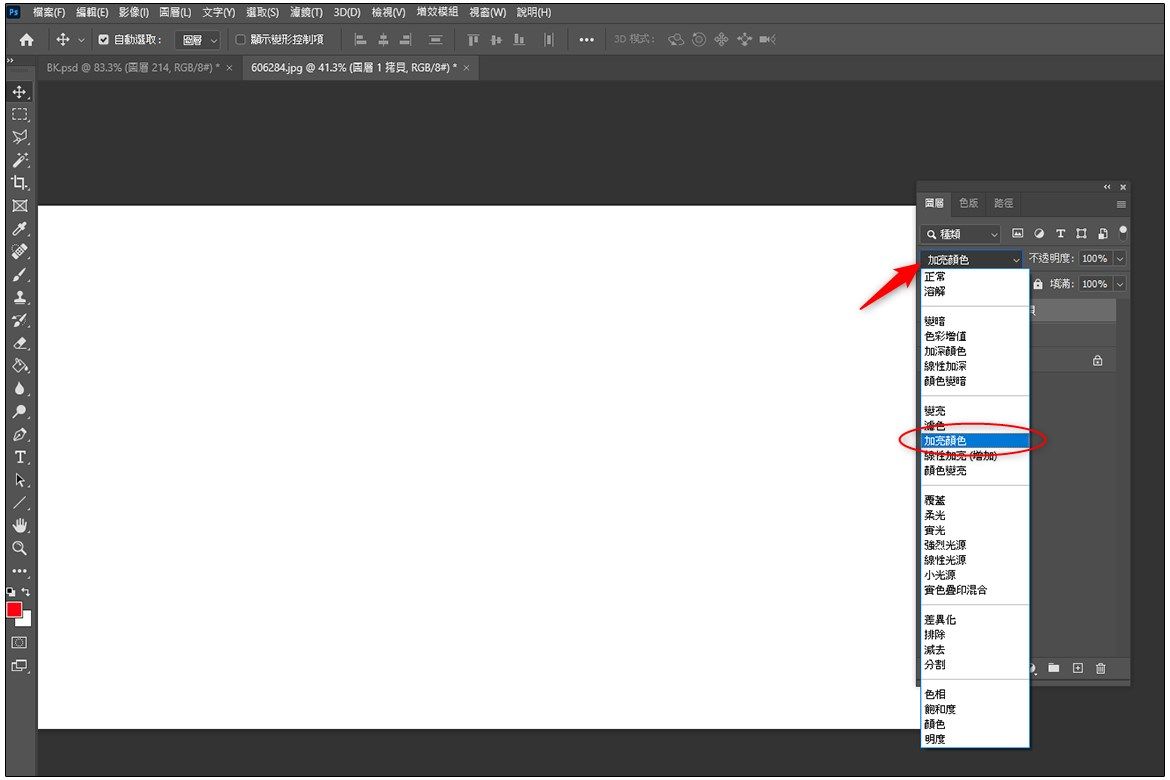
Next, the picture will turn completely white, don't be nervous, this is normal.
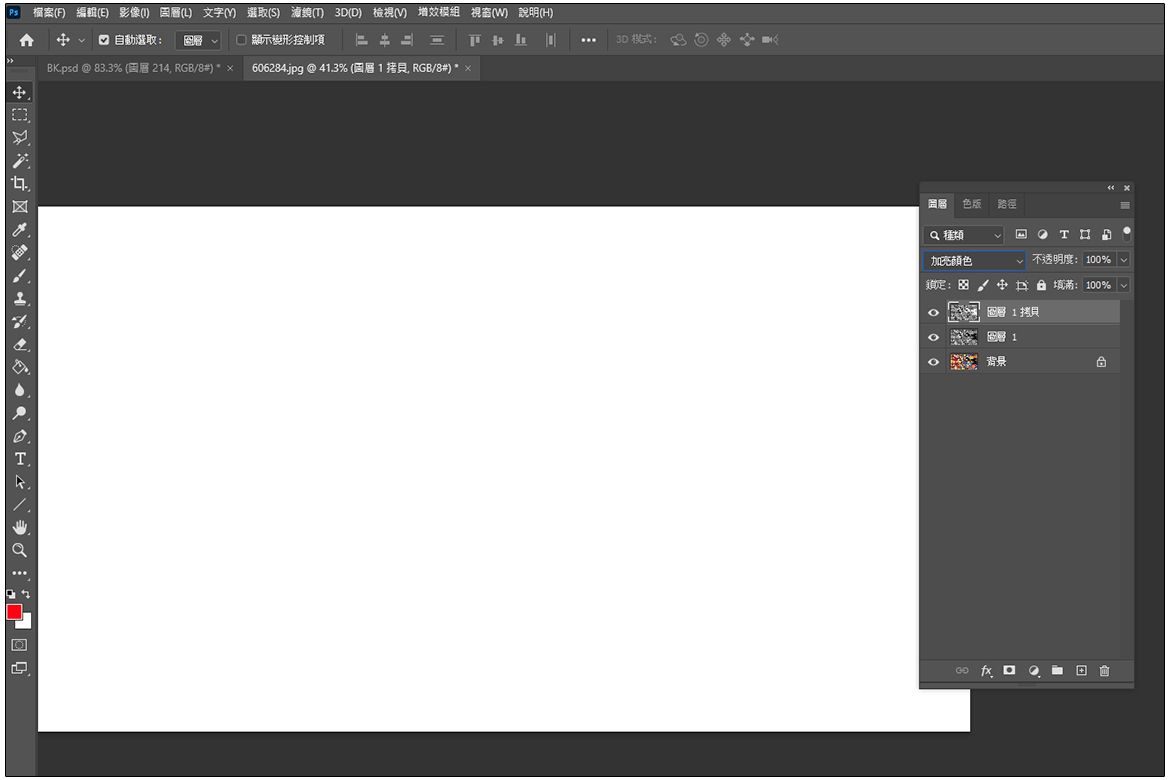
STEP 7
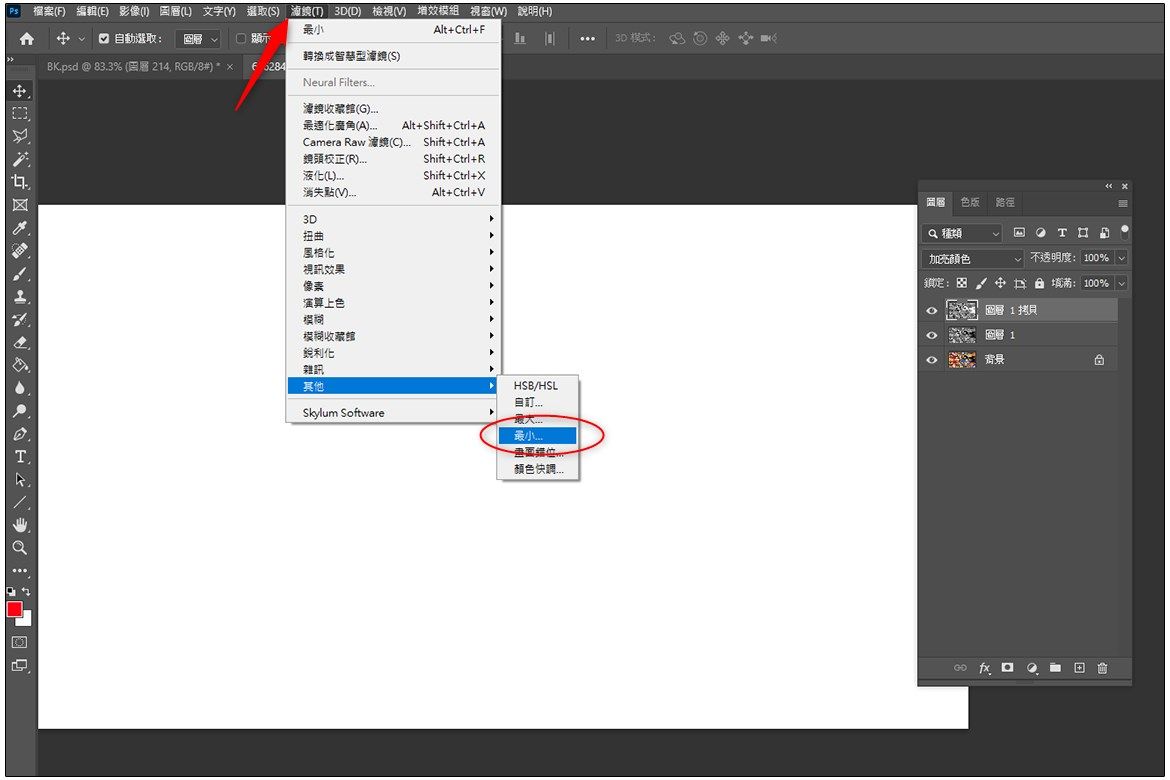
Finally we select [ Filter ]>[ Others ]>[ Minimum ]
STEP 8
The default intensity value is [ 1 ], which is exactly the value we want.
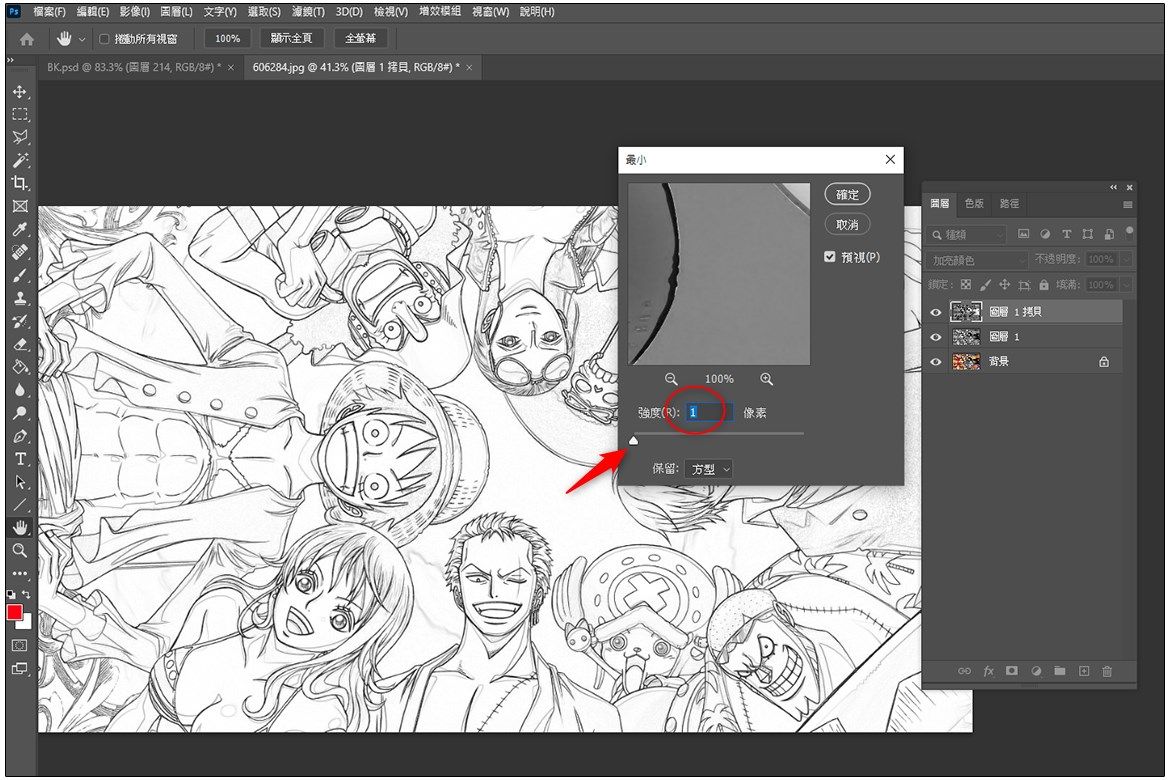
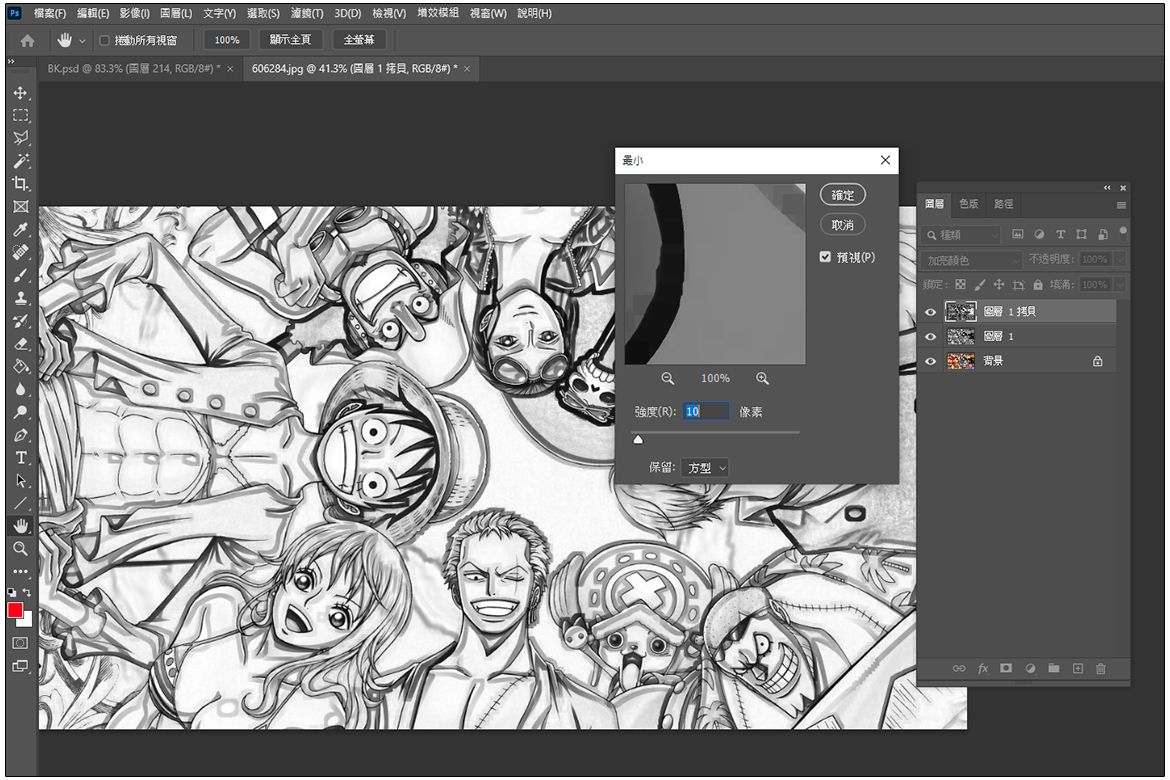
Let me show you a comparison. If the intensity is increased, it will look like this. This is intensity [10].
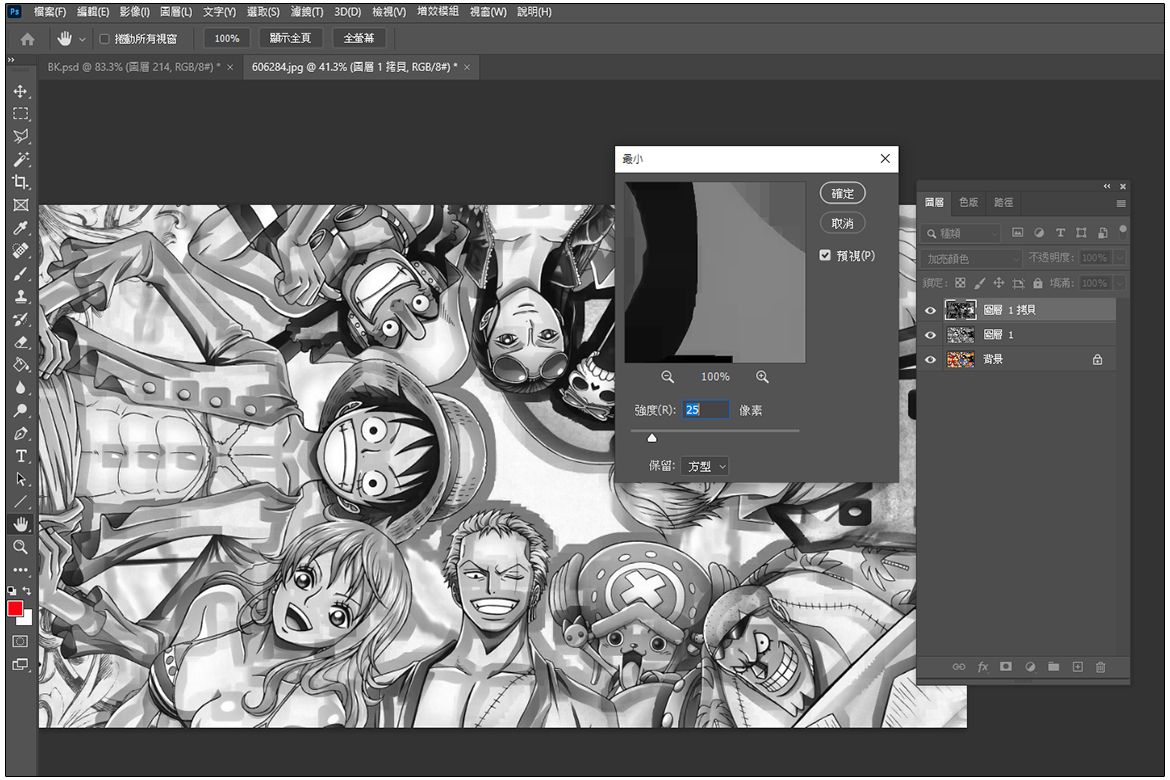
This is intensity【 25 】
That's it. A colored picture can be turned into a line drawing through a few simple steps!
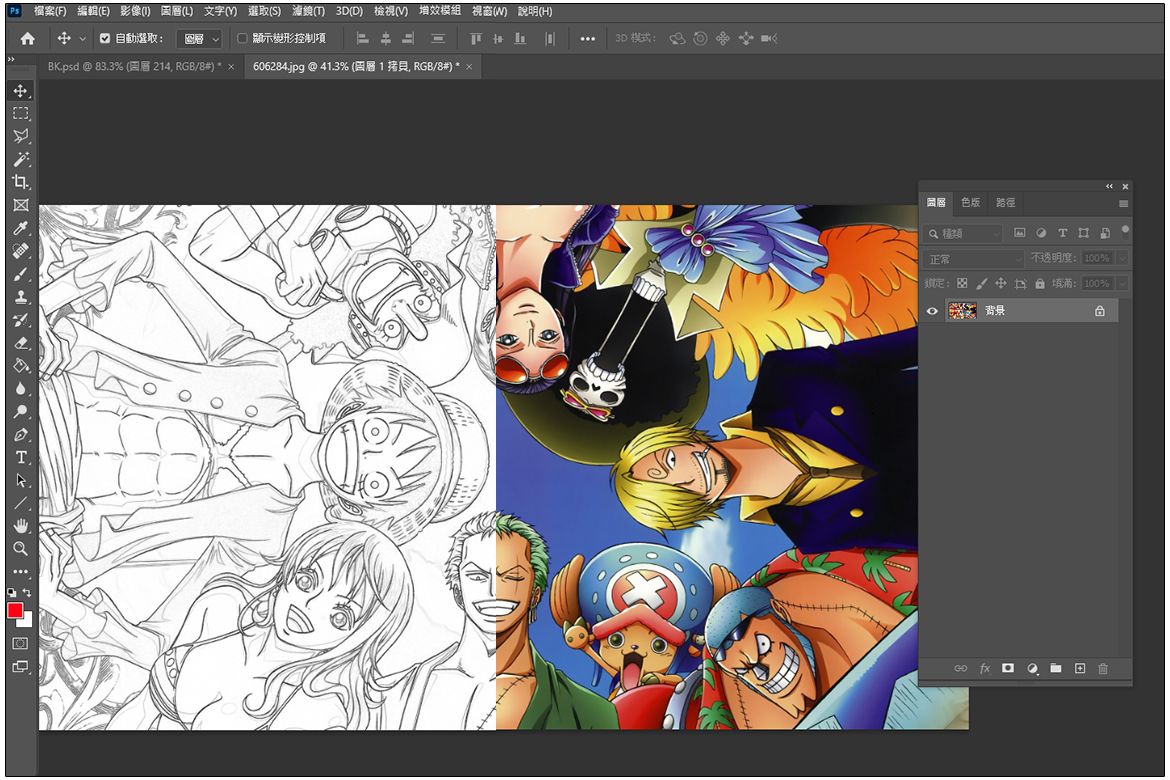
example


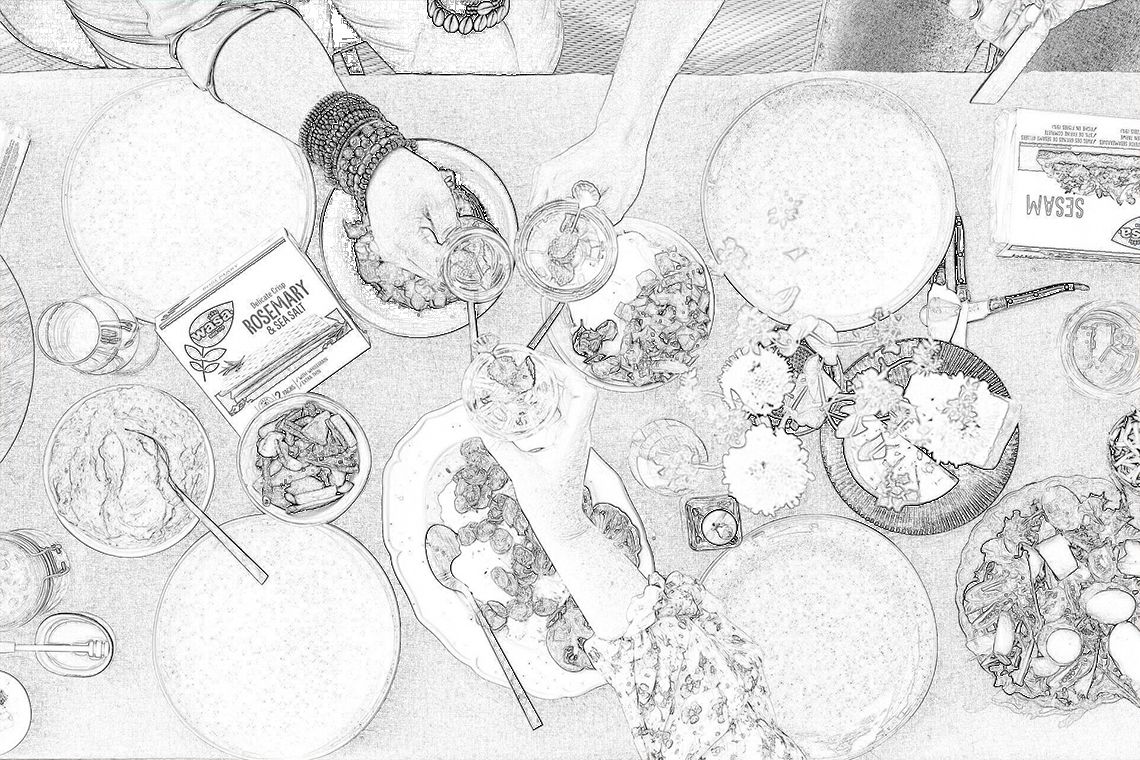
Like my work? Don't forget to support and clap, let me know that you are with me on the road of creation. Keep this enthusiasm together!

- Author
- More