
推广DAO理念,并帮助更多的人投入价值创造实践
How to mint sellable music NFTs
Summary: Want to know how to make your music into NFT? Just reading this is enough!
Cover: the first one below
Original title: How to Mint an Audio NFT to Sell
Original link: https://medium.com/pinata/how-to-mint-an-audio-nft-to-sell-1733cd864090
Word count: 892
Author: Kyle Tut
Translator: La
Proofreading: Ryan
Translation agency: DAOSquare
At the end of this blog, you will learn how to:
2) Use Rarible to mint NFTs for your audio files and sell them to the market
This guide assumes you have a basic understanding of creating audio files, how to use crypto wallets , and why NFTs need IPFS .
Upload to IPFS
The first thing you will do is upload the audio file to IPFS. IPFS (Interplanetary File System) is a protocol that utilizes " content addressability " to ensure the availability of files corresponding to NFTs.
Content addressability allows NFT creators and collectors to prove that the document is different from traditional Web2 URLs. The problem with Web2 URLs is that your NFT files can easily be swapped out, forged, or corrupted without the collector's knowledge. This is because Web2 URLs don't know what your NFT files actually are, thus reducing their value in the long run. However, this can be easily prevented by uploading your files to IPFS via Pinata.cloud .
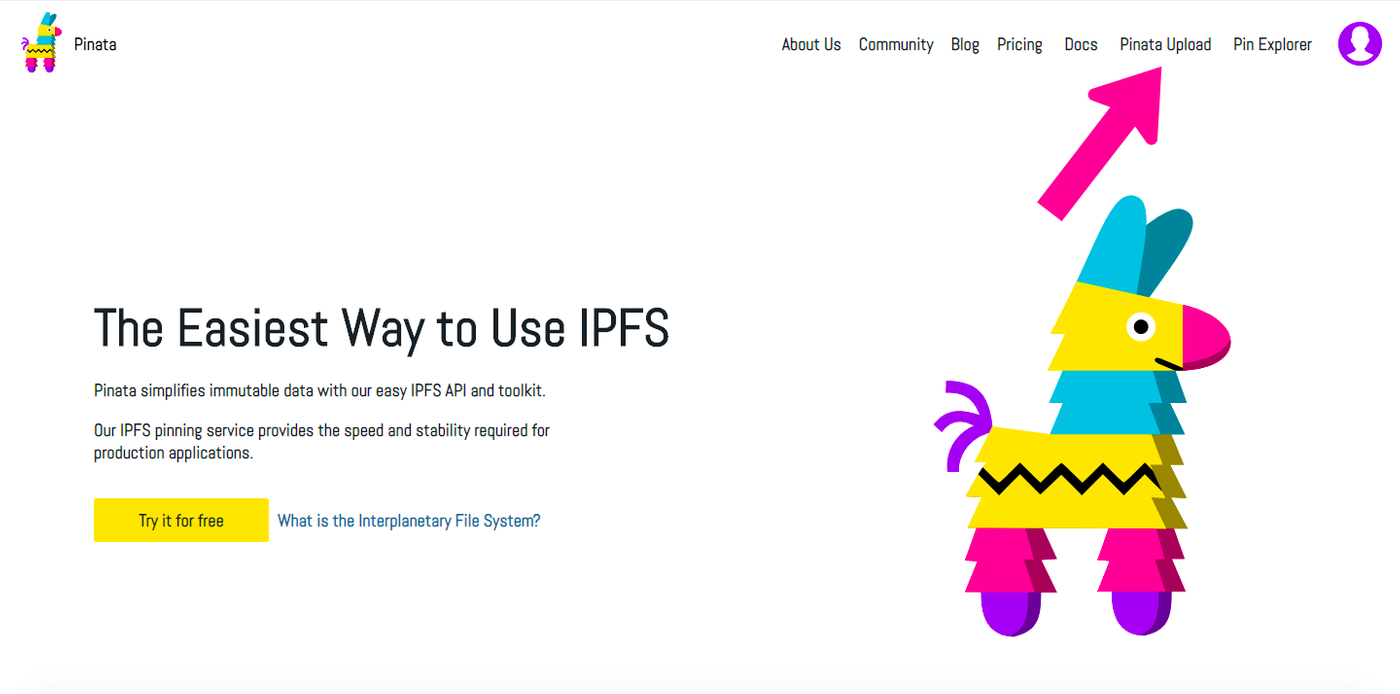
"Pinata Upload"
If you don't have a Pinata account yet, sign up. When you are logged in, click "Pinata Upload" at the top right of the page.

"Browse"
Next, click "browse" to browse for the audio NFT file you want to use on your computer.
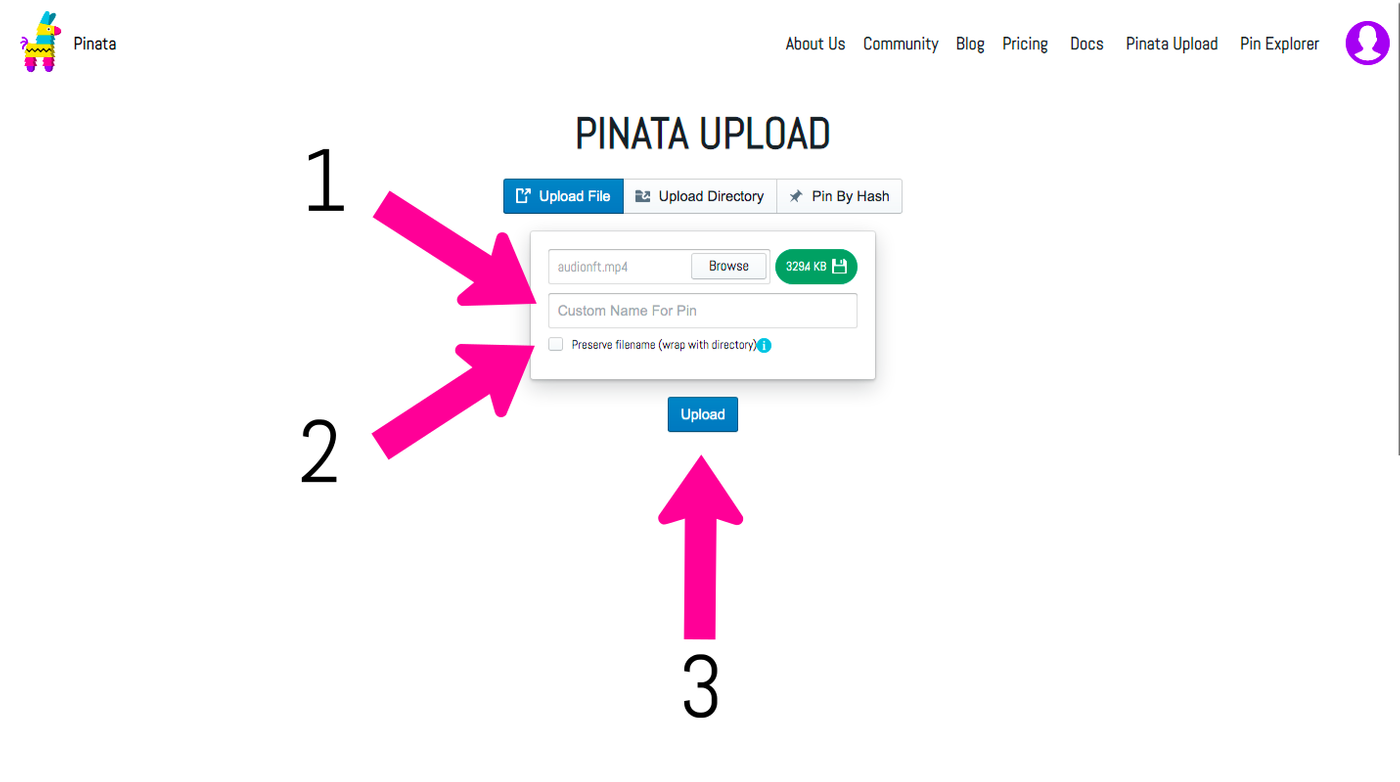
“Custom Name For Pin”, “Preserve filename” and “Upload”
When you have selected the audio files to upload, you can voluntarily fill in the first and second steps before uploading in the third step.
- (voluntary) You can give your audio files a "Custom Name For Pin" name on the Pinata platform. The name will only be visible on the Pinata platform. If you don't name the file when uploading, it will default to the original file name, you can change the name later on Pin Explorer. (
- (voluntary) Next, you can "Preserve filename" on IPFS to preserve the filename. Selecting this option will place your files in a directory that allows you to preserve the original filenames when retrieving files from the IPFS network. However, from an aesthetic standpoint, the link created by preserving the filename is a folder, which is more complicated and will be bypassed in this tutorial.
- Finally, click the "upload" button to upload the file to Pianta and upload the pin code to IPFS.
"Pin Explorer"
After you click the "upload" button, you will see a green prompt at the top saying "File Successfully Uploaded" The file was successfully uploaded! Then you can go to "Pin Explorer". Here you can manage all IPFS files on your Pinata.

"IPFS Hash"
In "Pin Explorer", find the audio file you just uploaded and click the "IPFS Hash" link.

"Link"
If you click "Preserve filename", save the filename, you will be taken to the IPFS directory page. You can link to this directory page, but as mentioned earlier, this page is not very aesthetically pleasing. So, please find the file link and right click.

"Copy Link Address"
After right-clicking, click "Copy Link Address", copy the link, copy the IPFS link to your clipboard. This IPFS link is how buyers of your audio NFTs get their files through Rarible 's "Unlockable" feature, which will be mentioned later in the post.
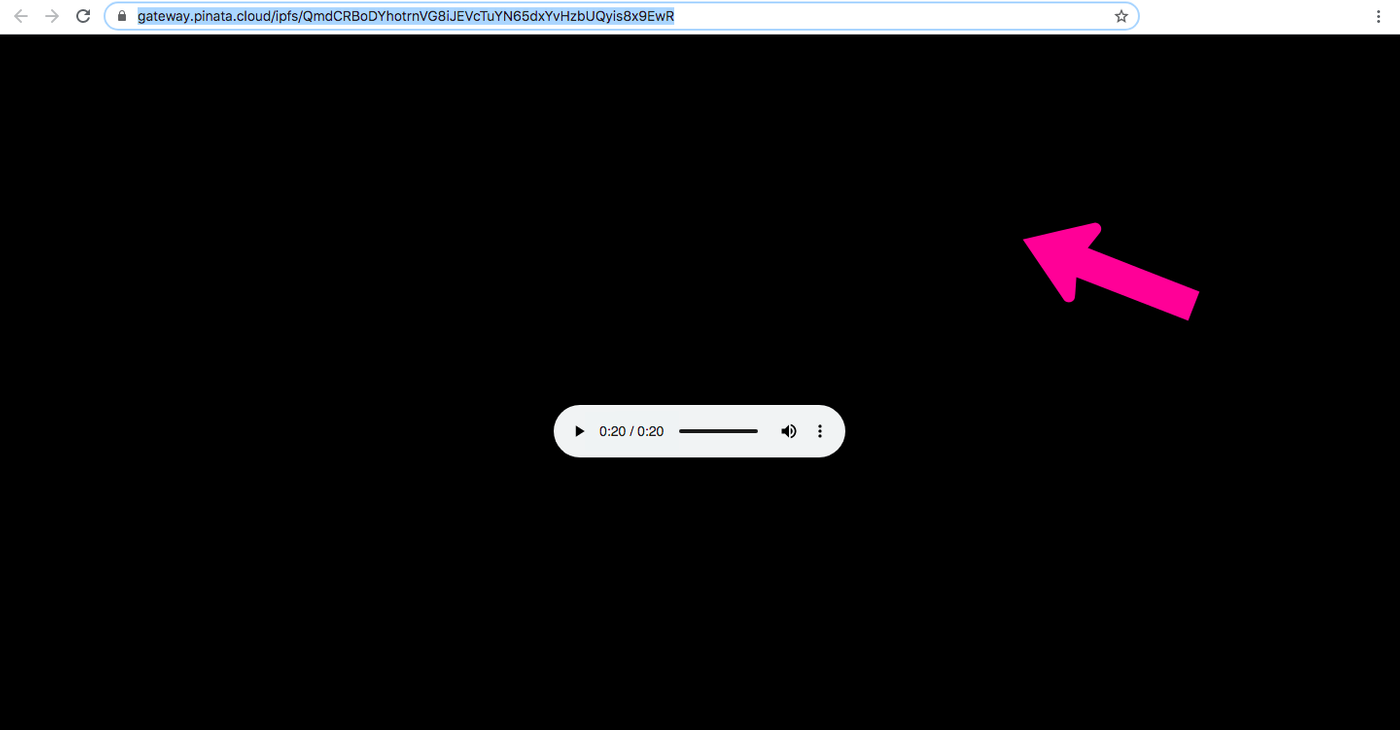
"Copy Link Address
If you don't select "Preserve filename", keep the filename, and when you click "IPFS Hash" on the "Pin Explorer" page, you will be taken directly to the page of the file itself (as shown above). Just copy the URL link to the file highlighted above.
Casting Audio NFF
When you're done copying the IPFS link, go back to Pinata's "Pin Explorer" and click the "Menu" menu on the right side of the page next to the file.

"Menu"
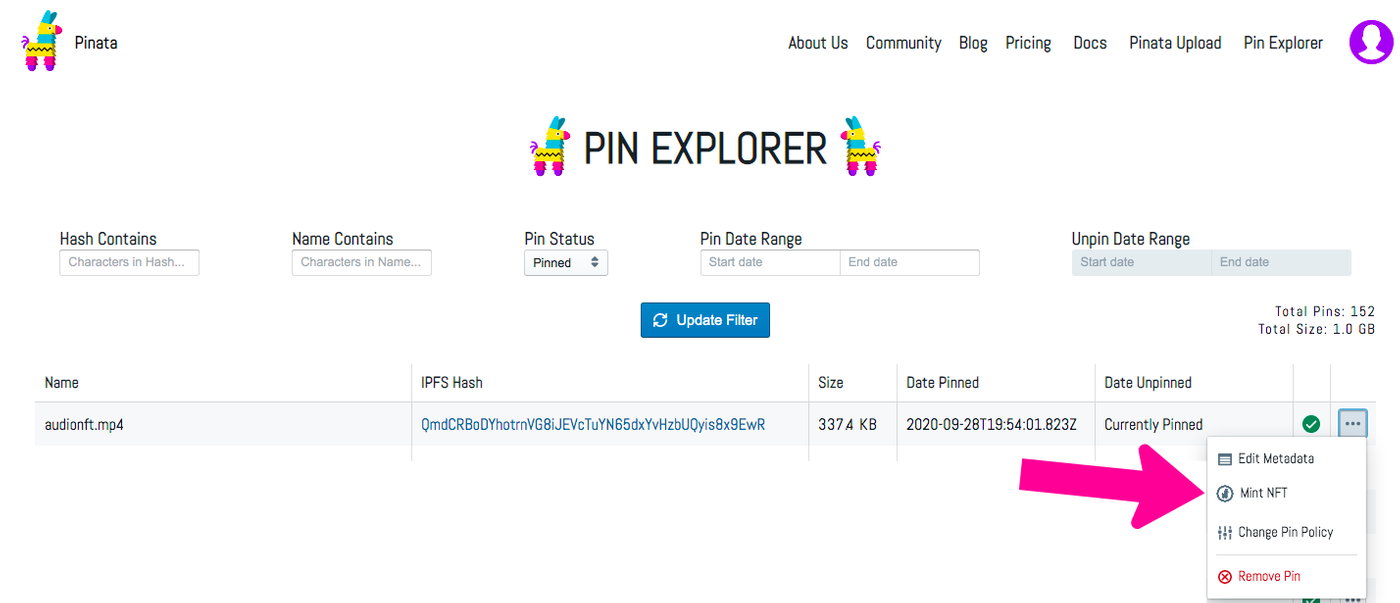
"Mint NFTs"
The "Menu" expands to reveal several options. Click on the "Mint NFT", which is the "Mint NFT" button.
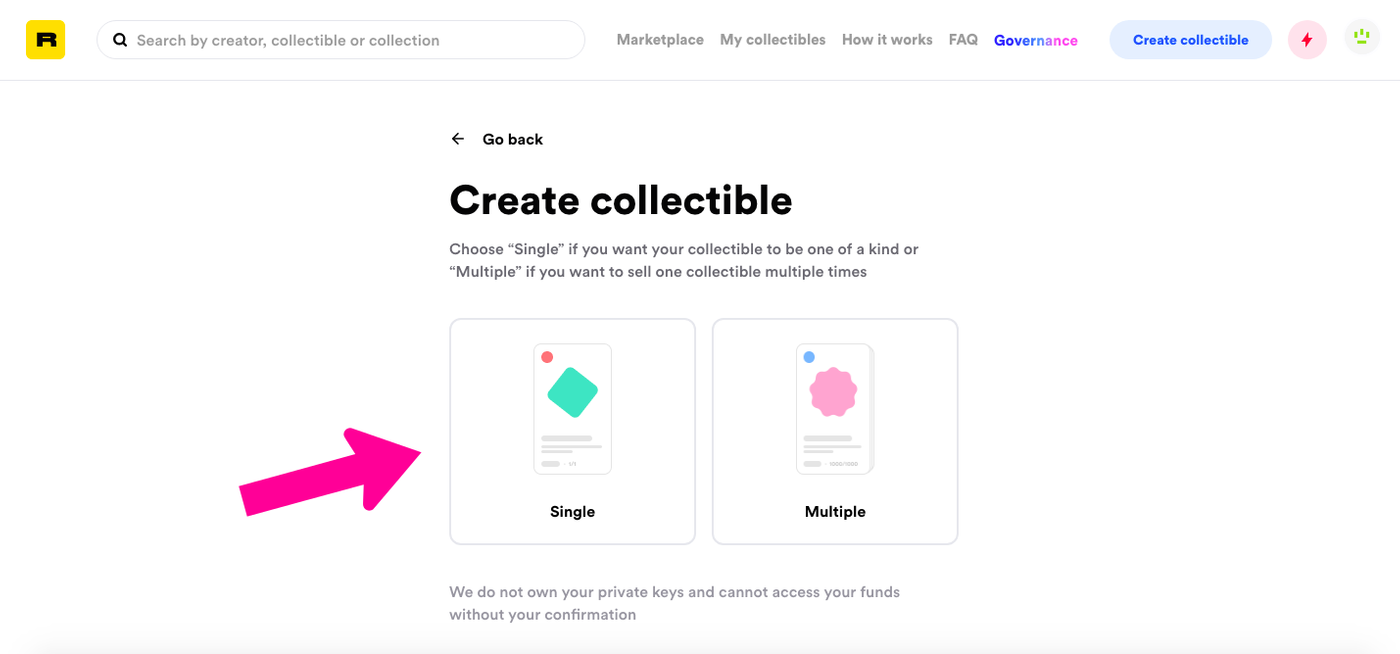
"Create collectible"
Clicking on "Mint NFT" takes you to the Rarible Create collectible page. At this point, you will decide whether you want to mint a single ("Single") or multiple ("Multiple") collectibles.
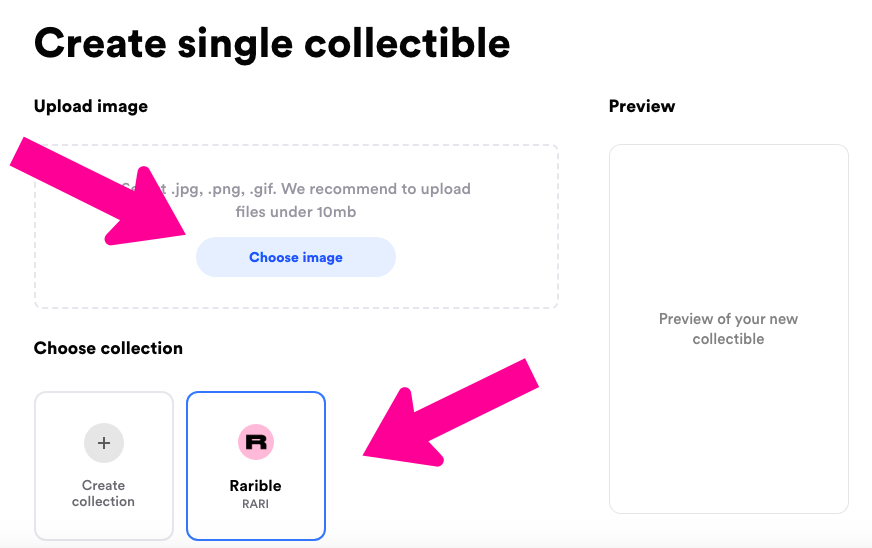
"Choose image"
Next, click on "Chose Image" and select the image key. Here, you'll find and upload an image that represents the audio file you're casting.
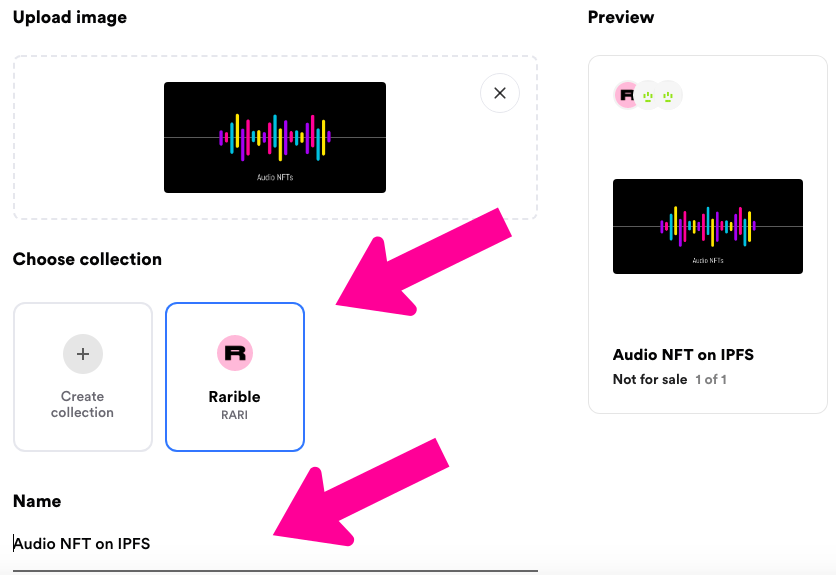
“Choose collection” and “Name”
After uploading the image, you first need to choose which collection you want the NFT to be in. You can choose a Rarible collection, or create your own collection with your own name and logo.
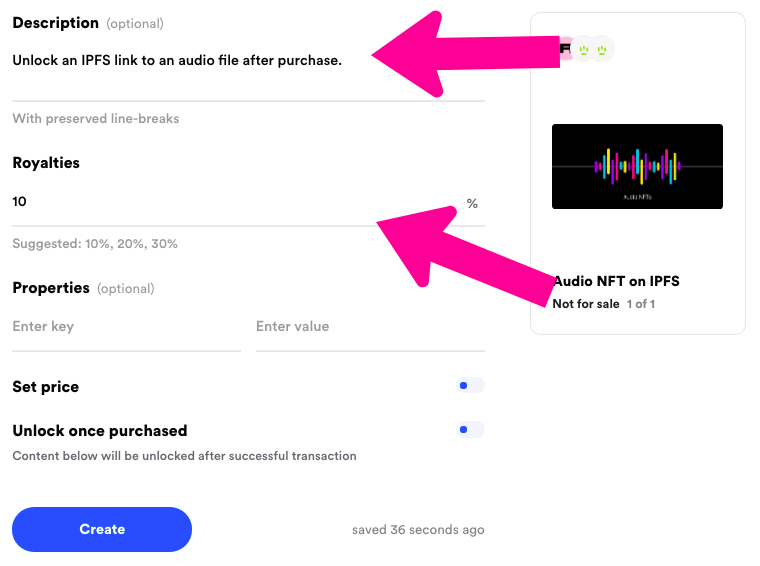
“Description” and “Royalties”
Here, you need to add a description to your file. Be sure to state that the link to access the audio file will not be signed until the NFT is purchased. Next, choose your royalty percentage.
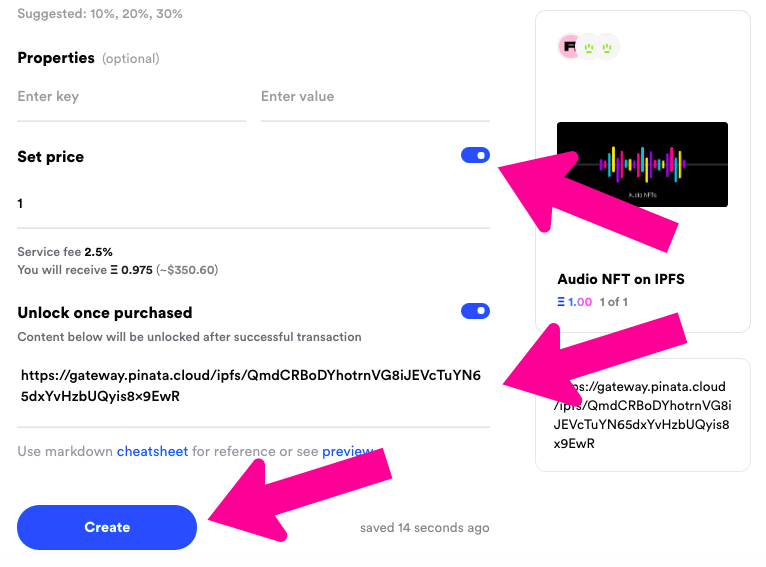
“Set price”, “Unlock once purchased” and “Create”
After selecting the royalty percentage, remember to "Set price" to set the price. You will then select "Unlock once purchased" to unlock after purchase. Once selected, it will give you a place to paste the link, which will be unlocked once the buyer purchases the NFT. Paste the IPFS link you copied to the clipboard earlier here. Finally, click "Create" to create. Now, you need to follow the wallet prompts provided by Rarible to complete minting the token and sign the transaction.
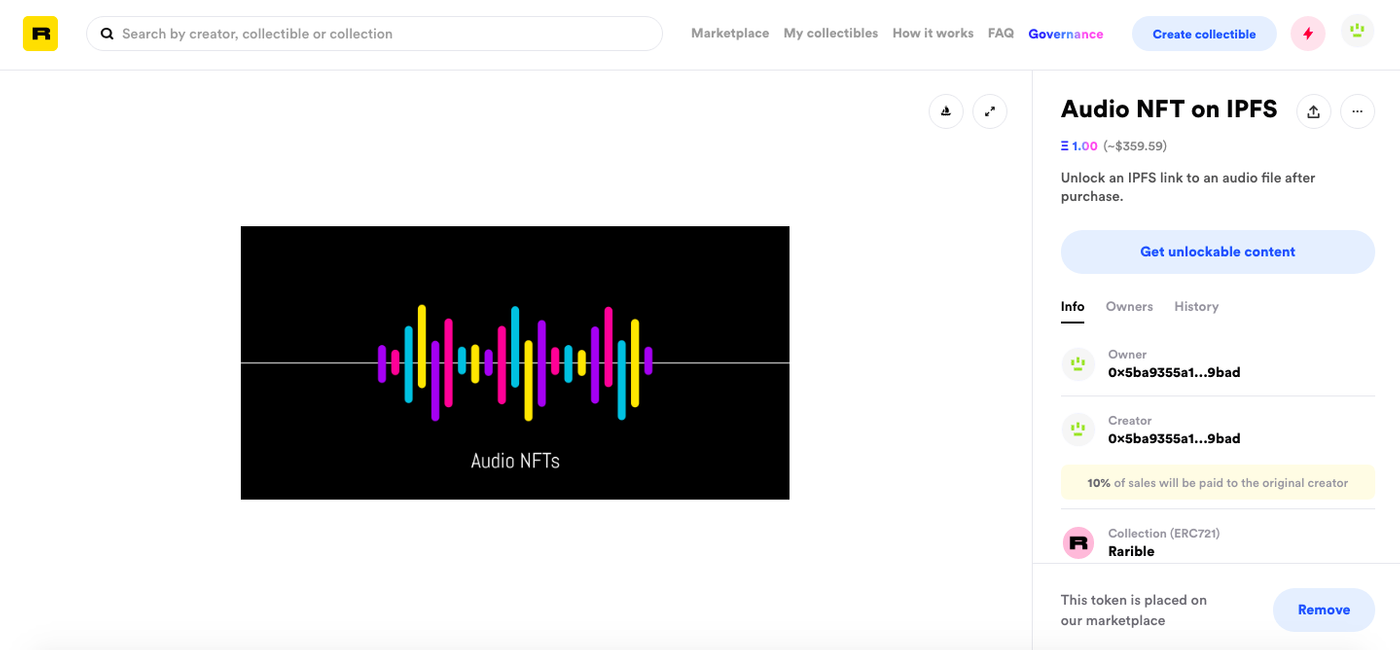
An Audio NFT on IPFS to Sell
Your audio NFTs are now ready and available for sale in a large number of marketplaces.
Happy Pinning!

https://medium.com/pinata/the-file-requirements-for-nfts-a20ea3ac524b

https://medium.com/pinata/who-is-responsible-for-nft-data-99fb4e8147e4
Like my work?
Don't forget to support or like, so I know you are with me..
Comment…