
I am 0xlefty, I left no memories.
The process and description of fxhash works
foreword
If you want to understand what fxhash is first, you can read the wonderful article of @bean puree : NFT story collection: Generative art wave, suitable for cathedral or flea market?
Part of the content in this article comes from the English document: fxhash Artistic guides and screenshots of the webpage.
In addition, this article is based on the fxhash 202206/04 online website version. If the website is revised later, there may be some differences from the description in the text.
Background knowledge and explanation
The NFTs on fxhash are all generative NFTs, that is, the operation results of NFT images, animations, videos or sounds generated by web programs (HTML/JavaScript/CSS). fxhash calls it a generative token (GT). To create GT works, you need to know the basic operation of web pages, and the works themselves are basically written in HTML/JavaScript/CSS format. It is assumed here that you already know how to write web pages or have completed a set of HTML/JavaScript/CSS ready to put your works on fxhash.
If you are interested in generative art creation and want to learn, you can refer to Wu Zheyu's Creative Coding course , which I see highly recommended by many people and seniors. Wu Zheyu's own work in fxhash is also very good!
Archive packaging and testing
Precautions:
- The main body of GT is an index.html file, please pay attention to the file name.
- The file format of the link in the HTML file needs to use a relative path
 <cript src="./p5.min.js"></script> // Correct/one more before p5.js.
<cript src="/p5.min.js"></script> // incorrect
3. Put a piece of JS code in your index.html (please see the official fxhash code snippet for the code )
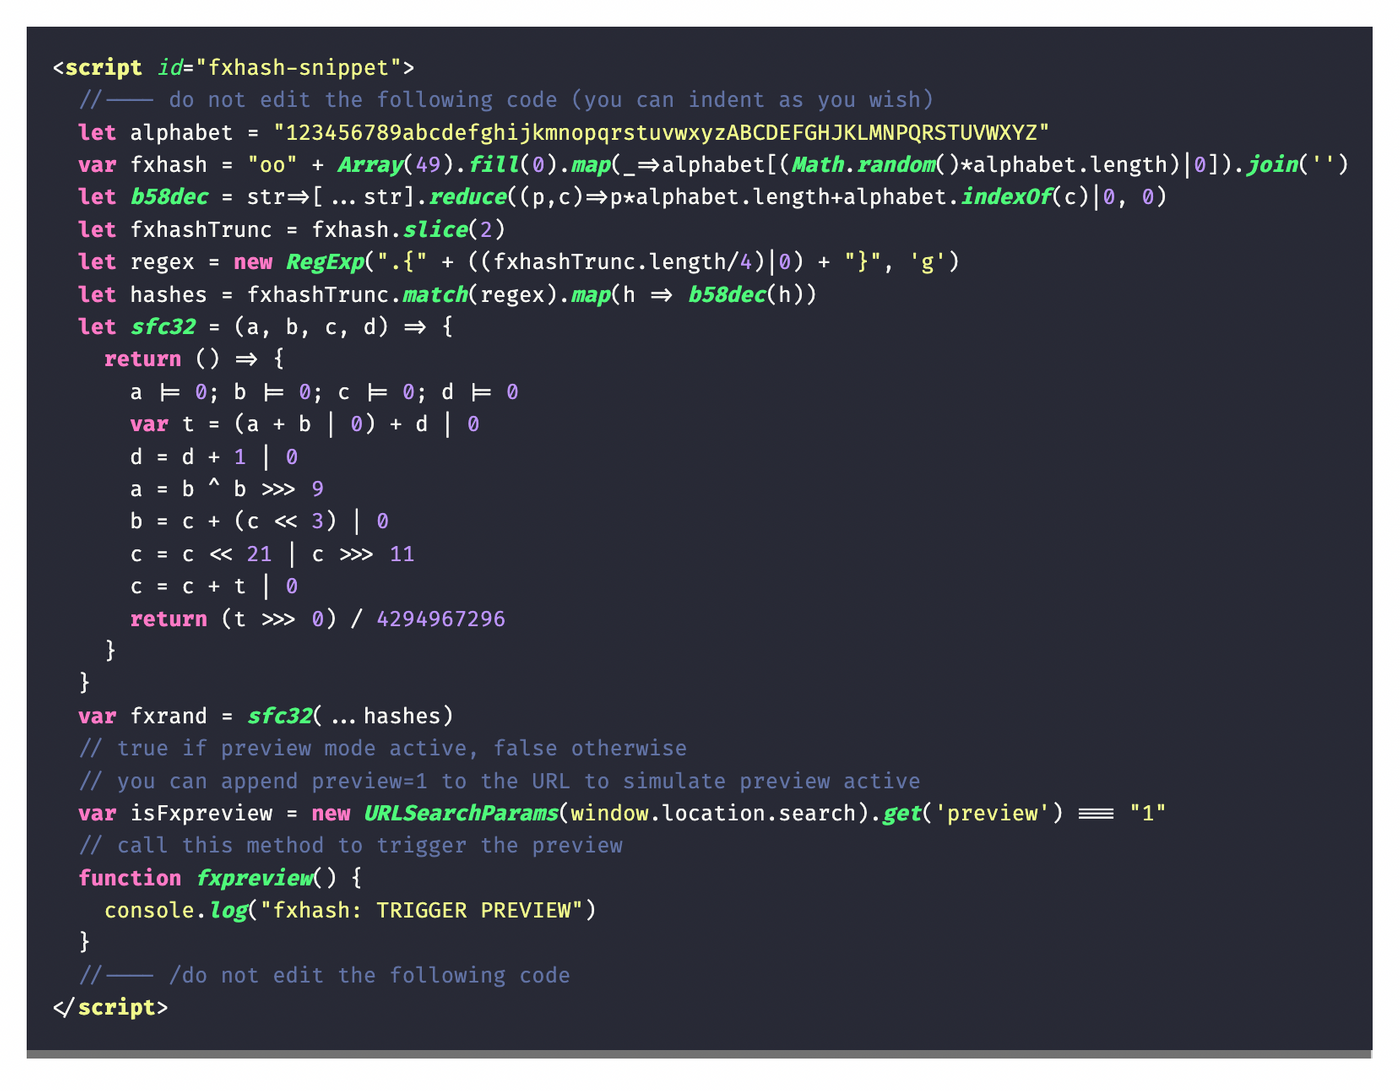
This JS program does three things.
The first function is that in your own development environment, she will also automatically generate the value of the parameter fxhash randomly for you. The author of GT needs to generate each unique operation result according to this fxhash. After the work is put on the shelves, the random hash value of the mint work will be added to the URL of the GT work (the parameter name is fxhash ), so that each buyer has a unique fxhash value and a unique calculation result.
For example, for the live URL of RGB Elementry's work No. 482 , the last parameter will be called by the JS program above, and then set a fxhash parameter equal to:
opXYGBSuhm9aY1gi7WVDtHfuq26K7Jotwhf67twZULgypJLTHX9
If this value is used in p5.js as an example, it can be used to set randomSeed or noiseSeed.
The second role is to set the timing of the screenshot of this webpage. More on this later.
The third function is to set the features of this GT work. Taking the RGB #482 just now as an example, you will see a section of Features on the work details page to count the frequency (rarity) of each attribute of this work’s iteration.
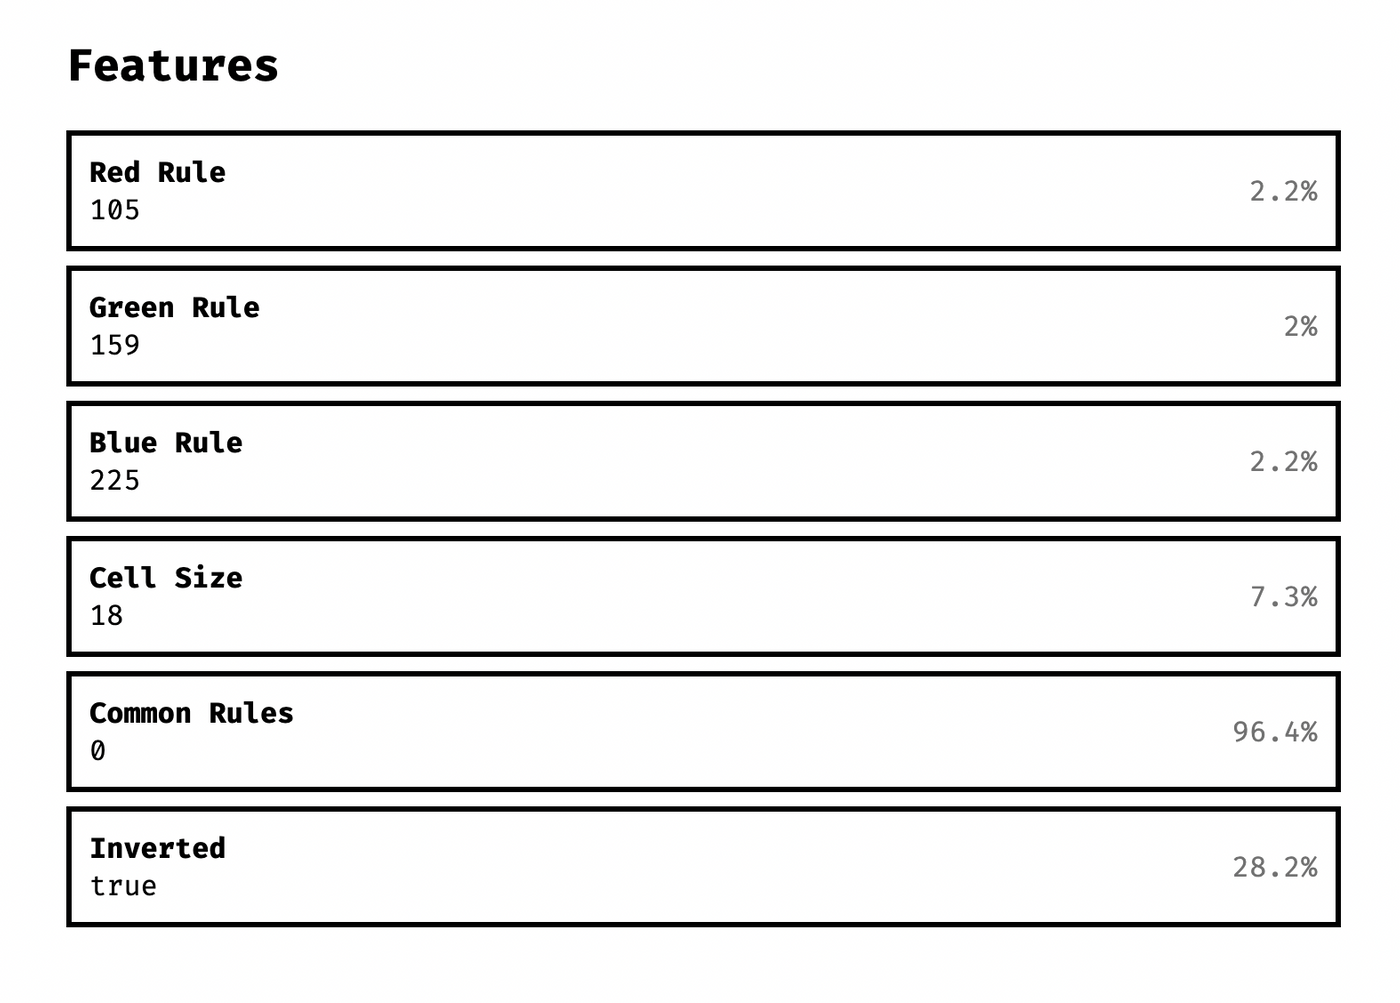
If you want the work to have this statistics table, you need to set the properties of the window.$fxhashFeatures object, and what is the value of each property. For example, the properties in the RGB screenshot above will need to be in the JS file. Make a statement similar to the following, and then the fxhash platform will help each work batch number to make statistics on the frequency of these features:
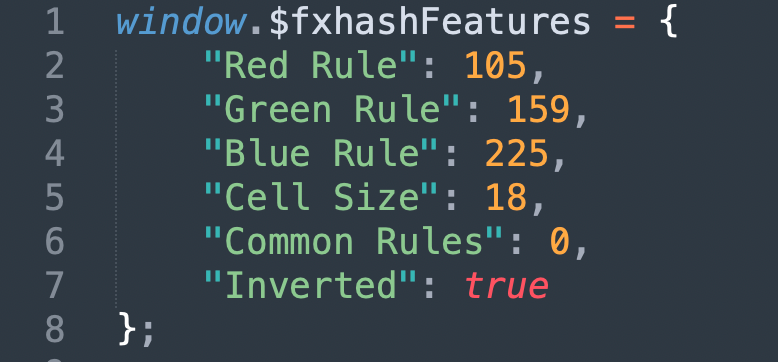
After checking the above items, you can package your web page into a compressed file (zip). Note that the first layer in the compressed file must have the index.html file. After packing, you can upload the test in the sandbox area to see if it can be displayed.
Listing process
If there is no problem, you can click mint generative toekn in the upper right corner menu to start the listing process
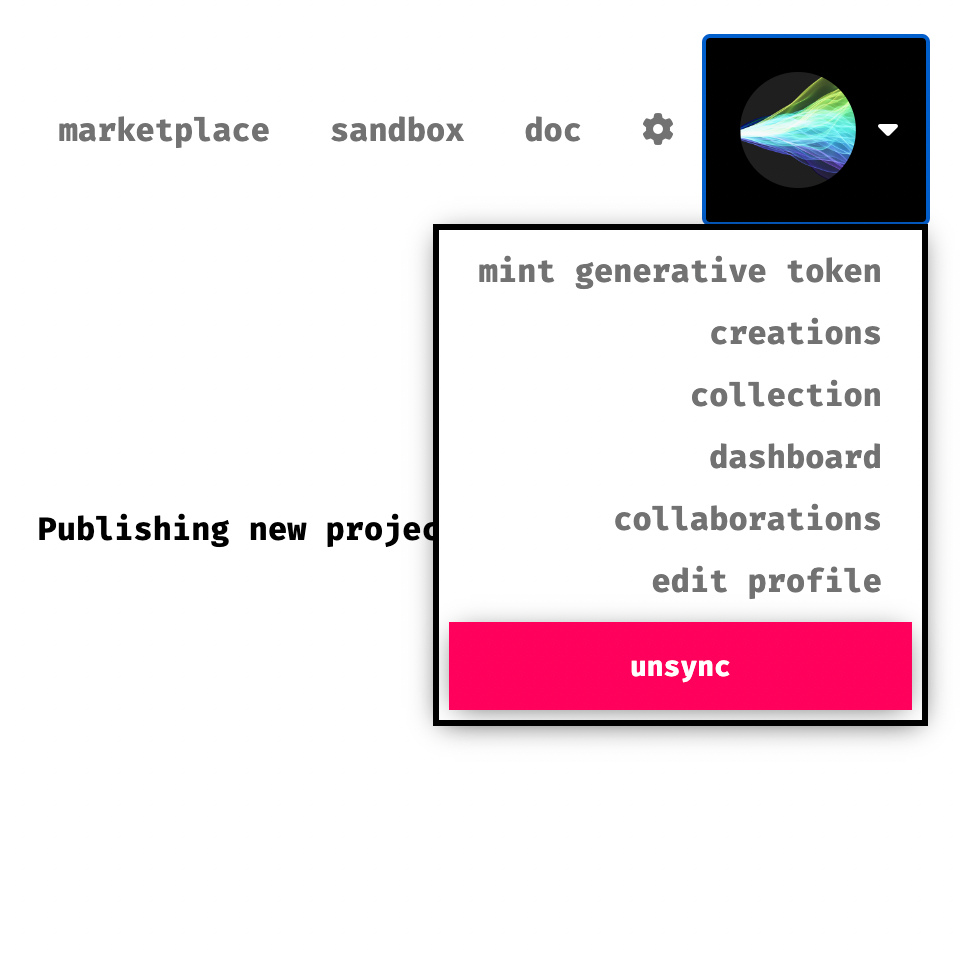
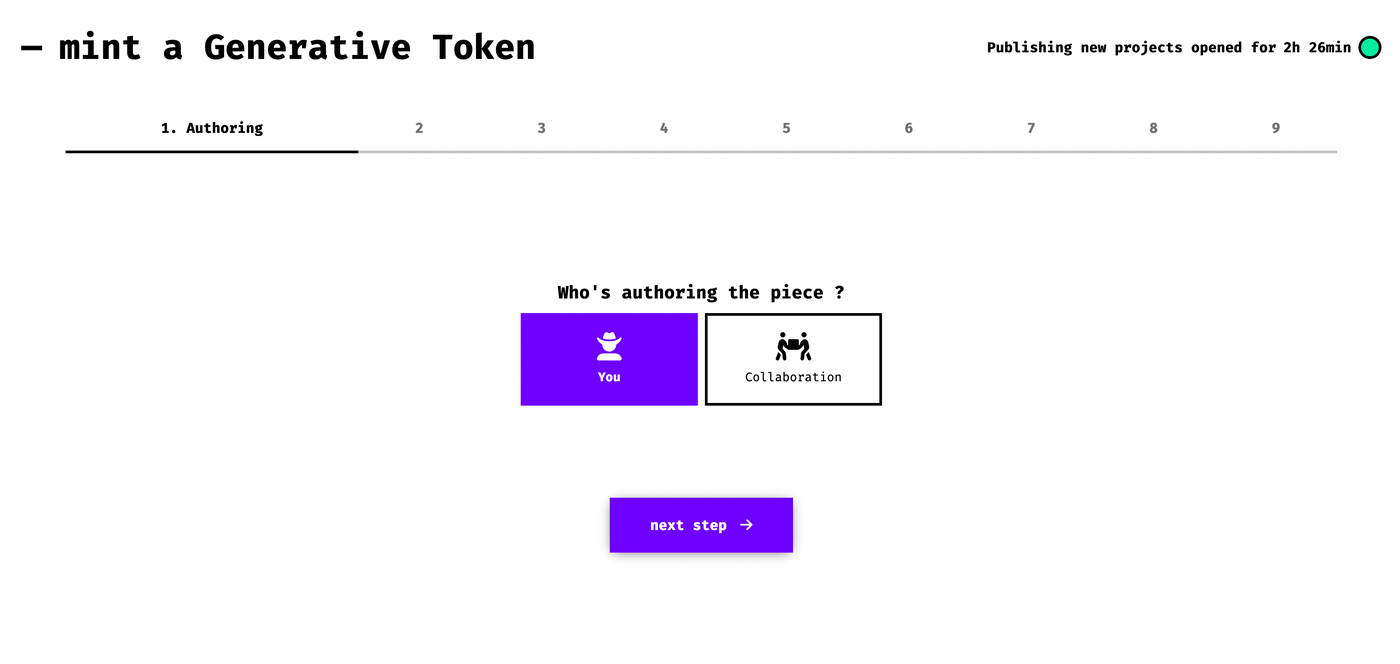
first step
Whether you are co-creating with other creators, or you are alone.
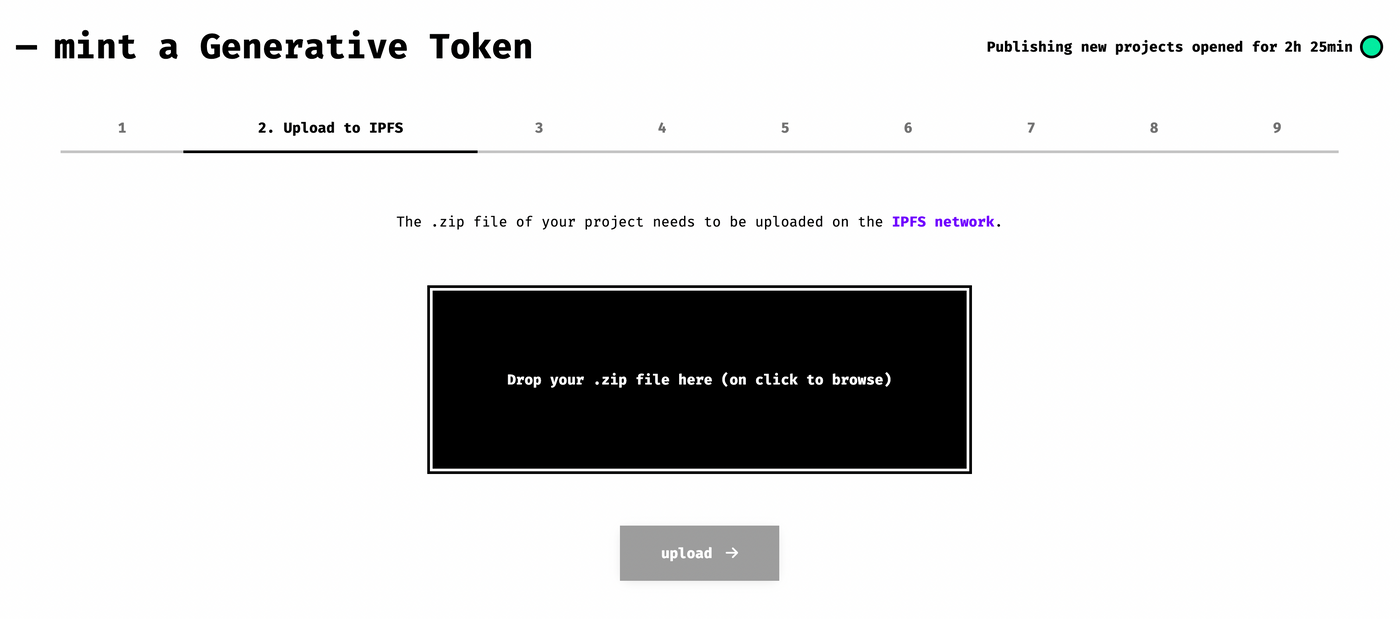
Step 2Upload to IPFS
File upload (will be stored in the IPFS decentralized interplanetary file system) if you test it in the sandbox, there should be no problem.
The third step Check files
If it is normal here, you should be able to see the calculation result of your work
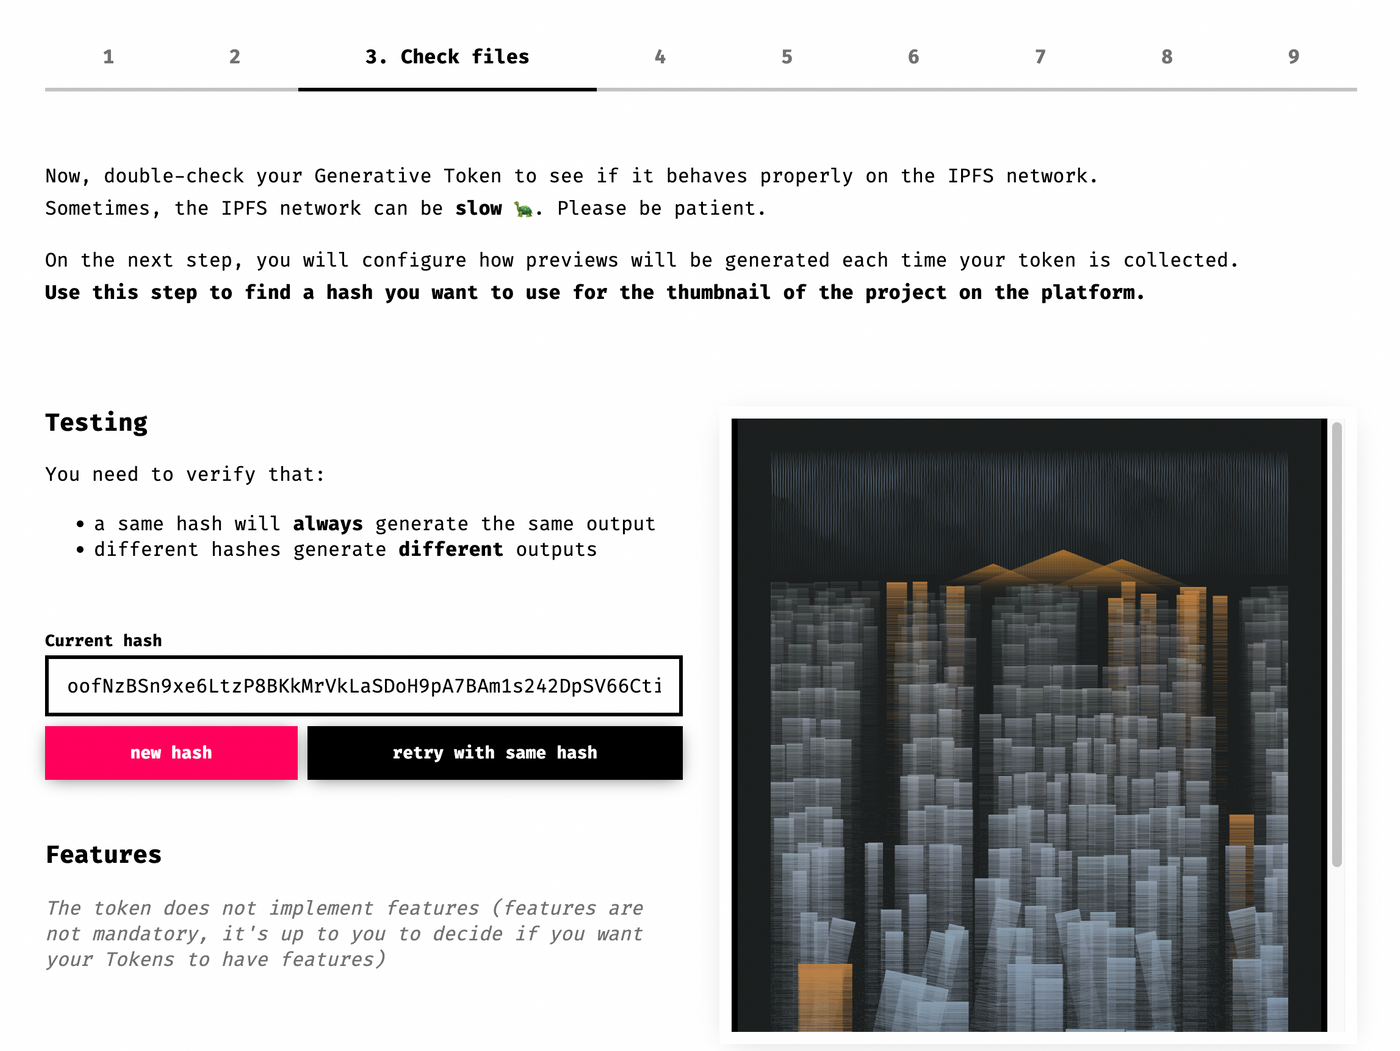
At this time, there are two things to do: test the hash and set the preview image (that is, the preview image that others will see before clicking on your GT project).
- Test hash : Clicking on the red new hash will generate a new fxhash value. At this time, different results are expected. Clicking on the black retry with same hash is equivalent to rearranging with the current fxhash value, which should produce the exact same image as before rearranging.
- Set the preview image : If it is confirmed that there is no problem, the next step is to click on the new hash to select the image you want as a preview image for others to see first. Pay attention to the proportion of your work here. For example, the project I listed is long, so in some viewing modes, it will be cut into squares from the middle, as shown in the figure below. After cutting, it may not look as expected. Same.
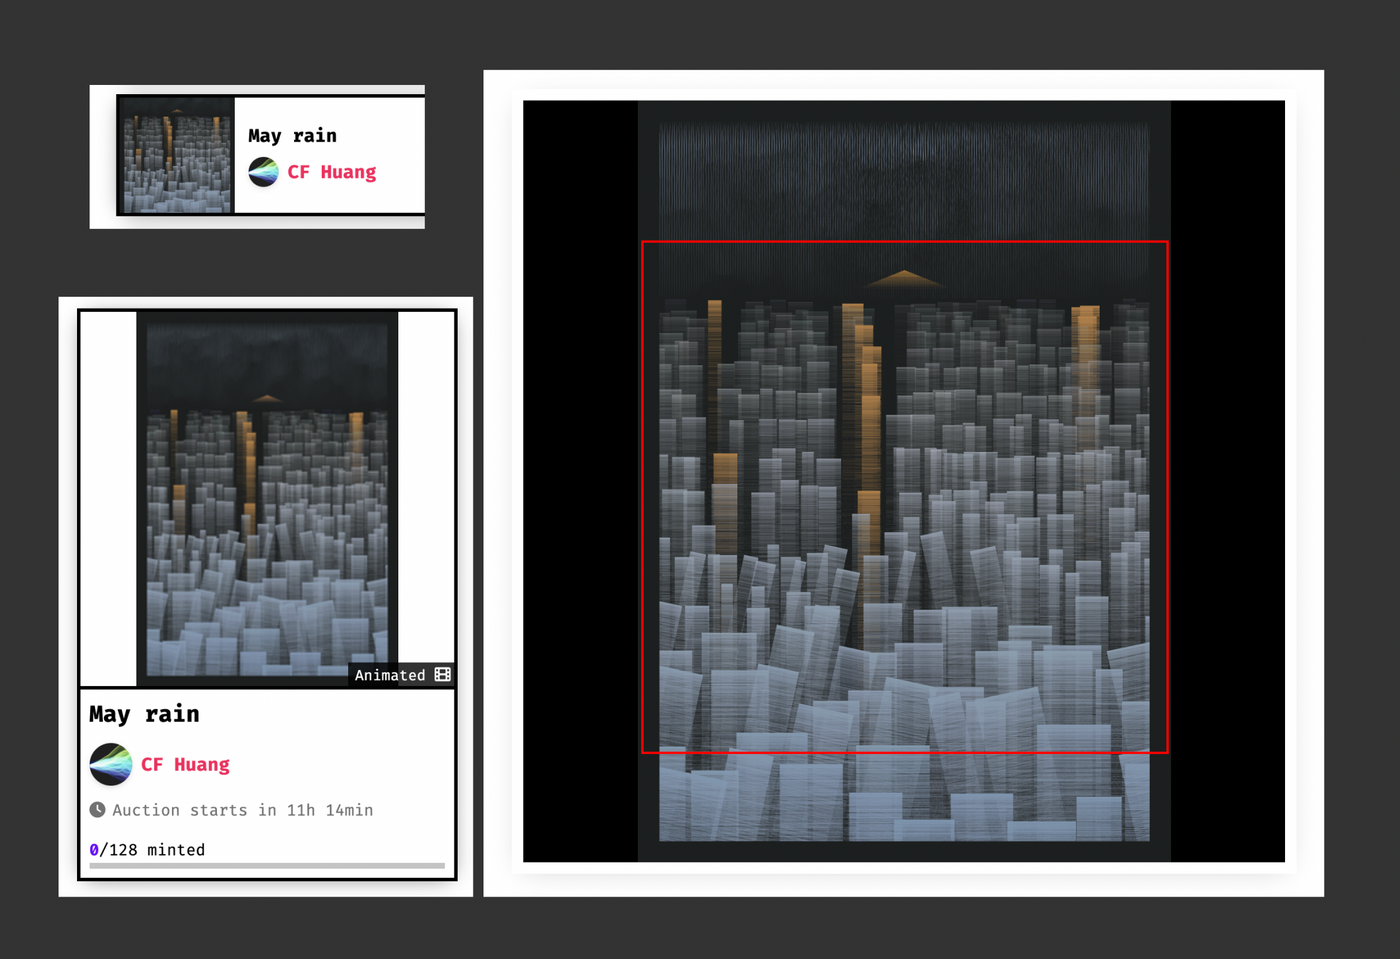
After you have selected the following two options, you can tick the next step: (The first is to confirm that your current hash is your first image preview, and the second is to confirm that your GT is working properly)

Step 4 Configure capture
The action here is to set the server to automatically capture the preview preview image through the fxhash server
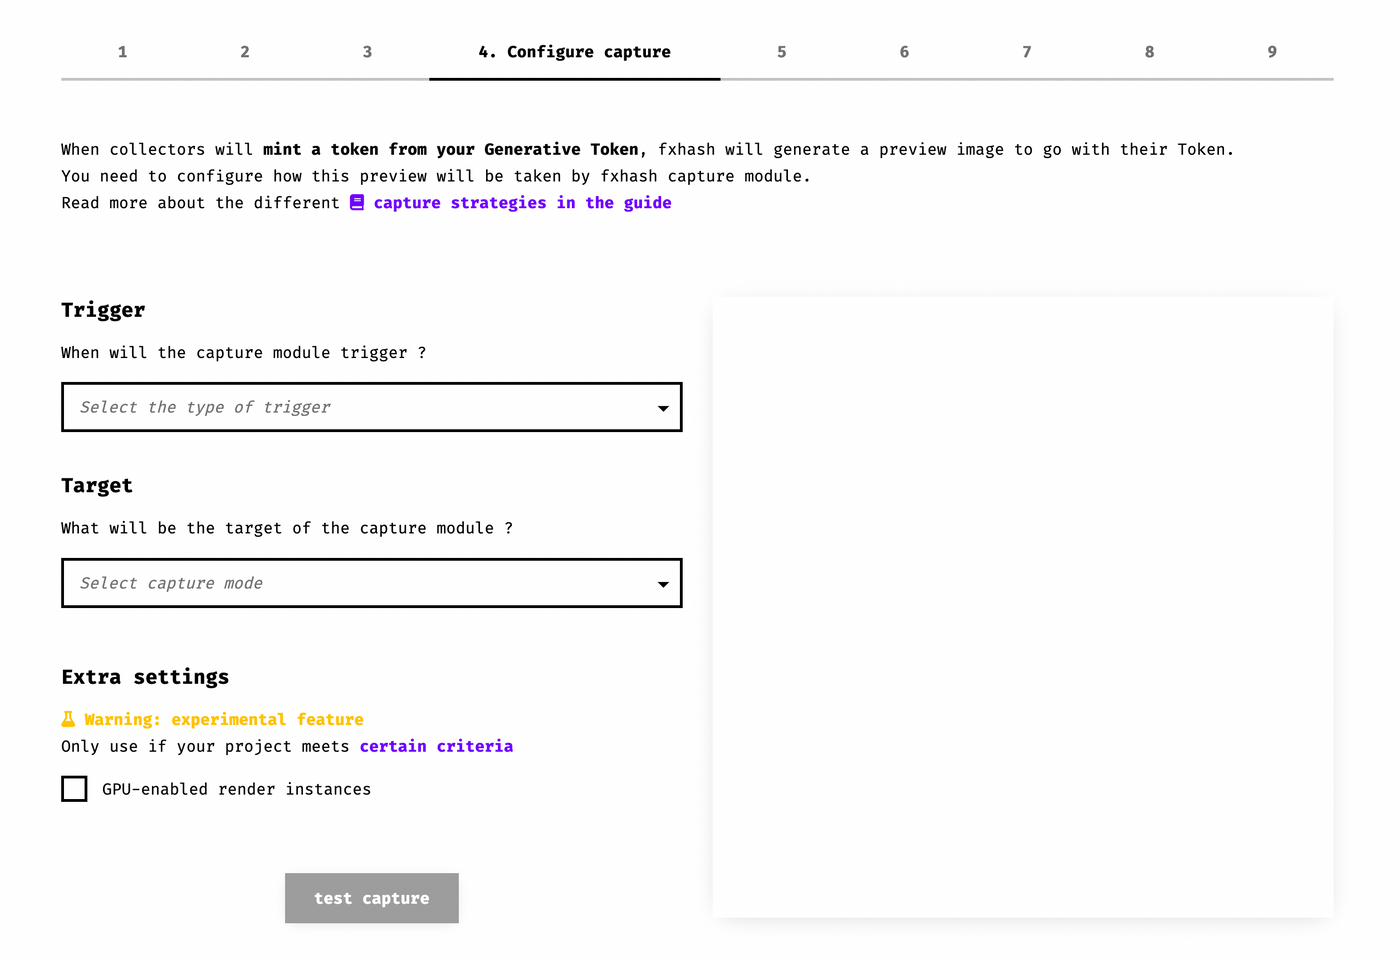
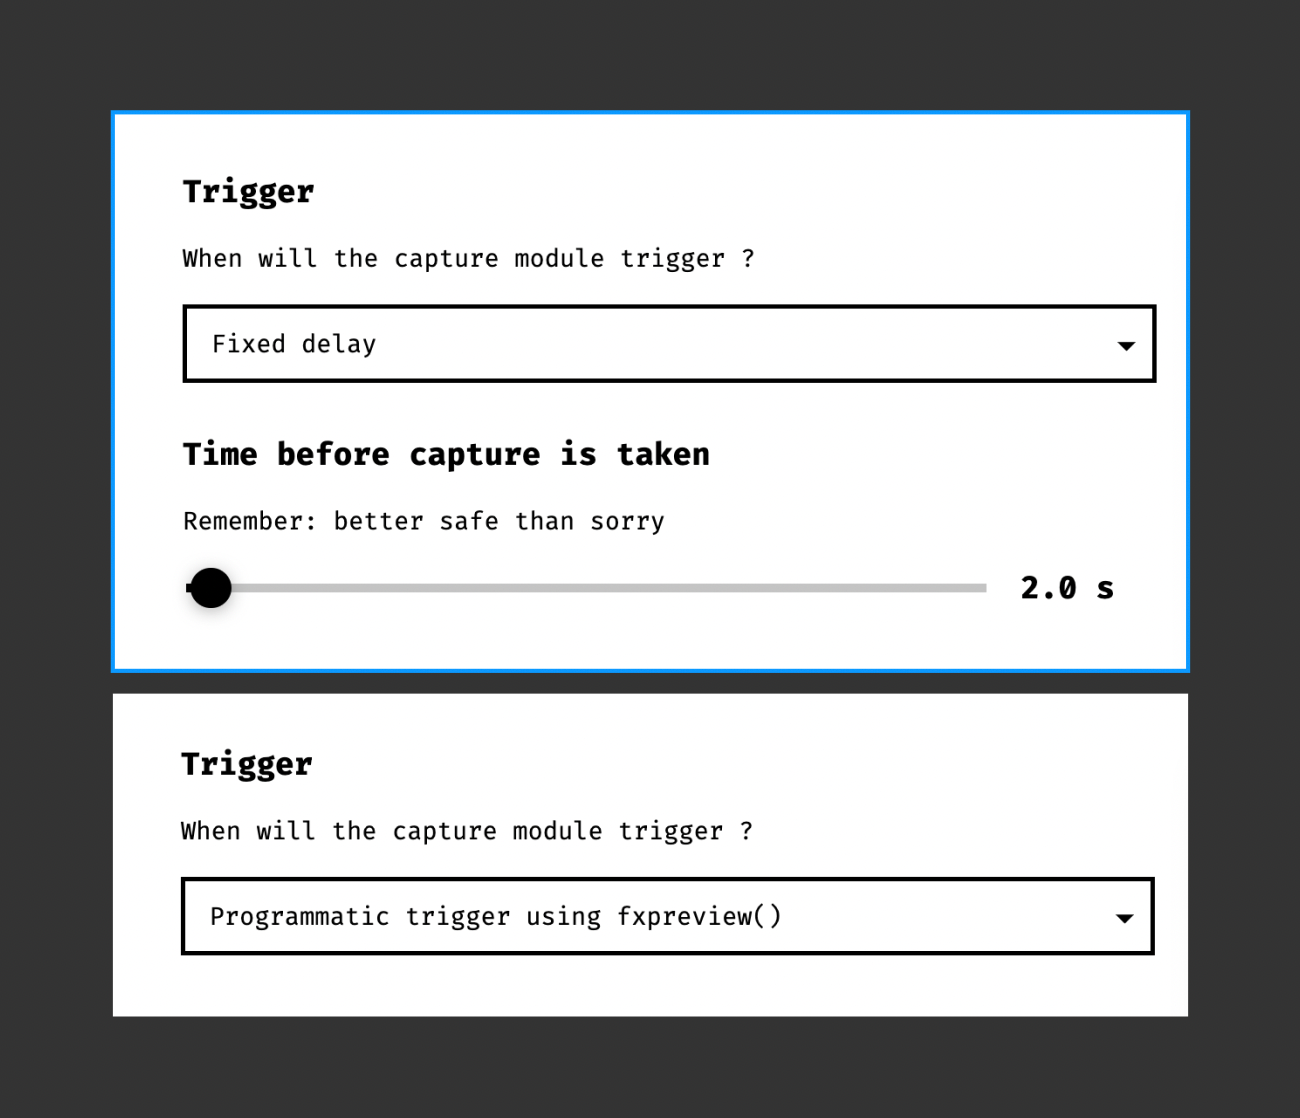
Trigger is to tell the server side (server side) at what time to trigger the screenshot as a preview of the work. Because the server side will actually execute the package of webpages and programs you upload once, but the server side does not know when each work will run out the images or programs of the work, or some works are always moving, so The creator needs to tell the server to take a screenshot after a certain period of time after entering the webpage ( Fixed delay ), or actively call a function fxpreview() to trigger the screenshot action ( Programatic trigger using fxpreview() ).
Target is to set the object to capture the screenshot. There are two types: From <canvas> and Viewport capture .
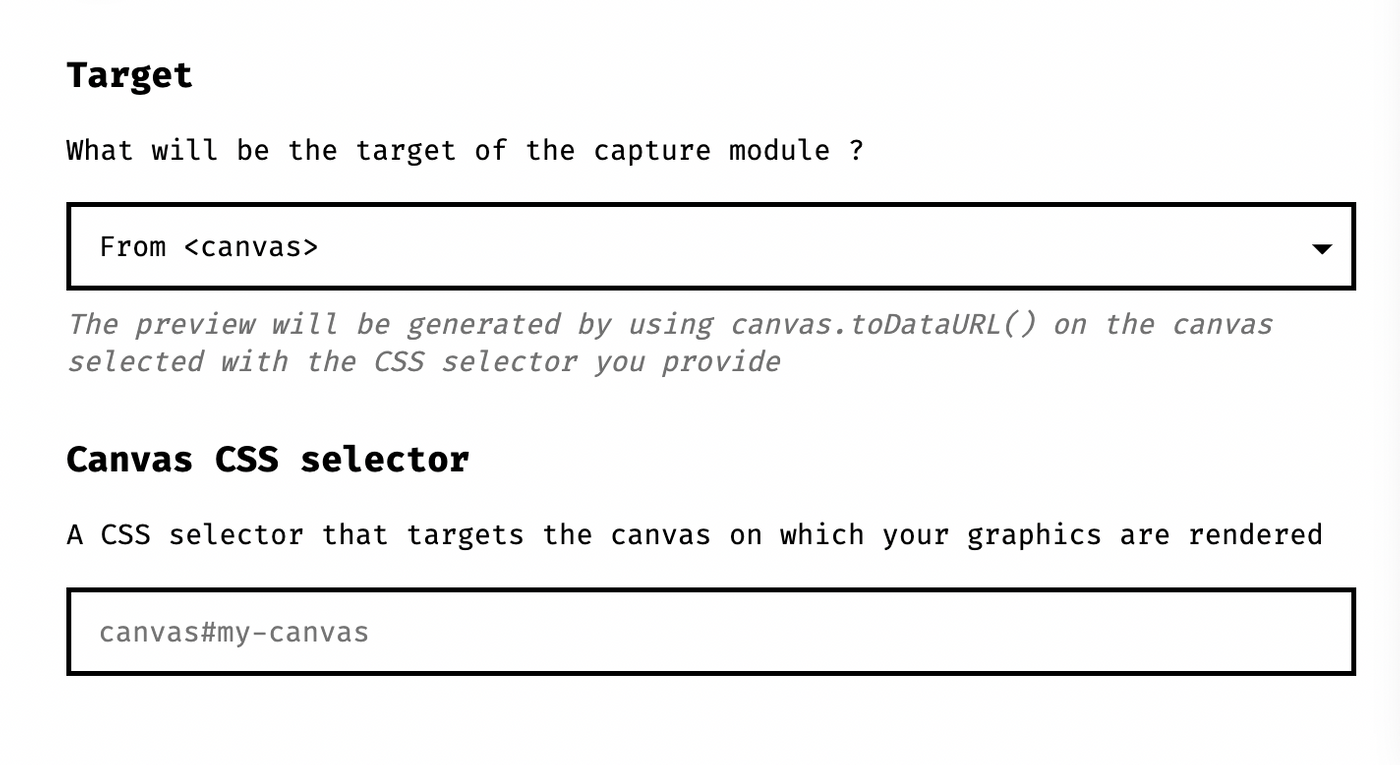
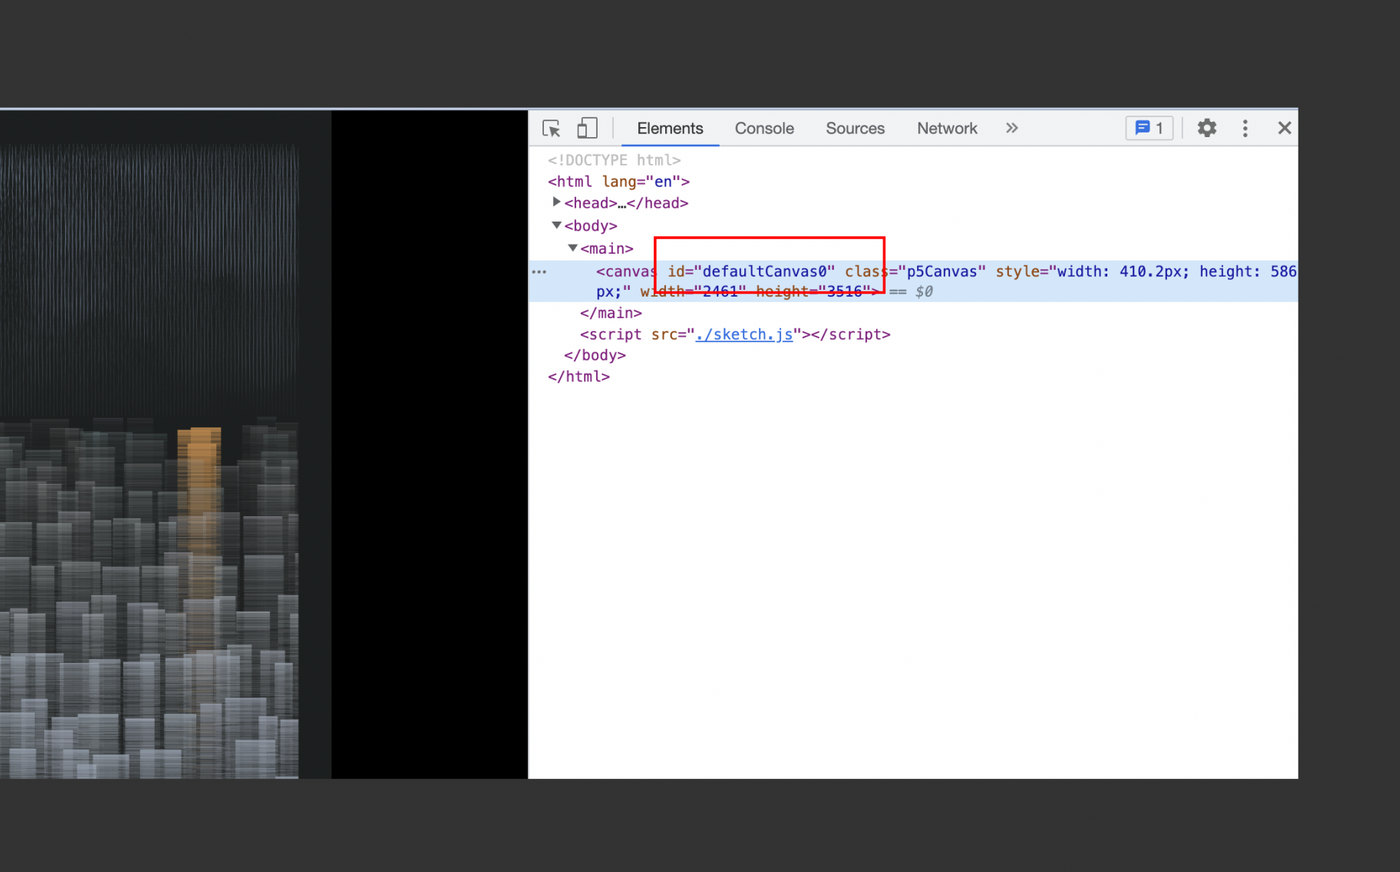
From <Canvas> is to grab a specific canvas object in the web page by specifying a CSS selector. I did it myself with p5.js so I chose this one. How to know the CSS selector description of canvas , so the value I fill in that Canvas CSS selector is canvas#defaultCanvas0 .
If your work will generate a lot of canvas tags or other non-canvas situations, you need to specify a browser window size with Viewport capture , and tell the server side to use the window of this size to directly capture the screenshot of the entire web page.
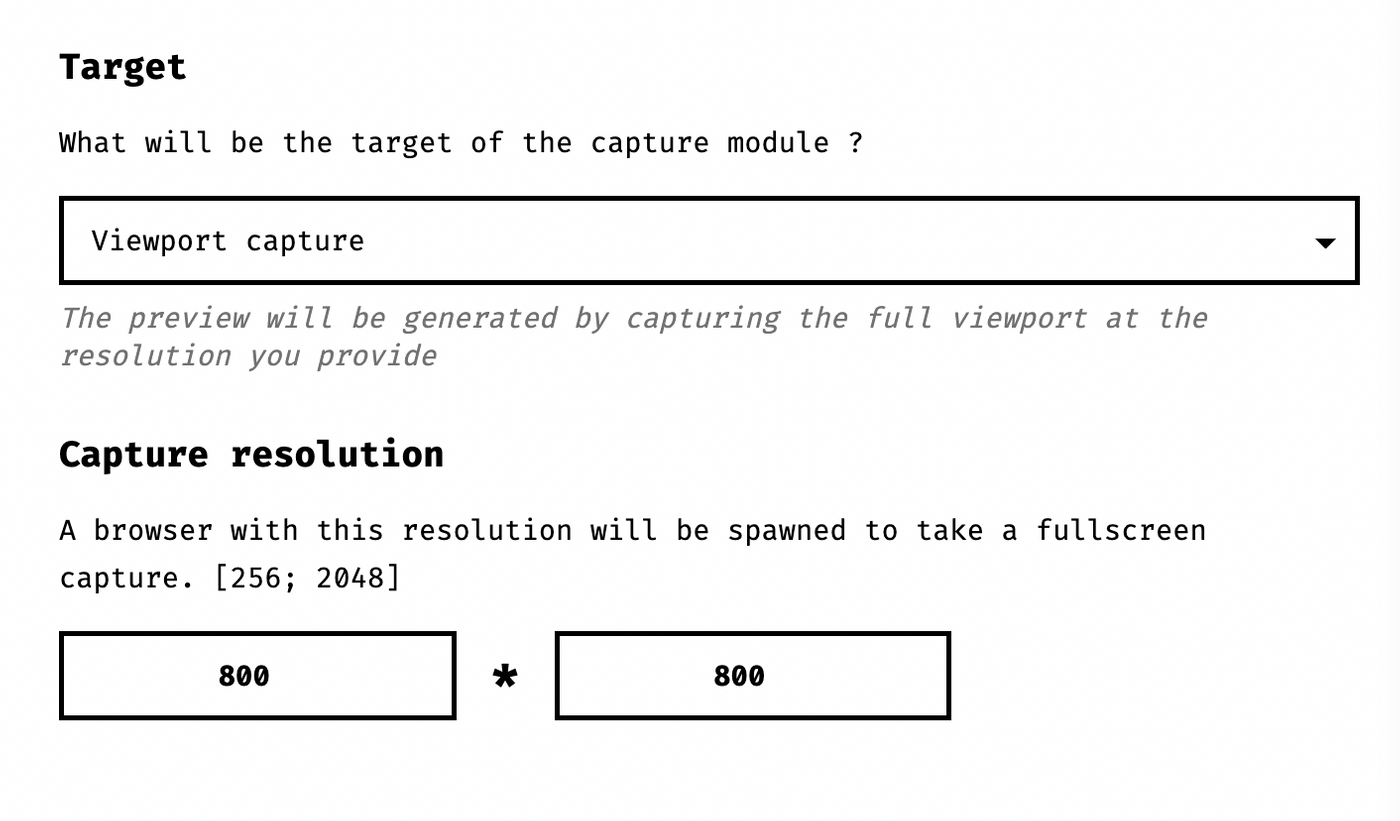
The next Extra settings are to decide whether to use the GPU to generate screenshots. Under normal circumstances, you do not need to tick, unless you find that your screenshot results are different from what you expected, then you need to tick this option. If you tick this option, the screenshot generation time will be full, and it will take a few minutes.
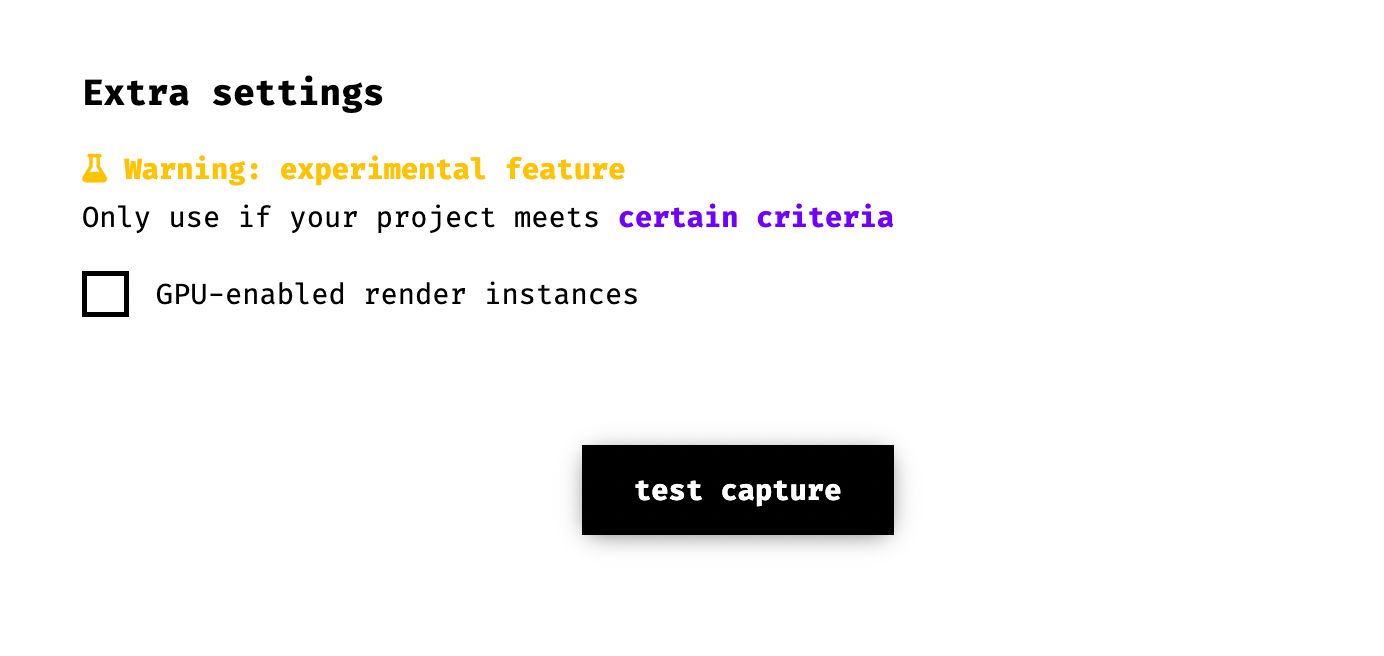
After all the settings here, press test capture to capture a screenshot. After a while, you should see the result of the server capture on the right, see if it is as you expected, adjust the parameters if necessary and test capture again. If there is no problem, just press next step .
Step 5Verification
Here, you need to confirm whether your online web page is the same as the preview screenshot. You can see that in my screenshot, the color of the mountain is a little different.
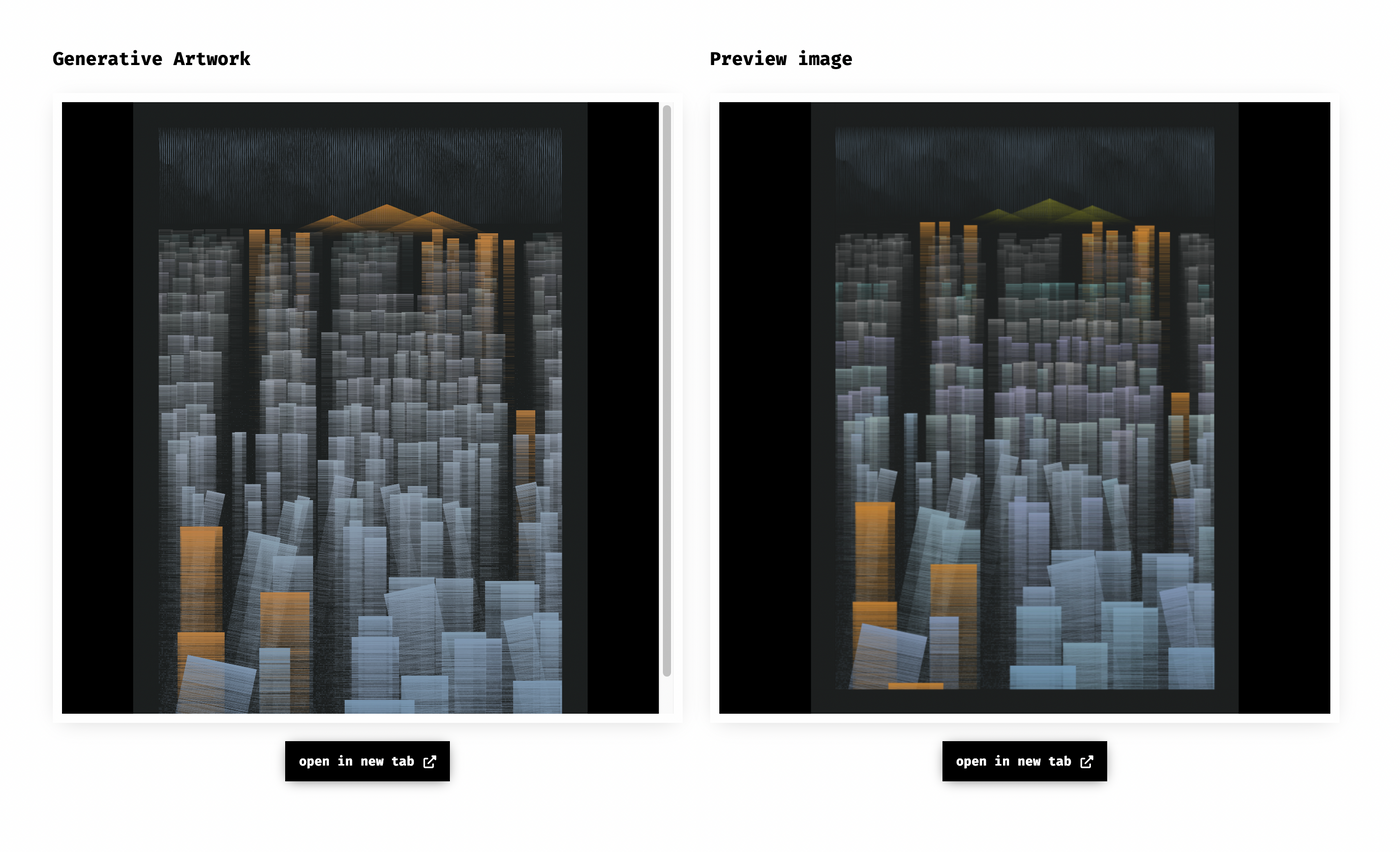
In addition to these two screens, it is also necessary to confirm whether the full screen is the same after opening in new tab.
The problem I have encountered is that I use some random to generate the object position, and my canvas size is also automatically adjusted according to the available width of the window, so sometimes when viewing on a smaller screen, the canvas size is 600 x 800, maybe 900 x 1200 when the screen is bigger. In addition, the unit of my random object is pixel, so as long as the screen size is different, the random result will be different.
The solution is to use the ratio of 0 to 1 to represent the various places that will be calculated to the size. For example, for an object that may have a width of 10 pixel, I may write it as 0.0166. In this case, when the screen width is 600, the width is 10, and the screen width is 10. When the width is 900, the width will be 15, which becomes a relative width size. This ensures that the random results will be the same on different screens and zooms. If you use random / noise, you need to pay more attention.
If you confirm that both are the same, you can go to the next step.
Step 6 Distribution
To decide how this GT will be sold. Some of the sales settings here can be modified again later. They are explained one by one as follows:
- Number of editions determines the number of editions that the work will be sold in. The number of editions cannot be changed after the number of editions is selected.
- Pricing methods The sales methods are divided into Fixed price and Dutch Auction (sometimes referred to as DS). This cannot be changed after selection.
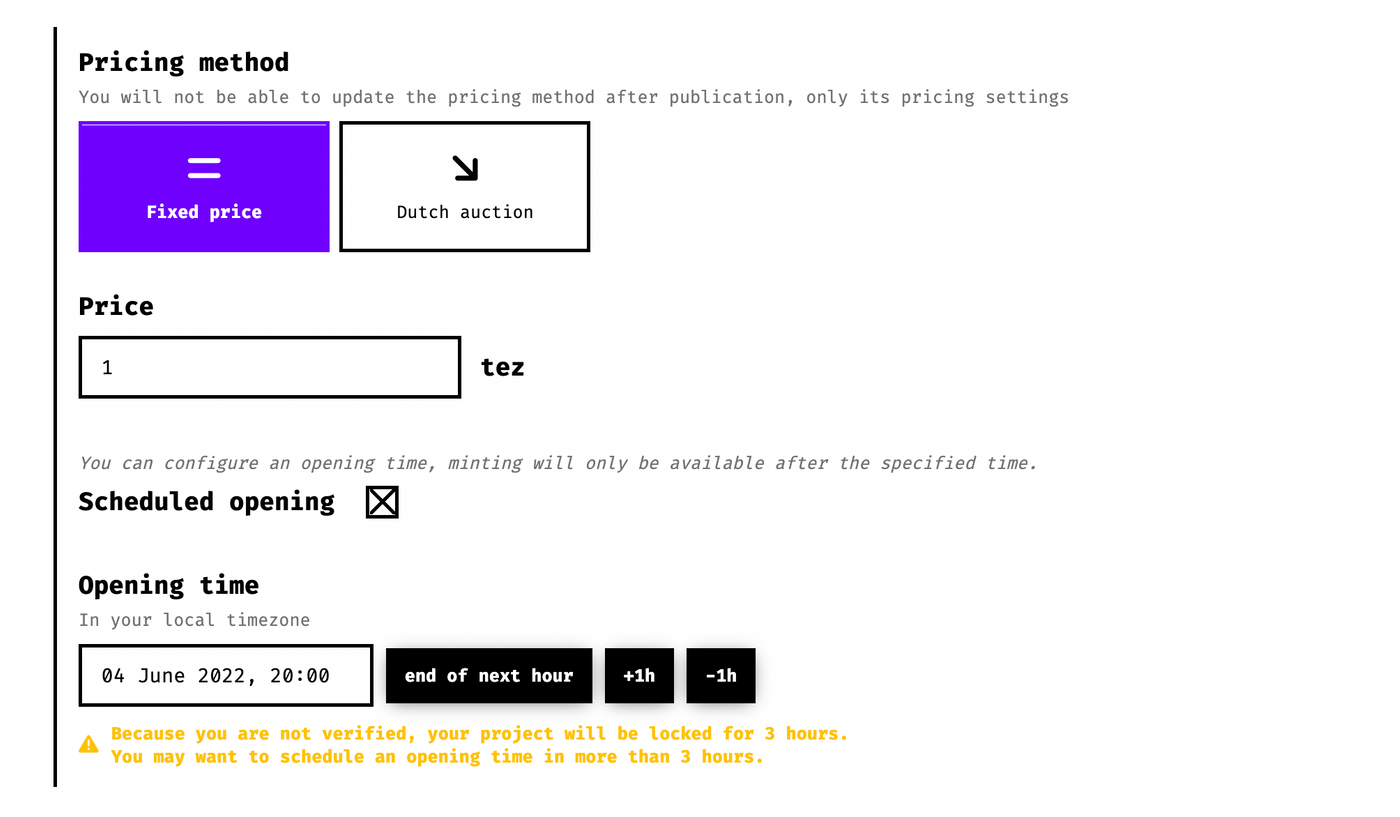
Fixed price can be set whether to reserve a time for listing. Generally speaking, it is better to set a shelf time and allow yourself plenty of time to do publicity.
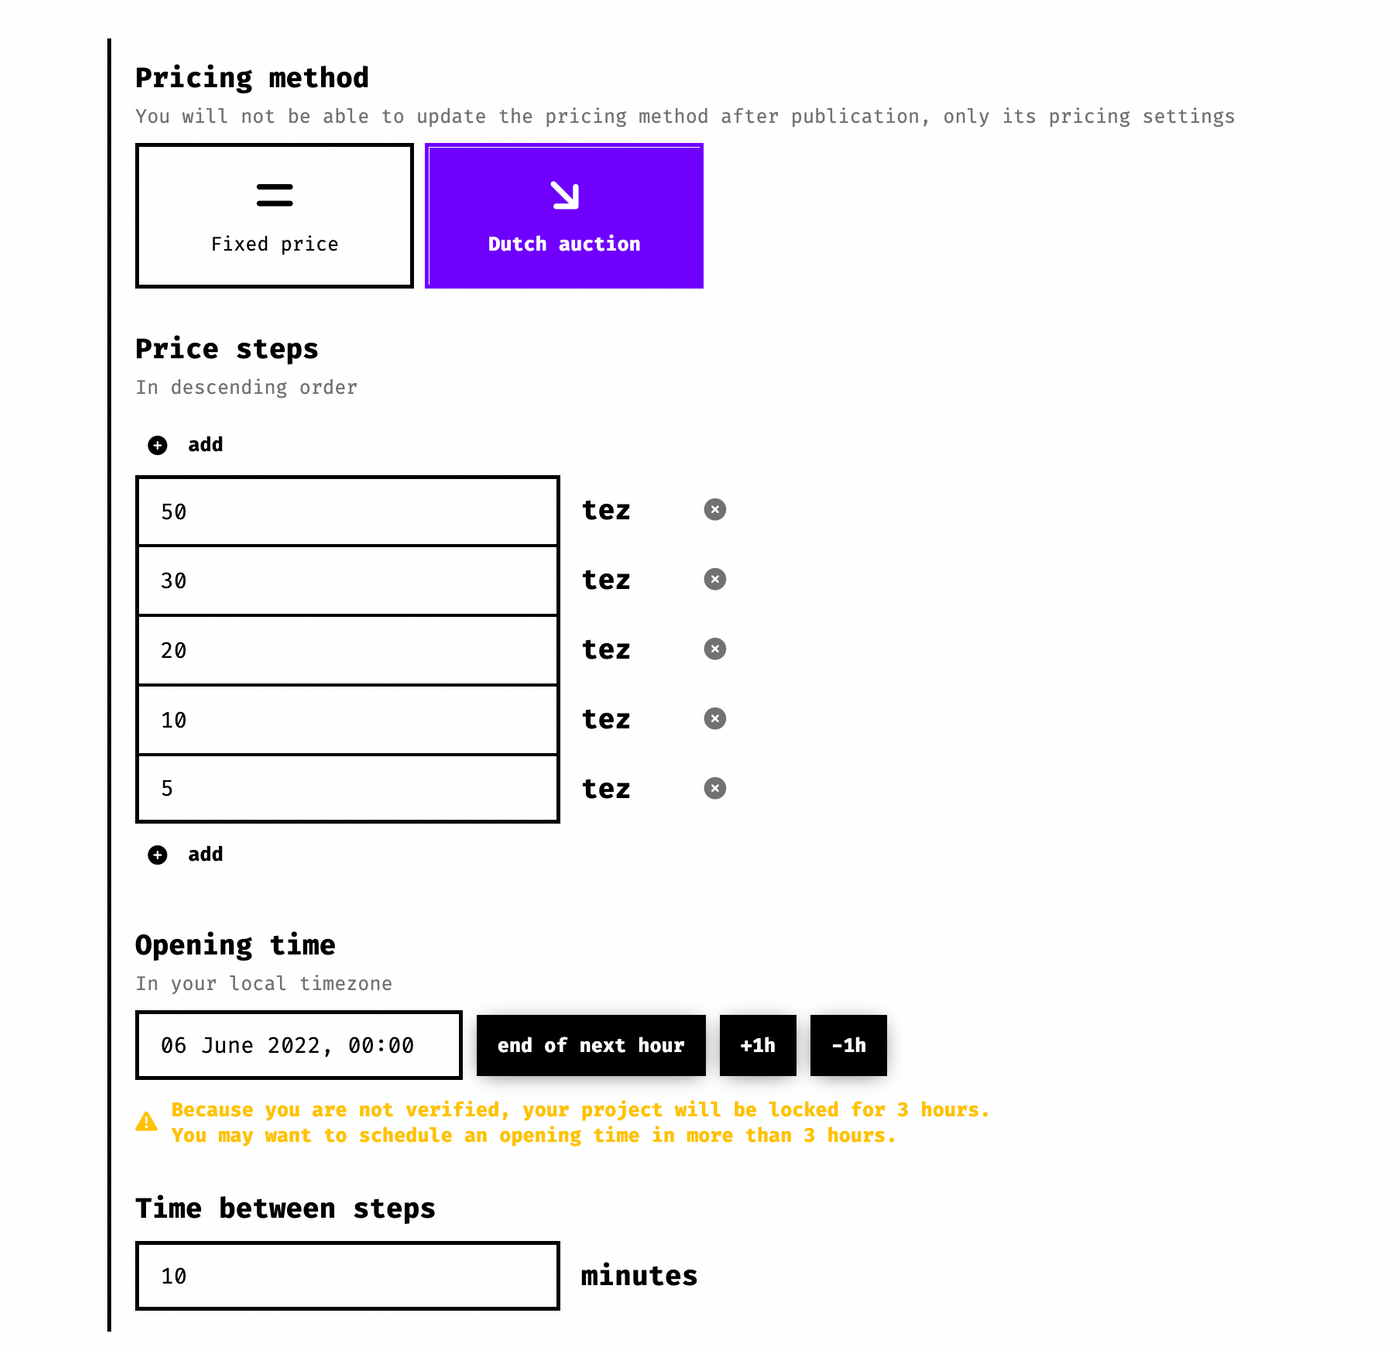
The Dutch auction is to set the price of the band, which decreases with the time set by yourself. Take the screenshot above as an example, the price is 50t after the sale, 30t after 10 minutes, 20t after 10 minutes, and so on.
- Whether the sales revenue of Primary splits is divided with other people, or a percentage of the donation is made. If you click on donations, there are some preset organizations to choose from.

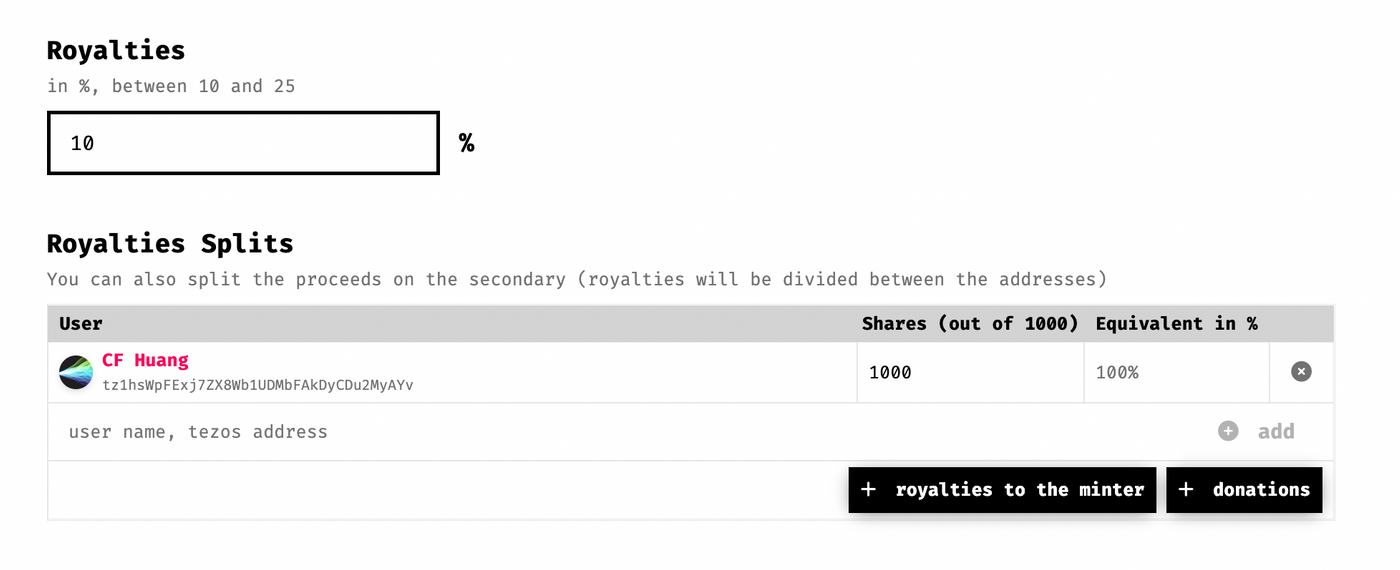
- Royalties & Royalties Splits If your work is sold on the marketpalce after someone buys it, a part of the price will be paid back to the author in the form of a commission. others. Here, if you choose royalties to the minter, a certain percentage will be given to the first collector who buys from you. This approach will also indirectly provide incentives to buy and sell again (that is, secondary market sales).
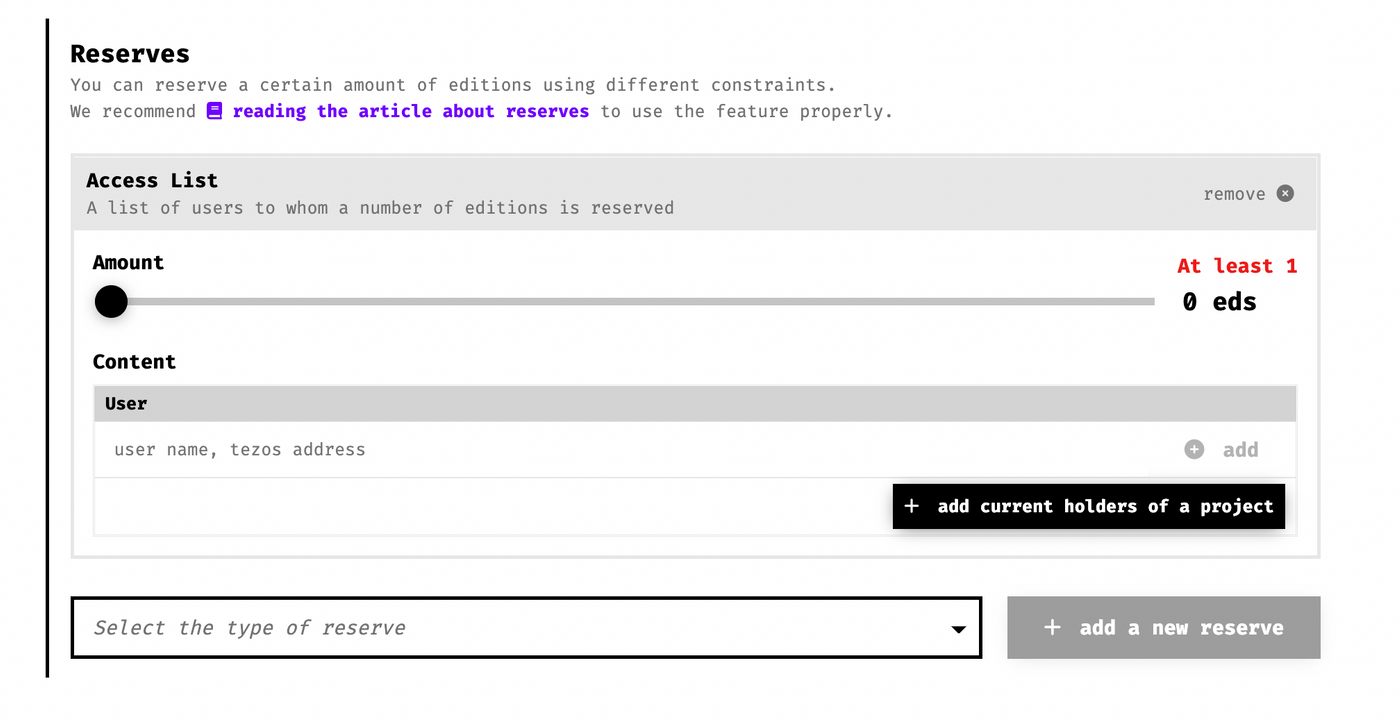
- Reserves can set the number of pieces reserved by the author, that is, the white list, which can be imported from the owner of his previous works, or the wallet address can be manually entered. I haven't used the functions here yet, and I'll introduce them later when I have the opportunity to use them. XD
- If Enabled is not ticked, it means that you need to manually check in after the work is on the shelves before it can be sold. If you tick it, it will automatically open mint works according to the time you set.

Go to the next step after setting.
Step 7Extra settings
Here is to set whether your project information page is open so that people can dice the works. The default exploration enabled check is open so that everyone can come to dice the works and see the changes of the works.
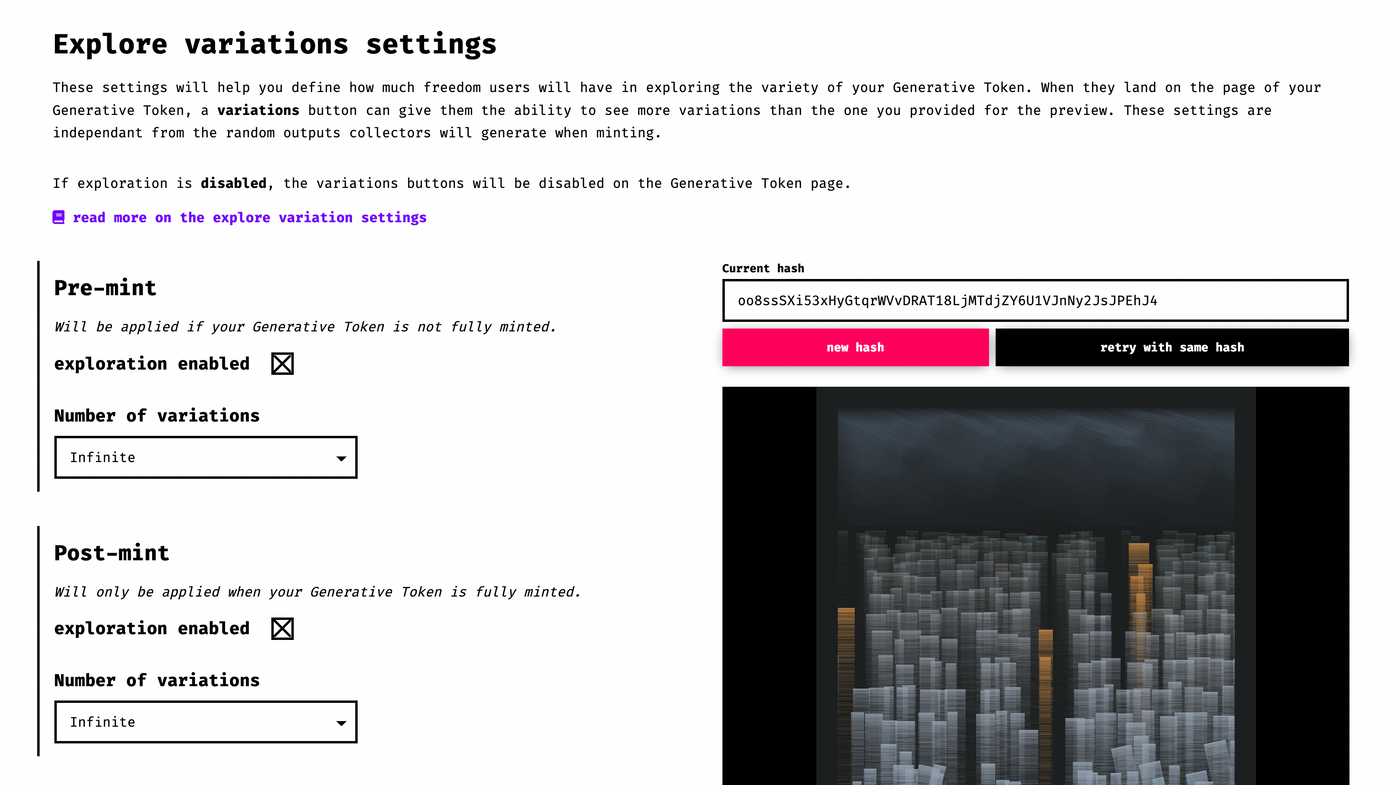
There are two modes: Infinite will always randomly generate works with different hashes, Constrained to a list of hashes is to list several hashes for people to view ( example ). In general, you might expect to see Infinite's exploration, which will bring a lot of random fun.

In addition, the upper and lower parts are divided into Pre-mint and Post-mint. The above settings will be applied before they are sold out, and the following settings will be applied after they are sold out. After setting, you can go to the next step.
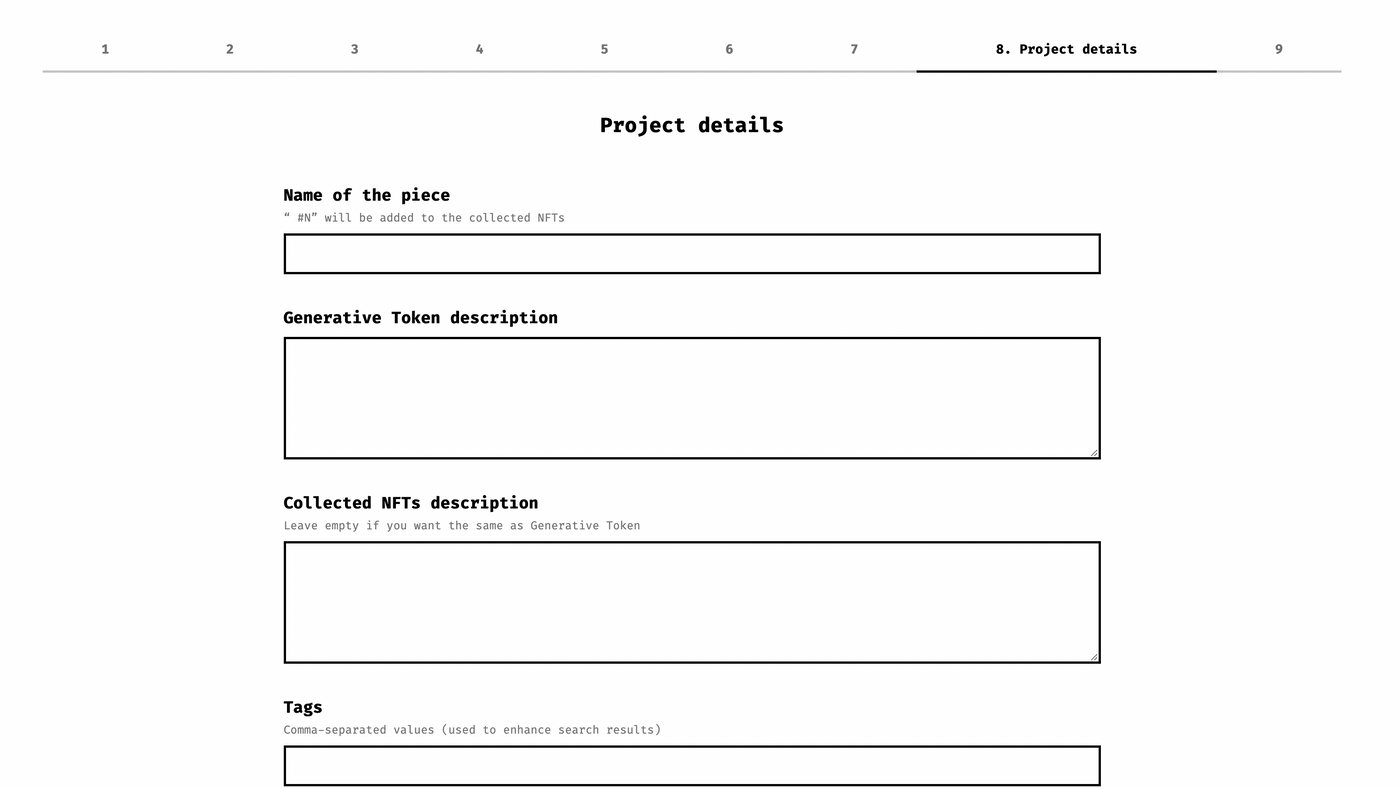
Step 8 Project details
Here you need to set the basic information and description of the work. First you have to come up with a name, and then you have to do some narrative description. Some people will explain the source of inspiration for the work, or what algorithm or technique was used, who will be donated to, or put on a project Twitter or webpage, etc.
Step 9 Preview & mint
Do the final confirmation and preview here, and press send to publish the work.
The above is a brief description of the steps of fxhash listing, I wish you all a smooth creation!
Like my work?
Don't forget to support or like, so I know you are with me..
Comment…