Let’s Understand Chrome V8:Chapter 1 V8 Environment Construction

Preface
V8 is not only the core component of Chrome, but also the core component of many software such as node.js, so the importance of V8 is self-evident. V8 involves many technologies such as operating system, compilation technology, computer system structure, etc., causing great difficulties for beginners. I will start with the basics, and explain in detail all aspects of V8 memory allocation, isolate creation, handles concept, builtin, codegen, compilation, etc., to make learning V8 easier.
Key points:
- Compilation tool chain, V8 compilation and debugging;
- How to learn V8 is the easiest;
- JavaScript element;
- Explanation of element principle.
Tip: Make sure that your network can access Google and your cmd command line can also access Google via http(s).
1. Download, compile and debug
1.1 System environment requirements
Operating system win 10 64bit, VS2019 community edition, git
The Windows 10 SDK is at least 10.0.19041 or above. It is not recommended to use the VS installer to install the SDK. You should download the SDK installation package separately because the SDK files installed by the installer are incomplete.
1.2 depot_tools
It is a V8 compilation tool chain, which is required for downloading and compiling code.
1.Download link: https://storage.googleapis.com/chrome- infra/depot_tools.zip
2.Compress depot_tools.zip, use the right mouse button to compress(do not double-click to open and drag from it)
3.Add depot_tools to the environment variable PATH; add the system variable DEPOT_TOOLS_WIN_TOOLCHAIN=0
4.Open the CMD terminal (not powershell, and can access Google through http(s)), and execute gclient.
5.After gclient is executed, use where python to view the path information of python.bat in depot_tools and ensure that the location of python.bat in the environment variable PATH is before the original (if any) python environment location in the system.
1.3 Download the code
Initialization of git
Download the V8 code
fetch v8 git pull origin master
The source code is not too large, and 7G of hard disk space is required after compilation in debug mode. It is recommended to use a solid state hard disk. Because of the large number of files, when VS2019 scans the reference relationship between files, solid state is very advantageous.
Generate GN project file
Parameters: is_debug = true to allow V8 to be debugged, v8_optimized_debug = false to remove code optimization that interferes with debugging V8. This will not affect the correctness of V8, but may only have a slight impact on performance. The following is my compilation configuration file args.gn.
is_component_build = true is_debug = true v8_optimized_debug = false v8_use_snapshot = false
1.4 Compile and debug
Compile V8 with VS2019
Under src\out\default, you can see all.sln, double-click to open it, as shown in Figure-1.
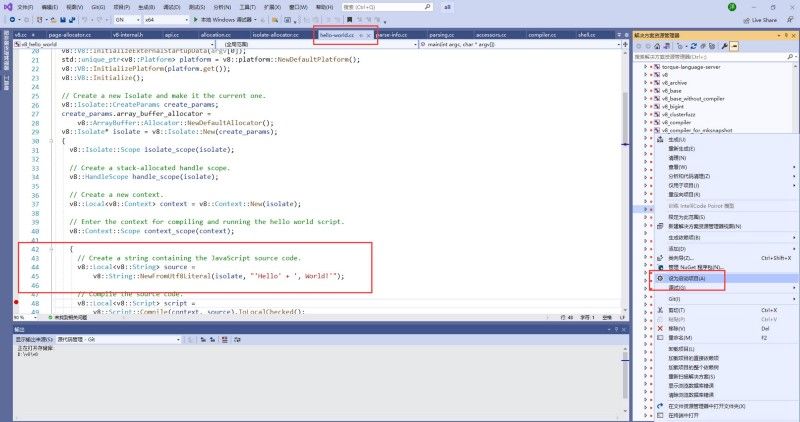
In the Solution Explorer, you can see the solution v8_hello_world. Right-click “Set as Startup Project”, and then right-click “Generate” again to start compiling. In the output window at the bottom of Figure 1, you can see Compilation process.
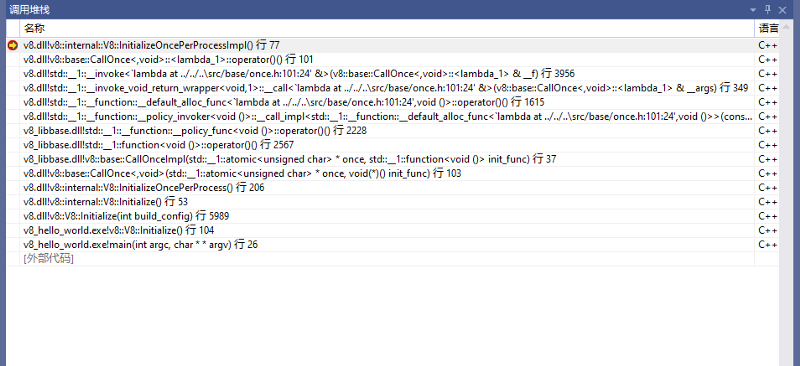
The above figure is to trace the call stack of hello world.
Tips:Unexpected problems may occur during the environment setup process, most of which are related to the SDK version and environment variables.
2. How to learn V8 the easiest
The structure of the V8 source code is as shown in the figure below. V8 has a large amount of code and a complex structure. You should start with samples.
In addition, src contains the core code of V8.

We start to learn from the samples directory. The file (hello-world.cc) opened in Figure 1 is in this directory. This hello world program is written in C++, including starting V8, running a hello world in javascript, and an addition operation. To be precise, V8 is a javascript virtual machine. In this hello word.cc, only “hello world” and addition are a real javascript program. The other codes are all for running the javascript virtual machine (starting the V8 virtual machine). They include V8 creation, Isolate creation, handle creation, compilation, output result, and exit V8.
3. Element debug
What is Element? First look at a concept, {a: “foo”, b: “bar”}, this object has two name properties, “a” and “b”, they can not be indexed by array subscripts, Those with subscript index properties are usually called elements, for example: [“foo”,”bar”], 0 position is “foo”, 1 position is “bar”. Attributes and elements are handled differently in V8. Let’s use a picture to illustrate the form of javascript objects in V8.
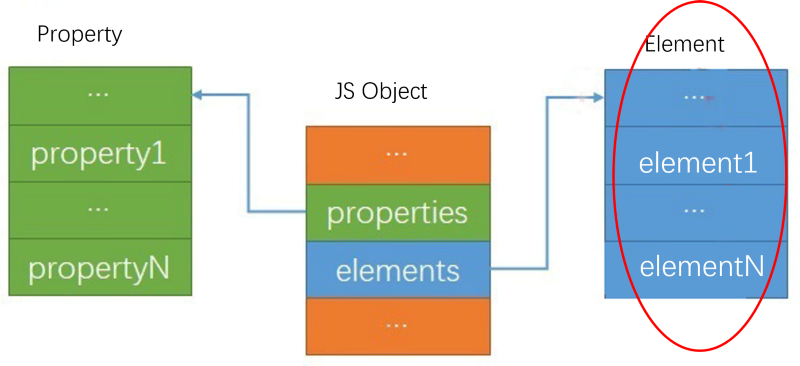
As can be seen from the figure, in V8 the javascript object is stored separately, and the name property and the element are stored separately, which is the part marked in red in the picture. I directly give the positioning element code and debugging method in V8, see the figure below.
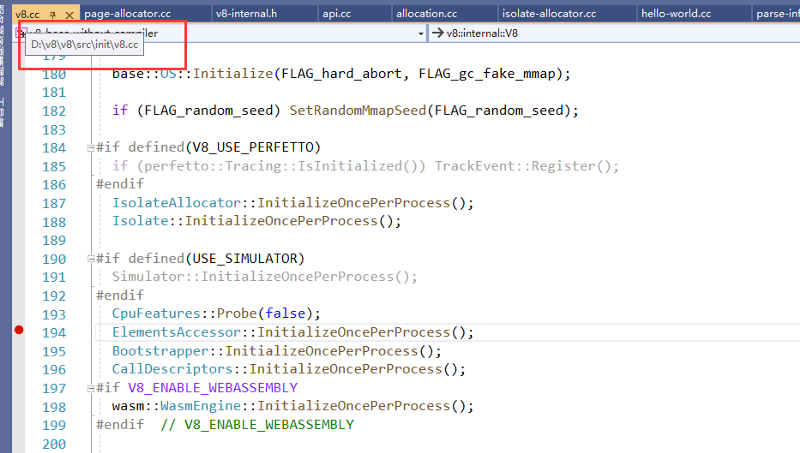
Pay attention to the position of the file and the breakpoint in the figure, you can stop at this position when debugging, this is the tracking method, just step into the analysis.
4. Element principle and important data structure
4.1 Main code and data structure
A large number of methods in Element, such as pop or slice methods, are mostly used to operate on a continuous address space. ElementsAccessor is the base class for operating Element, and every operation on Element corresponds to ElmentsAccessor.
The two macros ACCESSOR_ARRAY and ELEMENTS_LIST in the code cooperate to complete the initialization, and all kinds of element can also be found in ELEMENTS_LIST, as shown in the figure below.
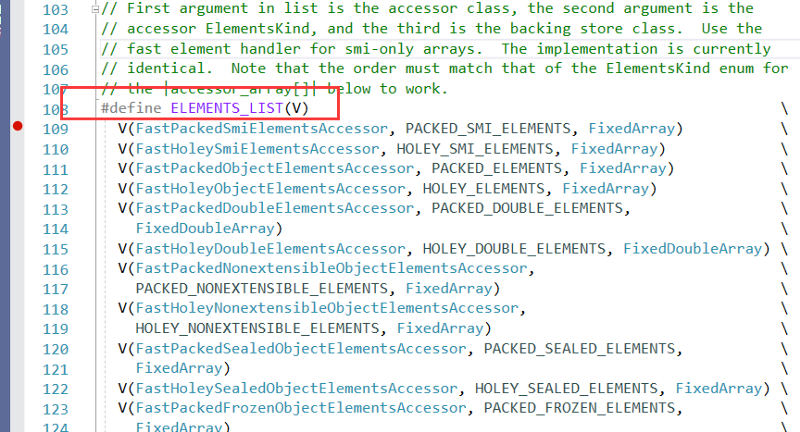
Take FastPackedSmiElemntsAccessor as an example for analysis. This class can be seen from the name that it is a continuously stored Smi type (specified in V8). Continuous storage means that there are no holes in the data address, For example: a = [1,2,3], this is packed Smi, b = [1,,3], this is Holey Smi. Smi is a small integer. Take a 32-bit CPU as an example. The lowest bit indicates the type. If it is 1, it is a pointer; If it is 0, it is smi.
There is no specific function in FastPackedSmiElementsAccessor. Its parent class FastSmiOrObjectElementsAccessor only has the initialization function of Element, and it does not talk about how it is used. For example, it is not explained in detail how the slice method is implemented. The “Normailize XXX” functions are very important, because every element operation method (such as slice) in Javascript is implemented by a specific “Normailize XXX” function.
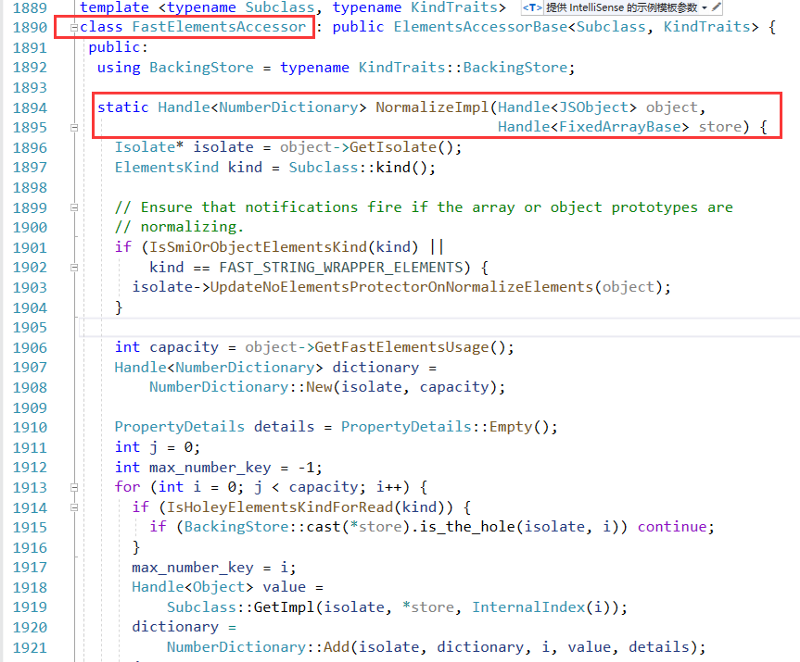
NormalizeImpl is a concrete implementation of the Normalize method, and then enter the next parent class.
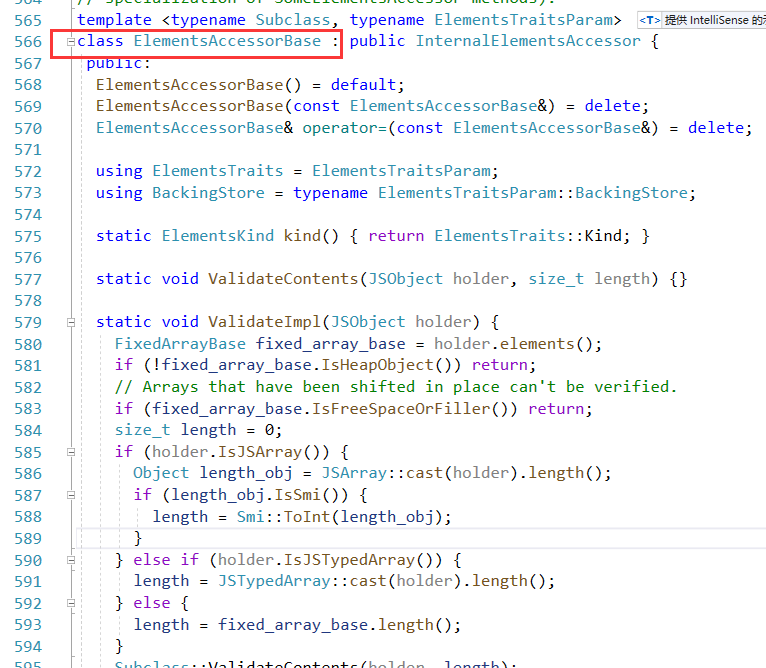
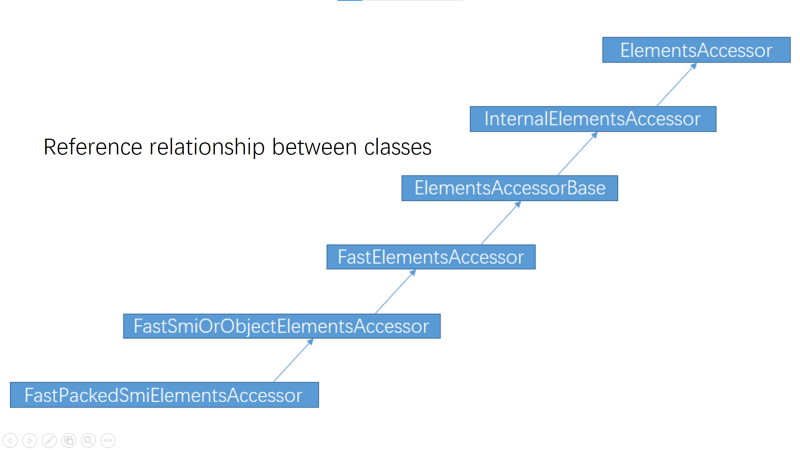
Finally, the nesting relationship of the types is given, as shown in the figure below.
After reading the various methods in these classes, you will feel that the methods still cannot be associated. This is normal, because so far we have not entered the method call process.
4.2 Look at the execution process from element.length
So far, we have only looked at the initialization process of element, which is only static analysis. If debug can be used it will greatly improve our learning efficiency, as shown in the figure below.
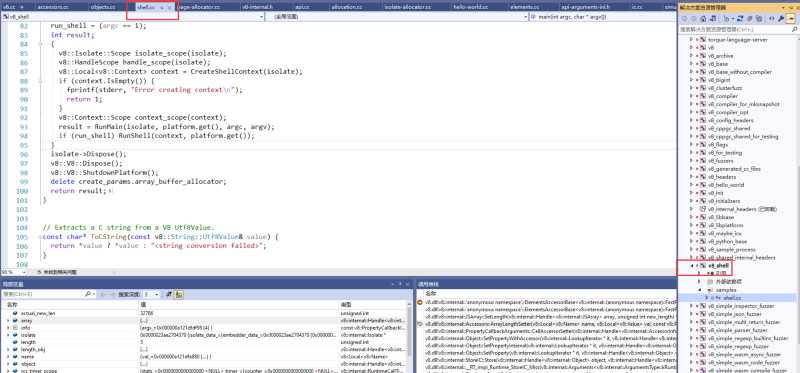
We are debugging shell.cc, its location is under samples\, we did not use hello world, but instead use shell.cc, just because the shell is more interactive.hello The world is still the easiest way to learn. Before debugging, you need to compile this project. Look at the red mark on the right side of the figure. You can set this project as a startup item and then generate it. After you start debugging, you can see the following figure.
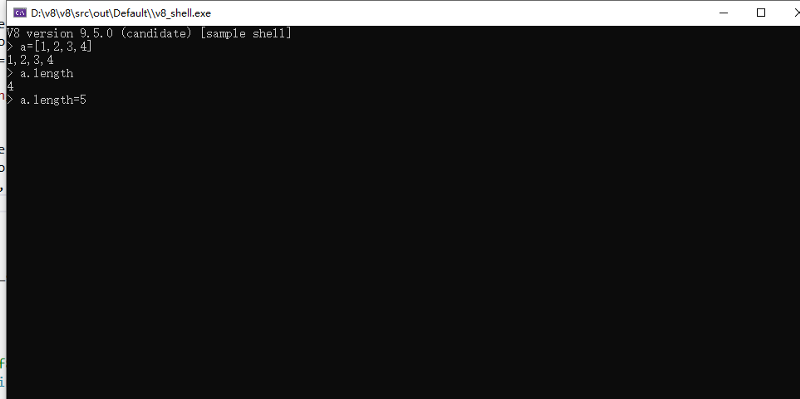
At this time, we set a breakpoint in elements.cc, as shown in the figure below.
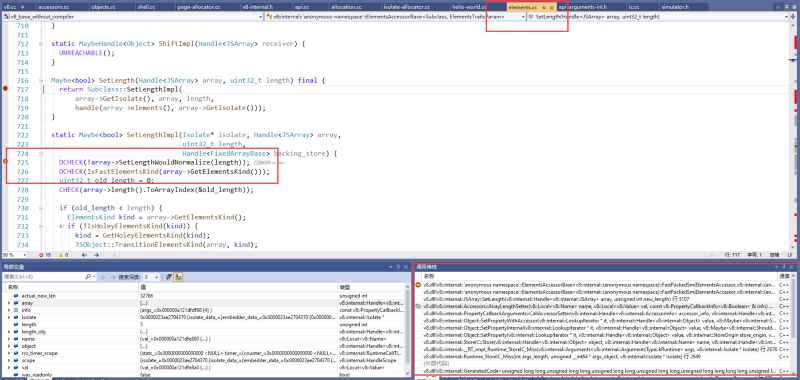
In the above figure, you can see the breakpoint and call stack, from which you can see the function call process, execute the following instructions in the shell window.
a=[1,2,3,4] a.length = 7//Intentionally change the length of the array, in order to trigger a breakpoint
At this time, the stack in the above figure can be restored.
3. Data structure Accessors
First, let’s look at part of the source code of this structure.
What is the role of this Accessors? Explained by the above example, the execution process of a.length=5 defined above is: you need to find its Accessors first, and then you can get to the specific setlength, which corresponds to the description of ElementsAccessor, as shown in the figure below.

Alright, see you in the next chapter.
For technical exchange, please contact Twitter: @Qing_8391
喜欢我的作品吗?别忘了给予支持与赞赏,让我知道在创作的路上有你陪伴,一起延续这份热忱!
