Gitlab server migration / 把 gitlab server 搬家
這篇文章整理得很好,把落落長的 gitlab 官方文章變得精簡許多。
安裝新 server
目前 gitlab 已經把 EE (enterprise edition) 跟 CE (community edition) 整合在一起,如果 EE 沒有付費,那麼試用期過後自動變成 CE。但如果直接就是要安裝 CE 的話,安裝說明要找一下(雖然跟 EE 差不多),以 ubuntu 來說的話在這邊。
備份原有 server
這次 migration 是從 gcp 要搬去 alibaba cloud,所以比較懶惰的方式是透過 gcp bucket storage,之前做的備份機制剛好可以用,設定在 /etc/gitlab/gitlab.rb。
gitlab_rails['backup_path'] = "/var/opt/gitlab/backups"

gitlab_rails['backup_keep_time'] = 604800

gitlab_rails['backup_upload_connection'] = {
    'provider' => 'Google',
    'google_storage_access_key_id' => 'YOUR_GCP_BUCKET_STORAGE_ACCESS_KEY_ID',
    'google_storage_secret_access_key' => 'YOUR_GCP_BUCKET_STORAGE_SECRET_ACCESS_KEY'
}
gitlab_rails['backup_upload_remote_directory'] = 'YOUR_GCP_BUCKET_NAME'
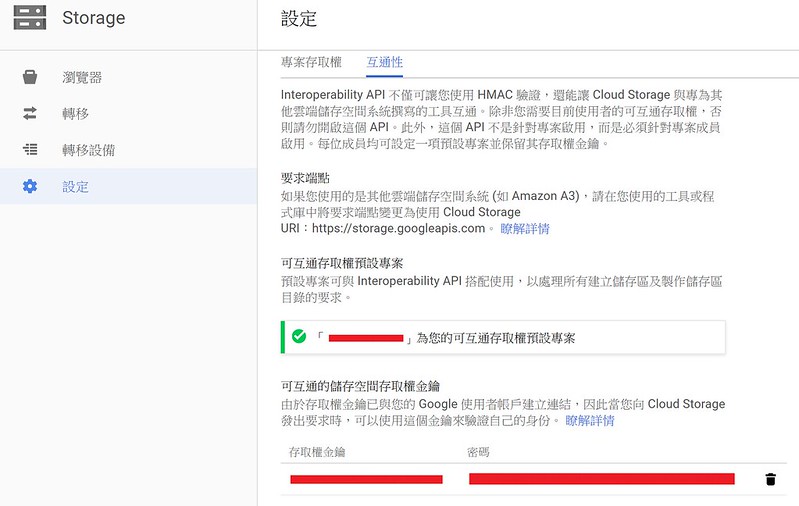
找 bucket name 以及 access key 以及 secret access key 可以參考下面兩張圖。


設定完成之後,就可以開始做備份。
/opt/gitlab/bin/gitlab-rake gitlab:backup:create
備份完成後,檔案就會自動複製到 gcp storage bucket 去,檔案名字會類似”TIMESTAMP_gitlab_backup.tar”這樣的格式。接下來只要開啟公開連結功能,就可以從新 server 上下載了。
Restore
新機器安裝完 gitlab 後,先做 gitlab-ctl reconfigure,然後啟動 gitlab (必須要在 gitlab 運行狀況下才能 restore),在把當中的 unicorn 與 sidekiq 兩個服務先暫時關閉,然後把下載下來的備份檔案搬去在 gitlab.rb 檔案中設定的 gitlab_rails[‘backup_path’] 裏頭,然後開始 restore。
sudo gitlab-ctl stop unicorn
sudo gitlab-ctl stop sidekiq
sudo gitlab-rake gitlab:backup:restore BACKUP=<TIMESTAMP> #注意只要備份檔案的 timestamp 部分就好,不用加上 _gitlab_backup.tar
接下來就是漫長的 restore 過程(有同事把 build 出來的 binary file 都丟上去了,只能無言面對 40 GB 的漫長 restore),除了中間會有幾次詢問是不是要 overwrite 現有的 gitlab 之外,就只能等了。
Restore後做檢查
gitlab-ctl reconfigure
gitlab-ctl start
sudo gitlab-rake gitlab:check SANITIZE=true
喔,對了,這個一行的checkout all remote branch 也蠻好用的。
for remote in `git branch -r`; do git branch --track ${remote#origin/} $remote; done
Original link: Phanix's Blog

