Akash Testnet 3 Week2 挑战8攻略
IPFS
挑战8和6,7类似,难点是要部署之前没部署过的质押类型的节点。 我选择了Polkadot,也是质押类型的节点
设置
- 下载Akashlytics https://www.akashlytics.com/deploy
- 完成安装后打开,新建或者导入旧账号
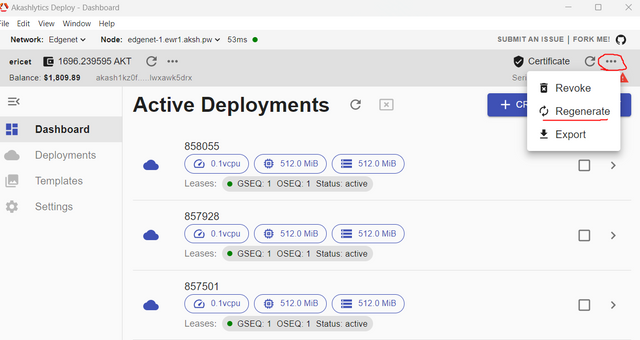
- 进入Dashboard页面后,右上角...那里选“Regenerate" 生成新的证书

任务2
- 点右上角的 "Create Deployment" 按钮创建部署
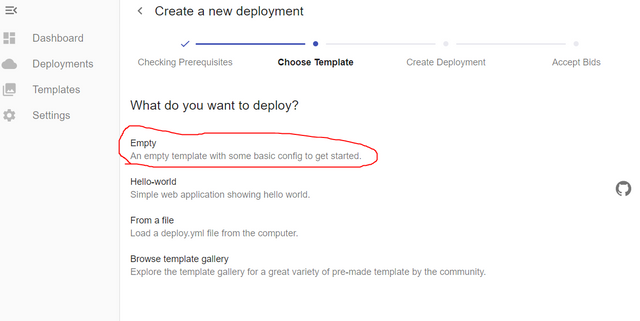
- 选择"Empty"

- 复制粘贴下面的SDL
---
version: "2.0"

services:
  polkadot:
    image: ericet/polkadot:0.1
    expose:
      - port: 30333
        as: 30333
        to:
          - global: true
      - port: 9933
        as: 9933
        to:
          - global: true
      - port: 9944
        as: 9944
        to:
          - global: true
profiles:
  compute:
    polkadot-profile:
      resources:
        cpu:
          units: 2.0
        memory:
          size: 8Gi
        storage:
          size: 64Gi
  placement:
    westcoast:
      pricing:
        polkadot-profile:
          denom: uakt
          amount: 1000
deployment:
  polkadot:
    westcoast:
      profile: polkadot-profile
      count: 1
- 同时你也可以复制上面的SDL并创建一个gist,把gist链接填入挑战8的任务2处
任务1
- 点击“Create Deployment" 开始部署
- 部署成功后,会获得一个Tx Hash,记下来,填在挑战8的任务1处
任务3
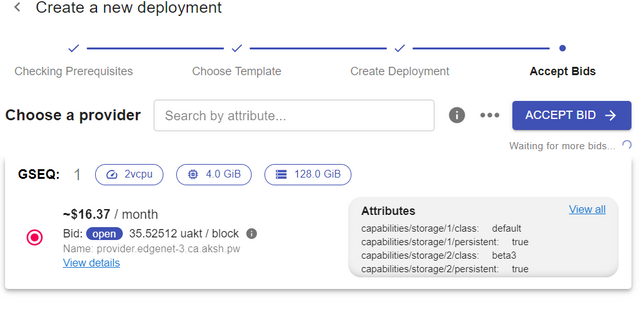
- 选择一个竞价,然后点击"Accept Bid"接受报价

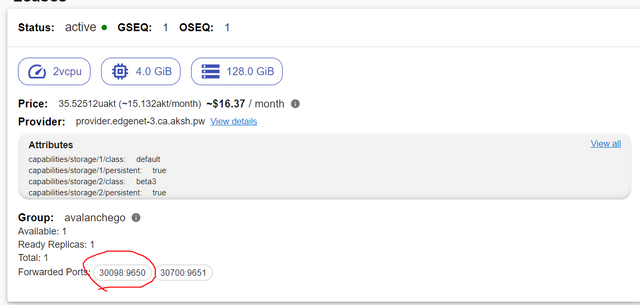
- 等待部署成功后,点击Forwarded Ports 9933那里获得部署的链接

- 复制部署的链接,替换下面命令里的 “部署的链接",然后运行命令
curl -H "Content-Type: application/json" -d '{"id":1, "jsonrpc":"2.0", "method": "chain_getHeader"}' 部署的链接

- 复制粘贴结果到挑战8的任务3处
任务4
- 完成上面的步骤后,就可以关闭部署了
- 回到Dashboard页面,选择刚才部署的应用,然后点击"X"的按钮关闭部署

- 成功后,复制关闭的Tx hash填入挑战8的任务4中。这样你就完成了挑战8中的所有挑战
喜欢我的作品吗?别忘了给予支持与赞赏,让我知道在创作的路上有你陪伴,一起延续这份热忱!

- 来自作者
- 相关推荐