如何在 Visual Studio Code 建置 Spring Boot 的開發環境
今天要教大家用安裝 Extension 的方式,用最熟悉的 VSCode 舒服地開發 Spring Boot 的專案~
事先準備
可以在 Terminal 打 java -version 確認自己有沒有安裝 JDK,像我這邊就是安裝了 OpenJDK 19.0.1
 ❯ java -version
 openjdk version "19.0.1" 2022-10-18
 OpenJDK Runtime Environment (build 19.0.1+10)
 OpenJDK 64-Bit Server VM (build 19.0.1+10, mixed mode)
安裝 Extension
首先我們打開 VSCode,這次我們總共要安裝兩個 Extensions ,準確來說應該是兩個套裝:
方法一:透過 MarketPlace 安裝
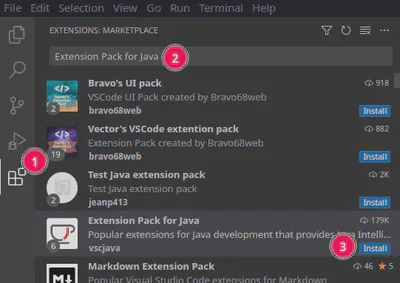
你可以從左邊這裡進到 MarketPlace,然後搜尋 Extension 的名稱,接著按 Install。
方法二:複製指令
或是你可以從上面的連結,複製這一段安裝的指令
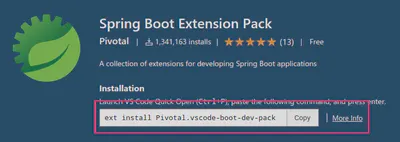
然後在到 VSCode 裡面按下 Ctrl 和 P,在跳出來的小視窗貼上指令之後就會開始安裝囉!

安裝好之後就可以來準備建立專案,記得兩個 Extensions 都要裝哦!
建立 Spring Boot 專案
在 VSCode 按下 Ctrl、Shift、P 會跳出一個執行指令的小視窗,在這裡我們輸入搜尋找到 Spring Initializr: Create a Maven Project... 之後按 Enter。

接著是選擇 Spring Boot 的版本,我這裡選擇 2.7.7。

語言這邊選 Java。

Group Id 這邊我就先用預設的 com.example。

Artifact 這邊我輸入 test。

Packaging type 這邊我選 Jar。

Java 版本我選 11。

Dependencies 這邊要選擇三個:Spring Boot DevTools、Lombok、Spring Web。
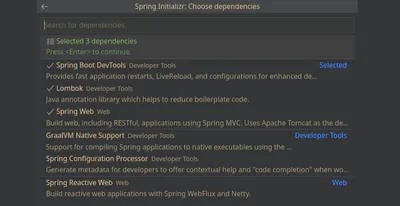
接著就是選擇要專案建立的地點,這邊 VSCode 會幫你建立一個名字是上面輸入的 Artifact Id 的資料夾,然後把建立好的專案放在裡面。按右下的 Generate Into this folder 開始建立了。
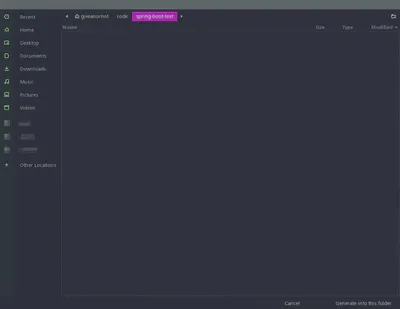
噹啷!這個時候一個新的 Spring Boot 專案就被建立好了,按右下角的這個 Open 就可以打開剛剛的專案囉~(然後舊的視窗就可以關掉了)

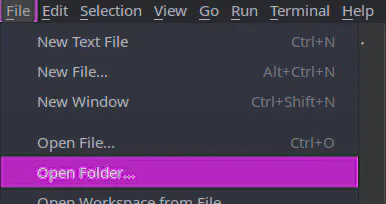
如果你不幸錯過了這個 Open,你也可以從上面的 File > Open Folder 選到剛剛的資料夾開啟他。
Hello World
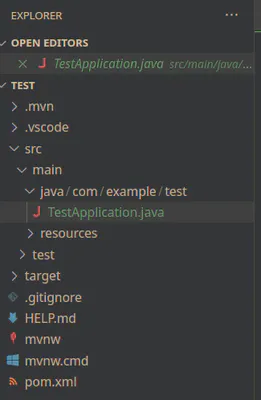
建立好專案,我們就來寫個最簡單、只會回傳 Hellooo 的 API 吧~ 首先先打開 src > main > java > com example > test > TestApplication.java 。
然後按下 Ctrl Shift P,選擇 Java: New Java Class 。

然後輸入 controller.TestController 按 Enter 。

這麼做的話 Class 的檔案和資料夾就會被建立好。
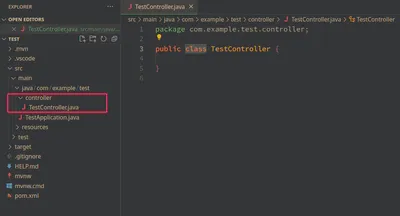
接著我們在 TestController.java 內建立一支 API:
package com.example.test.controller;

import org.springframework.web.bind.annotation.GetMapping;
import org.springframework.web.bind.annotation.RestController;

@RestController
public class TestController {

  @GetMapping("/hello")
  public String Hello() {
    return "Hellooo";
  }
}
點一下左邊的 Spring Boot Dashboard,然後在點一下 Apps 這邊的開始,這個 Spring Boot 的專案就會跑起來了。
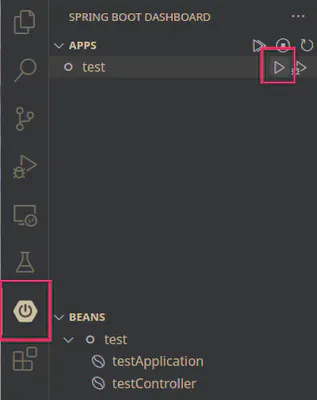
下面的 Terminal 也顯示 Server 在 port 8080 啟動了。

接著我們打開瀏覽器到 http://localhost:8080/hello,就可以看到 API 的回應!

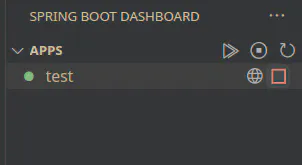
如果要結束執行的話,回到 VSCode 然後按這個停止按鈕就可以啦~
總結
今天我們在 VSCode 裡面用安裝 Extension 的方式來建置了 Spring Boot 的開發環境,並且用它往完成了一個簡單的 Hello World,我自己覺得用起來很舒服,甚至不亞於 Eclipse 等 IDE。如果也覺得不錯的話,記得在 VSCode 親自安裝試試看唷!
