[Note] Podcast Recording Record 01-How do you do it yourself? (Mac + Garageband + USB microphone)

Hi everyone, I recently started recording Podcasts, because the purpose is to learn new media, so I don’t particularly promote it. I have recorded four episodes, and the content is just random chat. I don’t have a clear idea yet, but I myself like it very much, because there are a lot of interesting things in the process, and I also need to learn a lot of things, so I thought it would be better to record these things. , to see if I can let more people hear my show, so I share this article.
First of all, I want to share how to get started and what I think can be done, because I have also checked a lot of sharing on the Internet and teaching abroad, but I found that if a recording rookie with no background experience wants to start, these There is still a bit too much information. After all, Taiwanese people like lazy bags (laughs), so I think I can recommend you how to record and adjust in a simple way.

How to start recording first (assuming I'm completely incapable of recording)
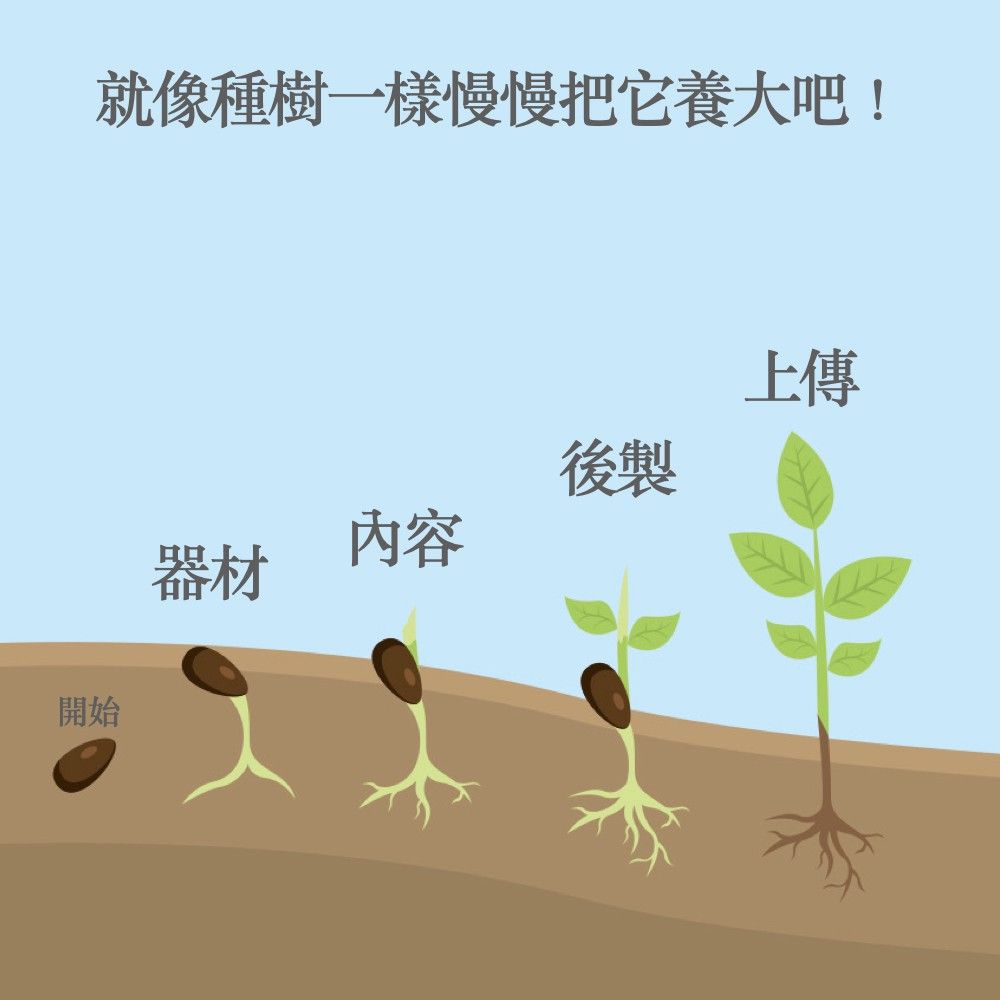
The recording is simple, but there are still some preparations needed. First of all, you must first determine whether your program is a single person or an interview. More than two people need more equipment and post-production support. One person is relatively simple. This is a simple introduction. , if it is complicated, you can watch the teaching of Bailingguo. I divided the recording of the Podcast program into several parts that need to be prepared:
- Equipment (you don't need to go through this step after buying it)
- Content (what is the show called, what is this episode about)
- Post-production (it can be stored after adjustment, and it will be much faster in the future)
- Upload (including determining which host platform to put on, and uploading program content)
1. Equipment (the simplest)
The following two methods are recommended, which require the least purchase. Although other online sharing may recommend buying a recording interface, it would be better, but because I am a poor Hakka family, I cannot, so I have to use the simplest method first. The following two are recommended. Hakka plan for you:
1. iphone + original earphones (mobile phone + earphones that can be used for calls): This is actually highly recommended, that is, there is no cost at all. Most people can't find earphones and then buy a earphone that can be used for calls to start, even if you If you are in a quiet place, you can directly turn on the amplifier and record, but there may be more noise, so it is recommended to use a headset, the original headset is fine.
2. Computer + usb microphone : This is what I recommend. After all, I think some post-production adjustments will also need to use a computer, because post-production is like makeup, whether it is done or not is really still a bit different. After recording on the mobile phone, it will still be put into the computer for post-production before uploading, so if you want a little texture, you will definitely use the computer. For Mac, I would recommend Apple's own Garageband (free download on the App Store). For PC, you can download the free software Audacity. Both software can record and post-production, and my current practice is to use both, because both software There are still some differences in function. If you don’t know how to do it at all, you can try my method. The details will be explained below.
Manduo teaching will say to use a dynamic microphone, but I bought the Blue Yeti condenser microphone at the time. Although it is said that it will be easier to record noise, I can record it now! Maybe my environment doesn't have too much noise, or it's just that my dead fish ears can't hear the slightest difference, but if possible, I think I can listen to the experts' opinions and buy a moving coil type. I have already bought a microphone. know about it.
2. Content
I don't have too many suggestions for this part, because basically I still do whatever comes to my mind, and I'm not promoting it. It's fine if no one listens to me, but I can share my current thoughts. Now Many people who are doing podcasts are doing interviews and chatting. I think if you have a special interest or expertise, you can go in this direction, maybe it will be more special.
I actually planned to chat with my friends at the beginning, but then I wanted to talk about it by myself. After all, people like stock cancer are all talking about it all by themselves. I also listened very happily, so I think the uniqueness of the content is more important. I like it. Whatever you do, you will always find a theme that suits you and a group that likes you.
3. Post-production
Here I will talk about the part that requires more practical operation. I will first share the simpler and easier way I have tried so far, because this part is actually full of things, but I think the simplest way is used first. I won’t let myself spend too much time grinding the edges and corners here. It’s most important to get the main recording content right first, so I think I can get 80 points if I record in a quiet place first!
Like before I recorded it, when I watched the teaching of Bailingguo, Ken would say that there was some noise and echo, but the results of the recording in the room are still acceptable. It is a messy room that has a little effect, but the most important thing is that your recording environment must be very quiet. It should be very troublesome to record other sounds together. Relying on some professional software operations, I personally cannot achieve this level, so I will keep recording in a quiet environment as much as possible.
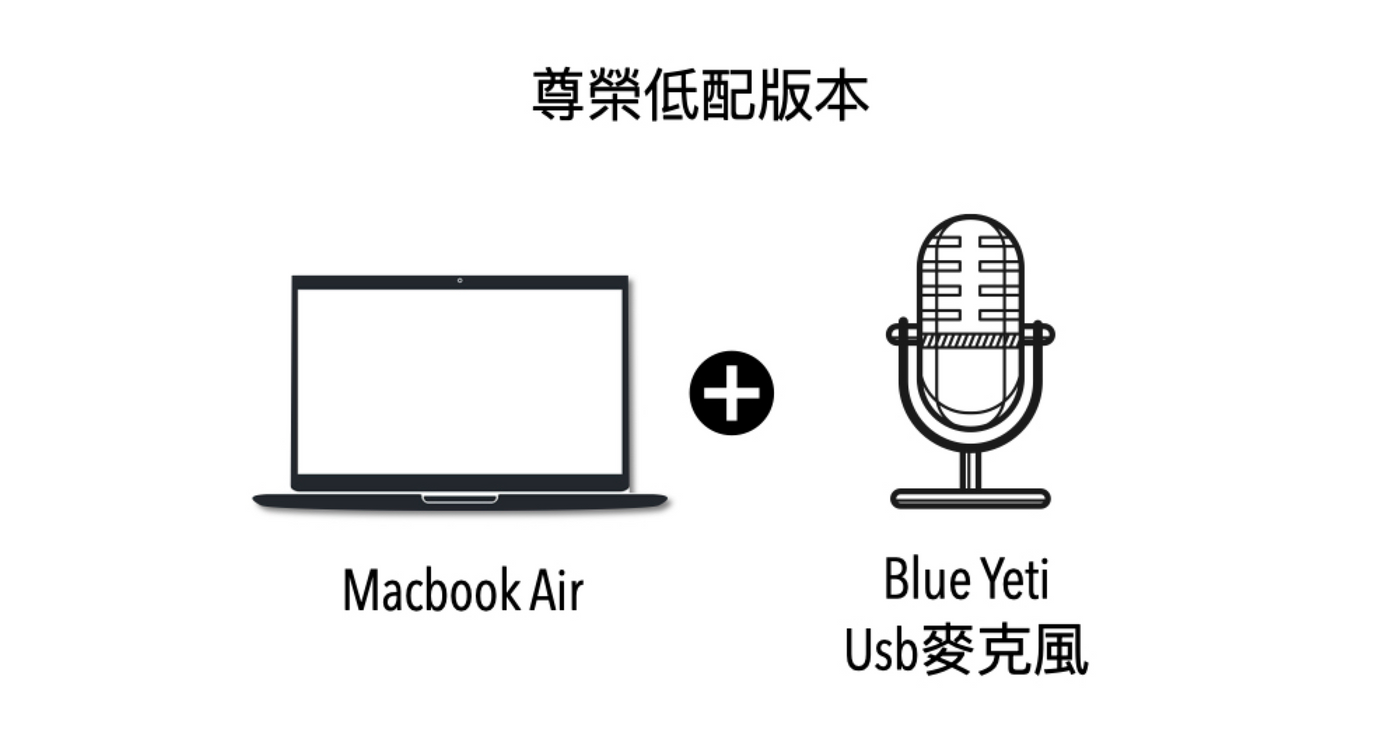
To share the way I use recording, I use the Mac to open the Garageband and connect the Blue Yeti microphone to the "honor low-end version".
In addition, because the Yeti microphone can be directly plugged into the headphones for monitoring, it is necessary to adjust the audio output of the Mac so that the sound can be heard from the monitoring microphone, otherwise it will be directly from the preset built-in.
As for the software, I use Apple's own Garageband. Many people who create music will use it to create music. Of course, recording is also possible. The reason I recommend it is that the interface is easier to understand, and there is not much professional sense of distance. For post-production, of course, Audacity can also be used, but because its interface is a bit too complicated for me at first, I will use Garageband to make preliminary adjustments first, and then throw it into Audacity to do some adjustments that Garageband does not have.
start recording
Remember to adjust the display on the Garageband to the time first, and turn off the countdown and metronome before starting, those are not used (the two purples above and to the right of it in the picture).
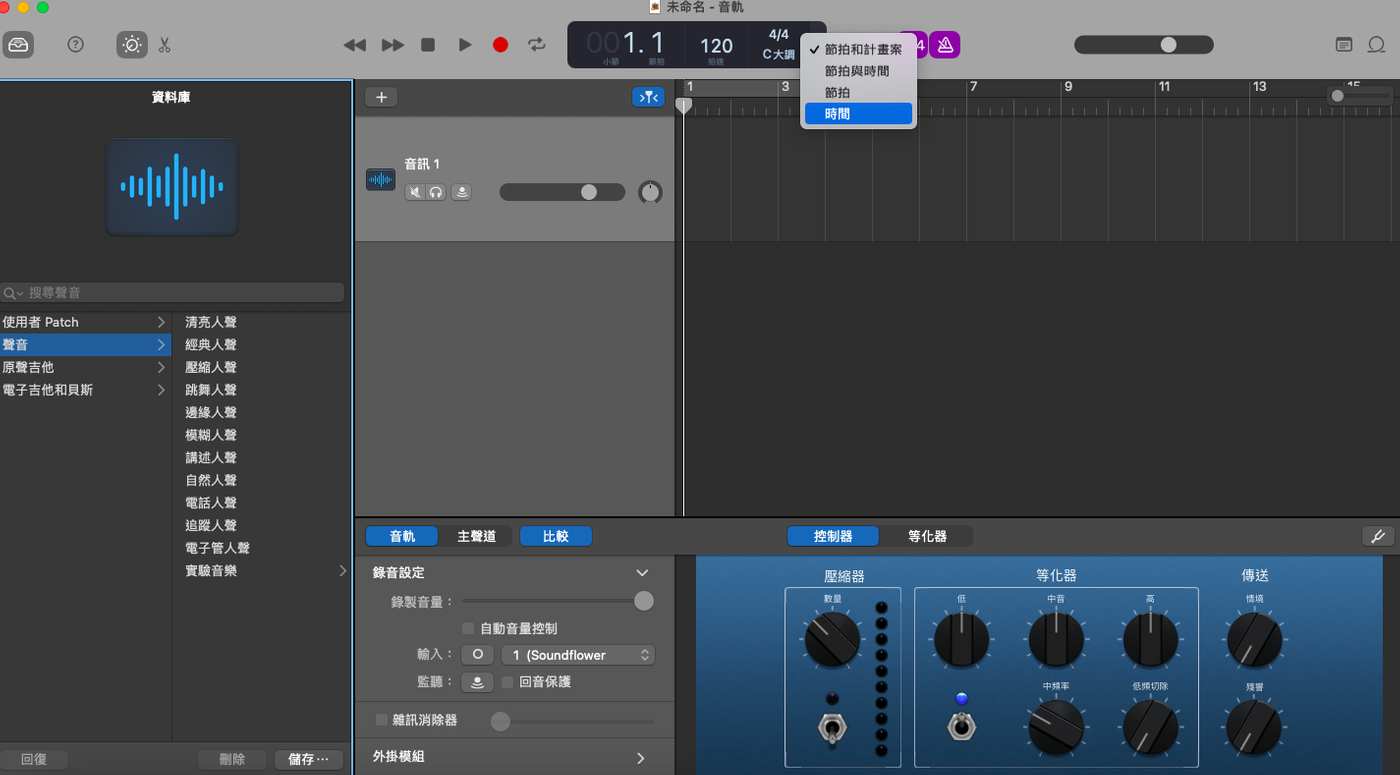
After clicking on the audio track, you can start recording. Here I would suggest that if you are recording for the first time, you can make adjustments after recording, because you can make different adjustments for the audio files you recorded later, just like after taking a photo After retouching, you don't need to apply filters at the beginning.
Plug-in module Plug-in (sound modification adjustment)
One of the advantages of Garageband is that there are some sound databases next to it, which are actually set plug-in modules. It is the same concept as some filter functions or back removal functions of the photo APP, so if you don't know how to use it, you can directly select it and play it. You can find the module you like first, and then fine-tune it. I think easier.
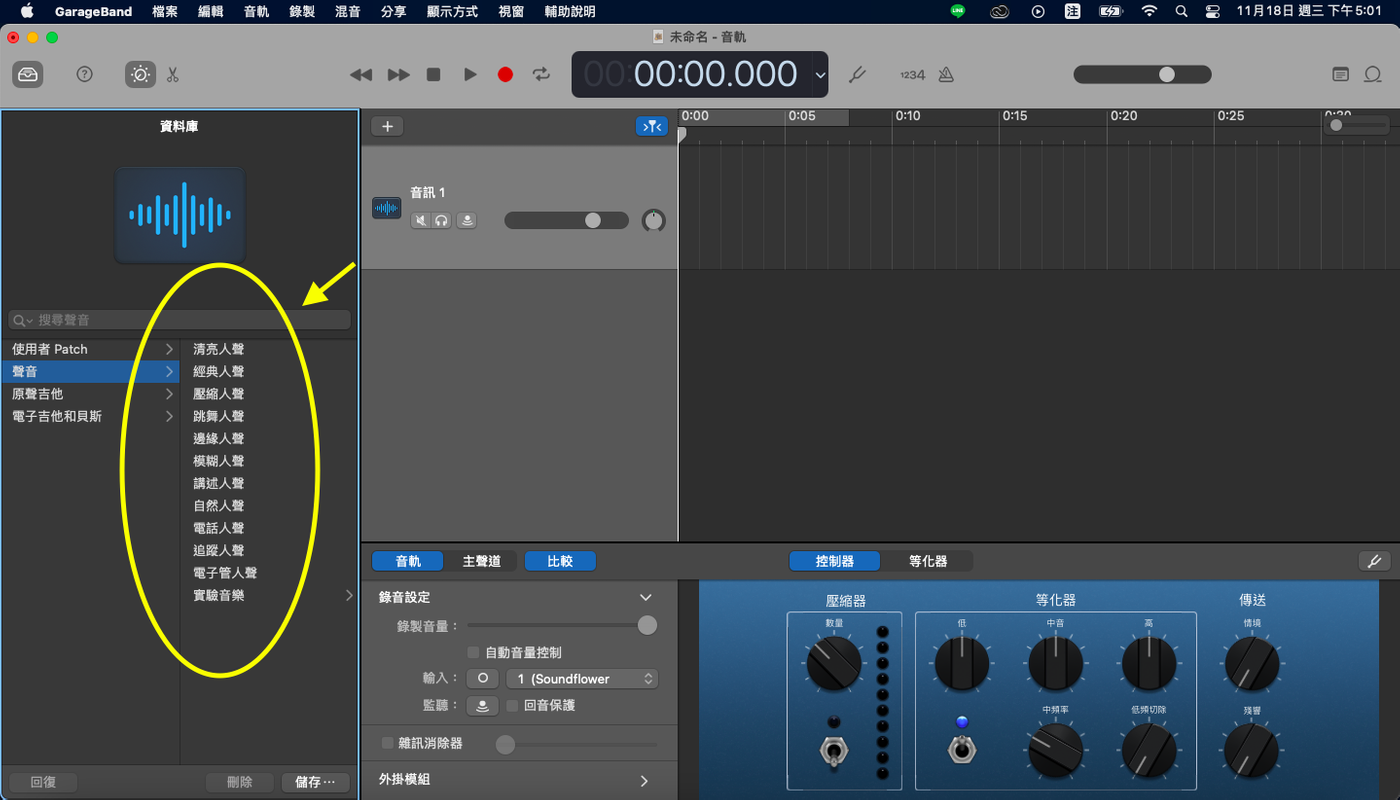
And what kind of plug-in is used in the module you selected, you can see at the bottom of the middle that he actually adjusted different plug-ins under different modules
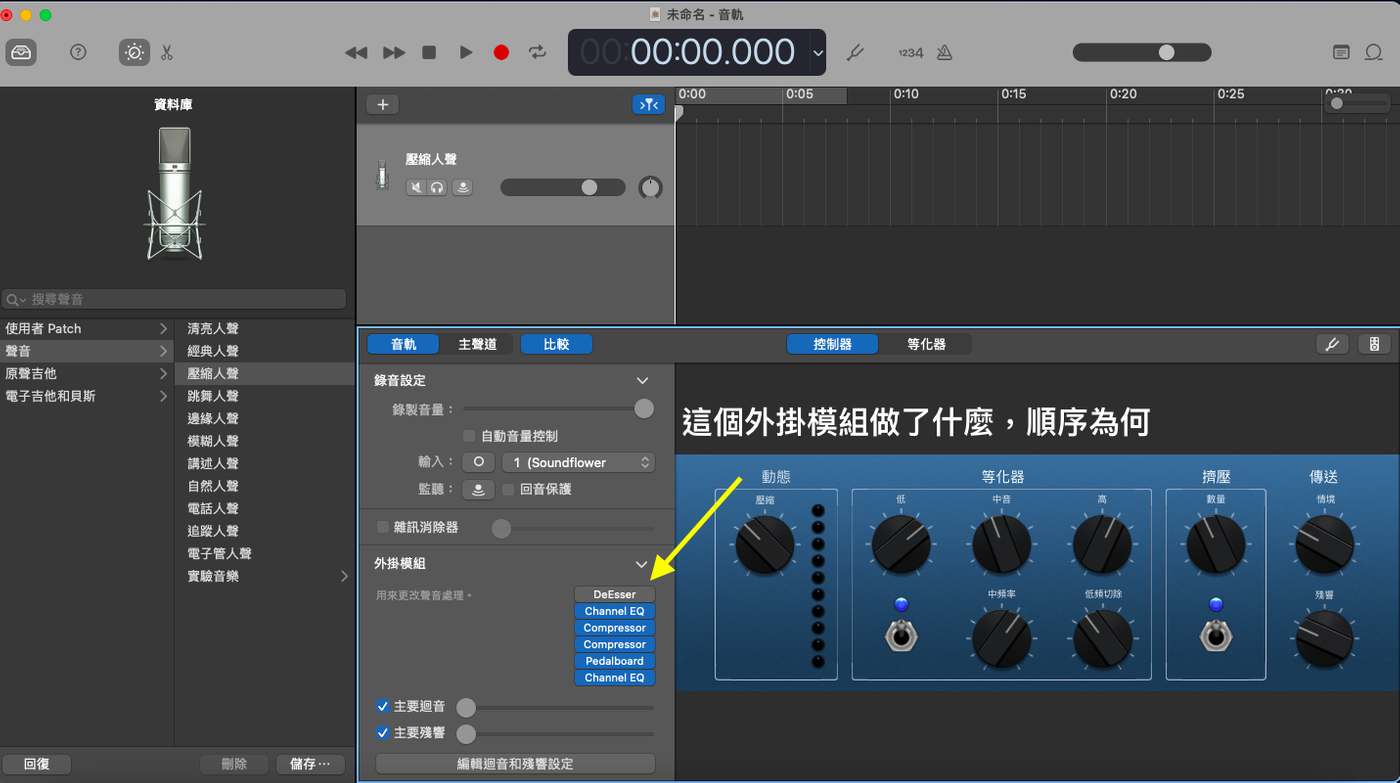
For example, compressing vocals is to do EQ first, then do Compressor twice, and so on. If you want to know more, you can go to the teaching episode of Bailingguo's access to good chords. I also learned it there. What I did, I didn't put it up if I basically didn't understand it, it was a simple version.
My order is the following:
1.Noise Gate (Noise Eliminator): Eliminate noise.
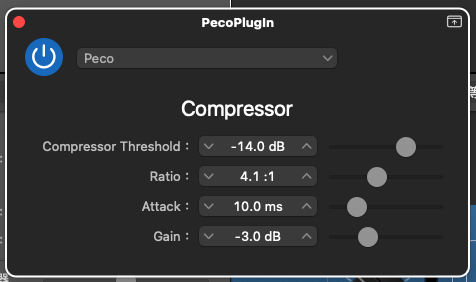
2. Compressor: Automatic volume adjustment, adjust the excessively loud sound in the recording, so that the loud and small sound will not be too different, and it can also make the listeners not too big or small. In this part, I listen to the chords and share them to adjust. There are four options in the Compressor of Garageband. Basically, I adjust the following picture.
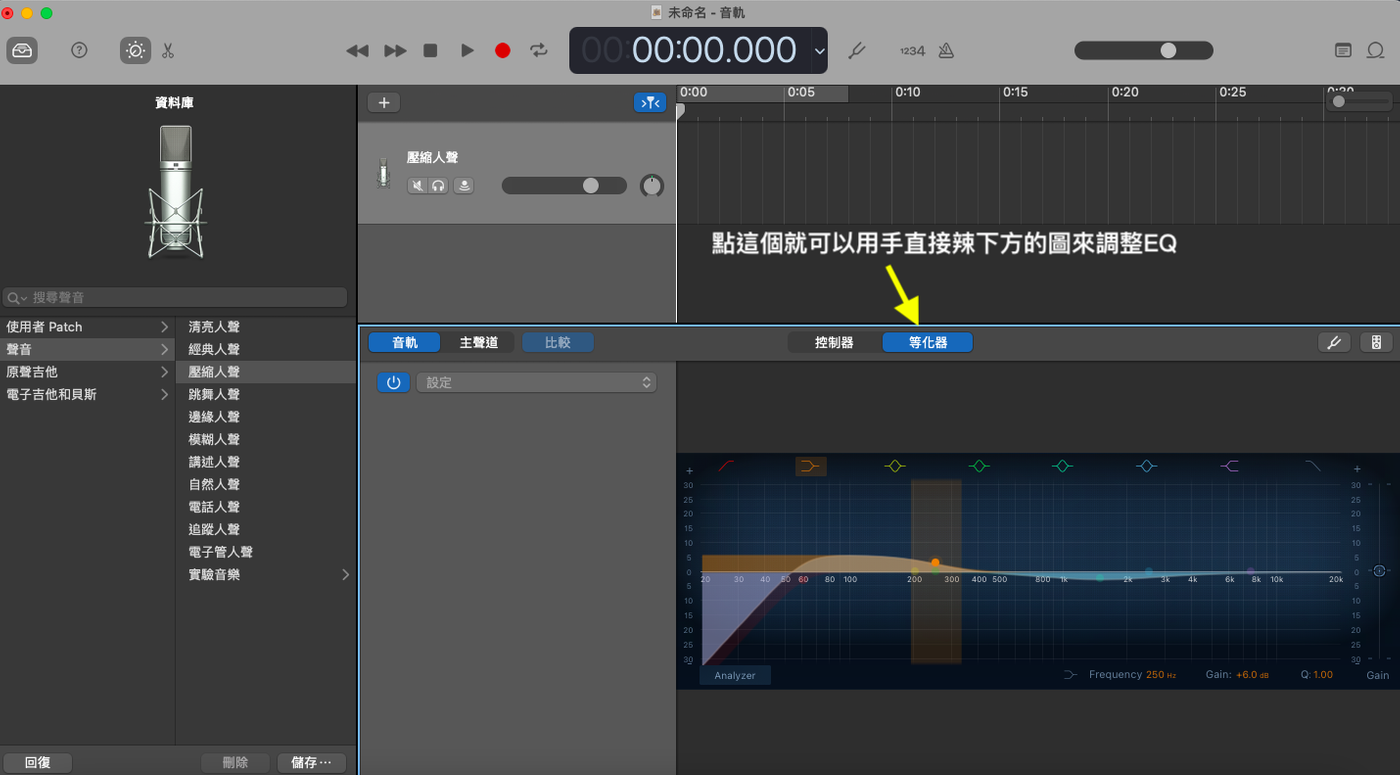
3. EQ (Equaliser, Equalizer or Equalizer): You can do some filter settings, just like a photographic filter, that is to say, you can adjust the sound according to your own preferences to make the sound match what you want, Grageband can be adjusted directly, etc. It is very fun to use the tuner to pull the wave pattern, but if you adjust it too much, it will become very strange. I adjusted it a little to the feeling that I can accept.
4.Limiter (limiter): It will help if the sound is too loud, but I am at ease, because it seems that a person does not have a chance to be very excited XD
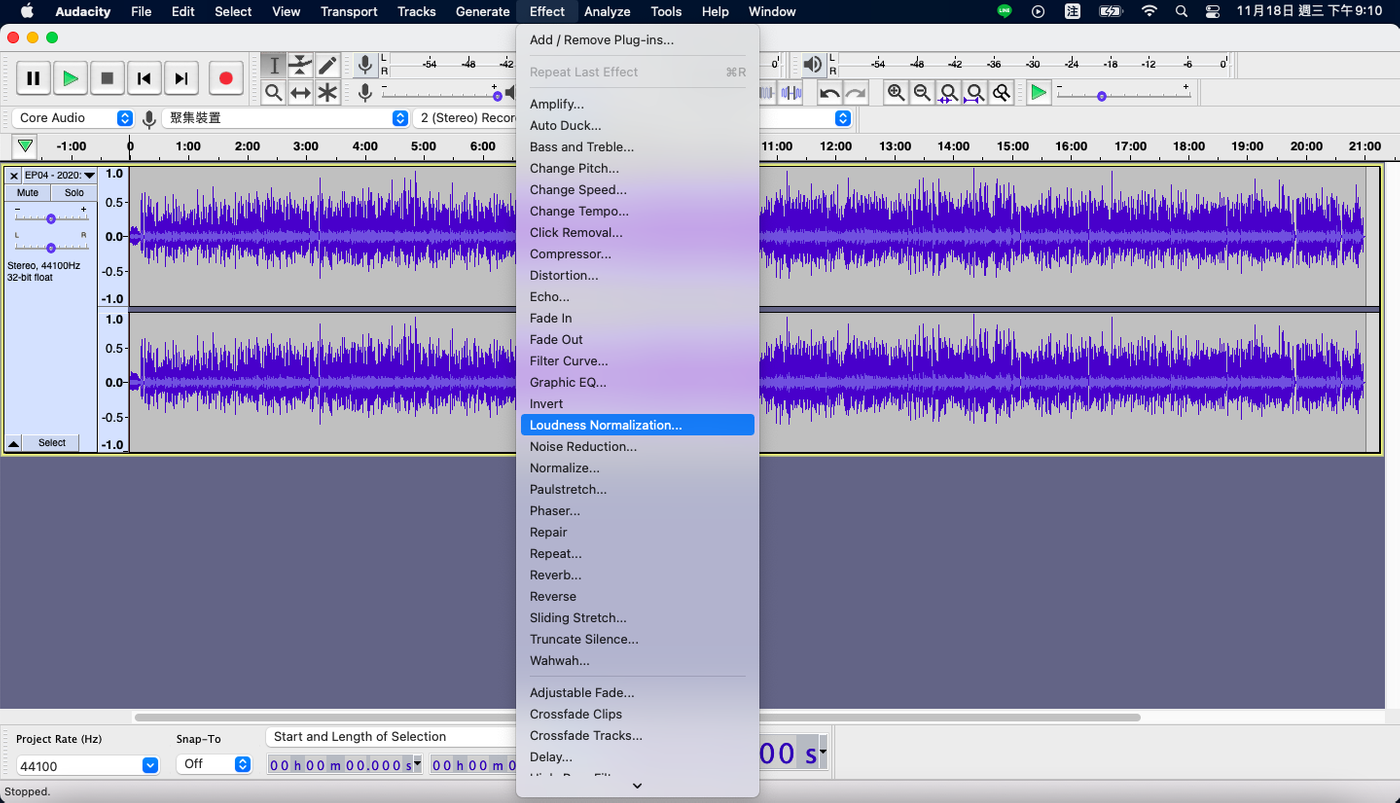
Garageband will do the basics first, then I will save the settings, and the next recording will be recorded directly through this module, and then I will output and then throw it to Audacity, because I will do Loudness Normalization through Audacity (so that the sound can be Control to the same size, it will be set to -14dB), and then the output is uploaded.
The last thing is to upload the audio file to the Host platform. I am currently using Anchor first. I originally wanted to use Soundon from Taiwan to try it out. When I could apply for an account, I failed and I stopped using it in a fit of rage. After downloading, it is not very intuitive, so I will use the platform supported by Spotify’s father first.

The upload part will be written in the next one, and this one will come here first, to sort out the simple recording production process of the chicken, and the audio file is lost.
- Noise Gate (Garageband)
- Compressor (Garageband)
- EQ (Garageband)
- Limiter (Garageband)
- Output (share → output songs to disk, I will use AAC for files)
- The output audio file loses Audacity
- Loudness Normalization (Audacity)
- Output (File→Export→Export to Audio, select M4A for File Type)
- Finish!
This is the complete process of uploading a pure recording without adding any music. I personally think it is suitable for people who want to try recording programs, because compared to buying a lot of equipment, it really doesn’t cost much (except for the microphone). If I add music, I usually play music first in Garageband, because its interface is very simple. If I have time to share it another day, thank you for watching.
I almost forgot, you can click the Podcast link below or search for "Space Peco"
Like my work? Don't forget to support and clap, let me know that you are with me on the road of creation. Keep this enthusiasm together!
