[No.2] Lightroom mobile photo retouching
Before the article begins, listen to my nonsense a few words. Distance from the last article is on 12/16.
In addition to being familiar with the environment here and appreciating the articles posted by everyone these days
I don't know much about LikeCoin, one of my thoughts is that I shouldn't limit this to sharing retouching articles, so if I have time to share ideas, I will write more articles about life, tourism, food, temple fairs, culture, etc. To everyone ------------------------------------------------ ----------------------
Lightroom for mobile photo retouching article start
Color grading app: Lightroom mobile version for Android and ios is free to download
Color step:
Open the photo you want to colorize with the app, and make preliminary adjustments according to the photo
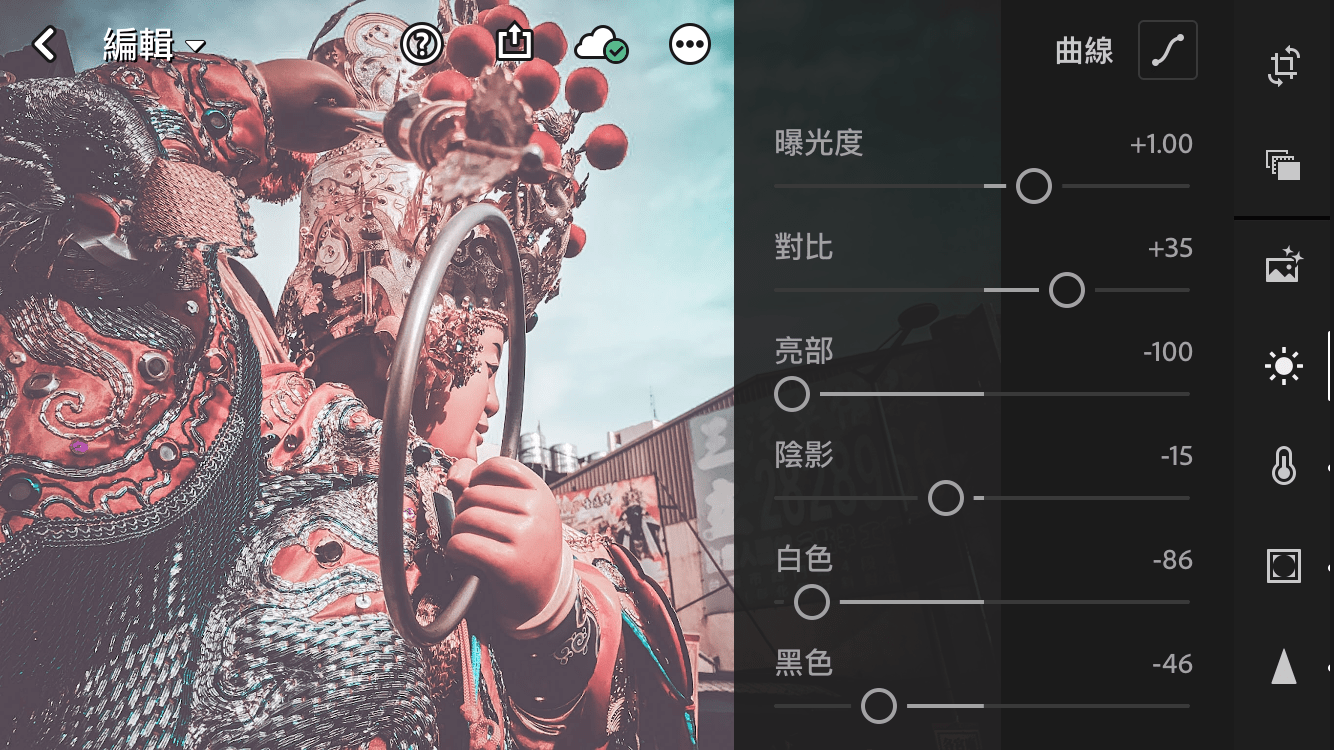
Light part (basic adjustment)
 Exposure.[+1.00]
Contrast.[+35]
Bright.[-100]
Shadow.[-15]
white.[-86]
black.[-46]
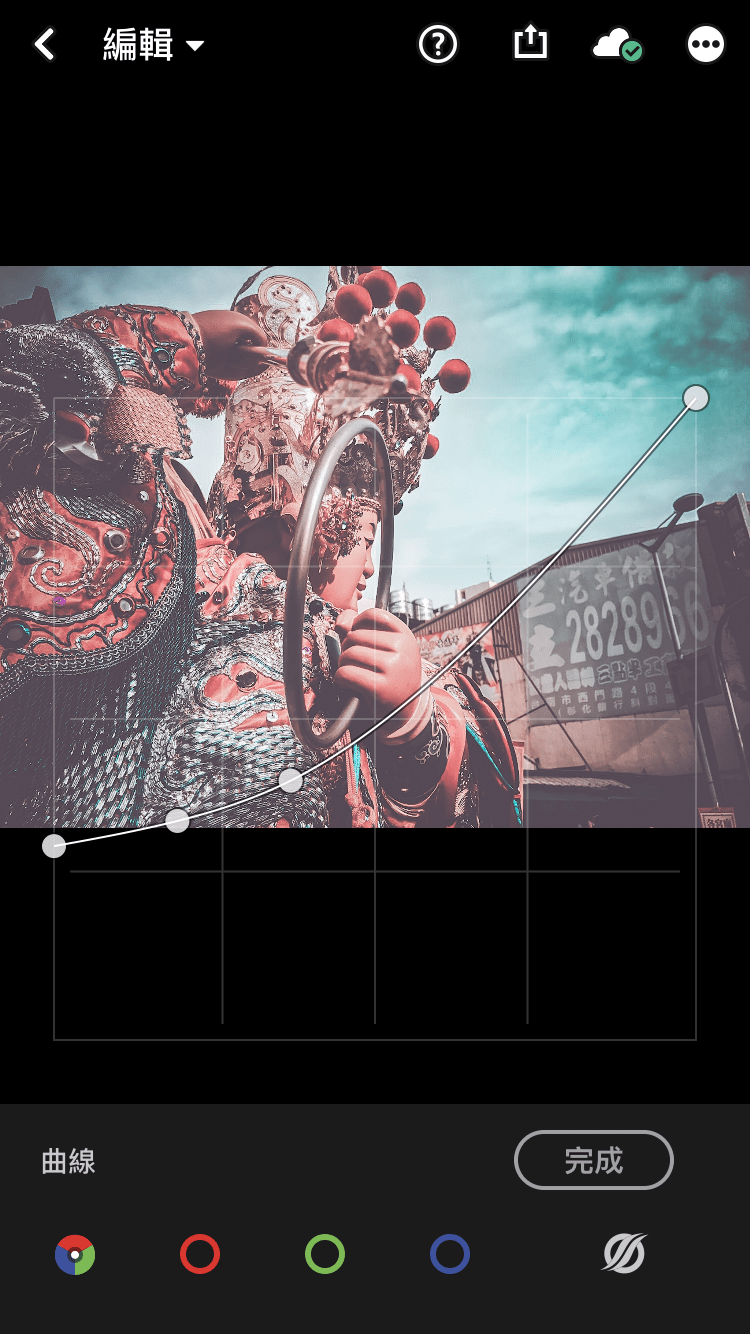
Curve part
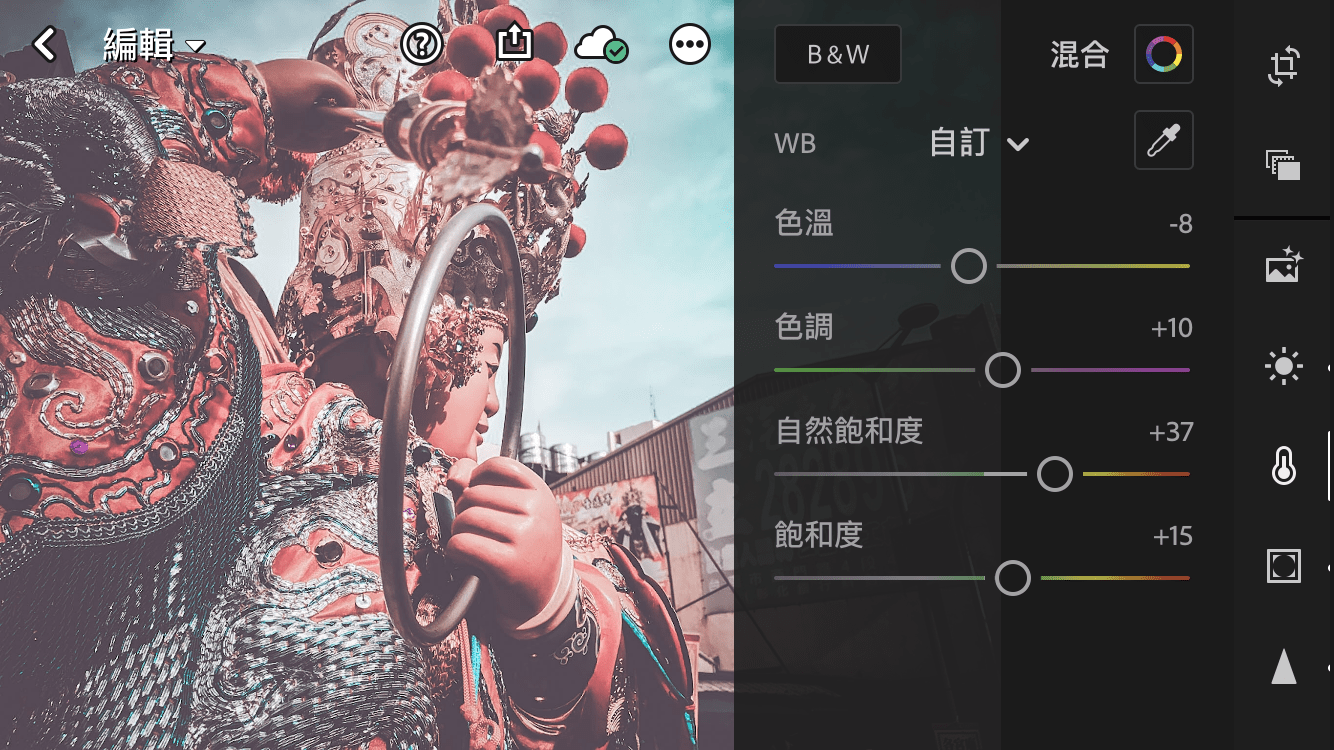
color temperature part
 color temperature.[-8]
Hue.[+10]
Vibrance.[+37]
Saturation.[+15]
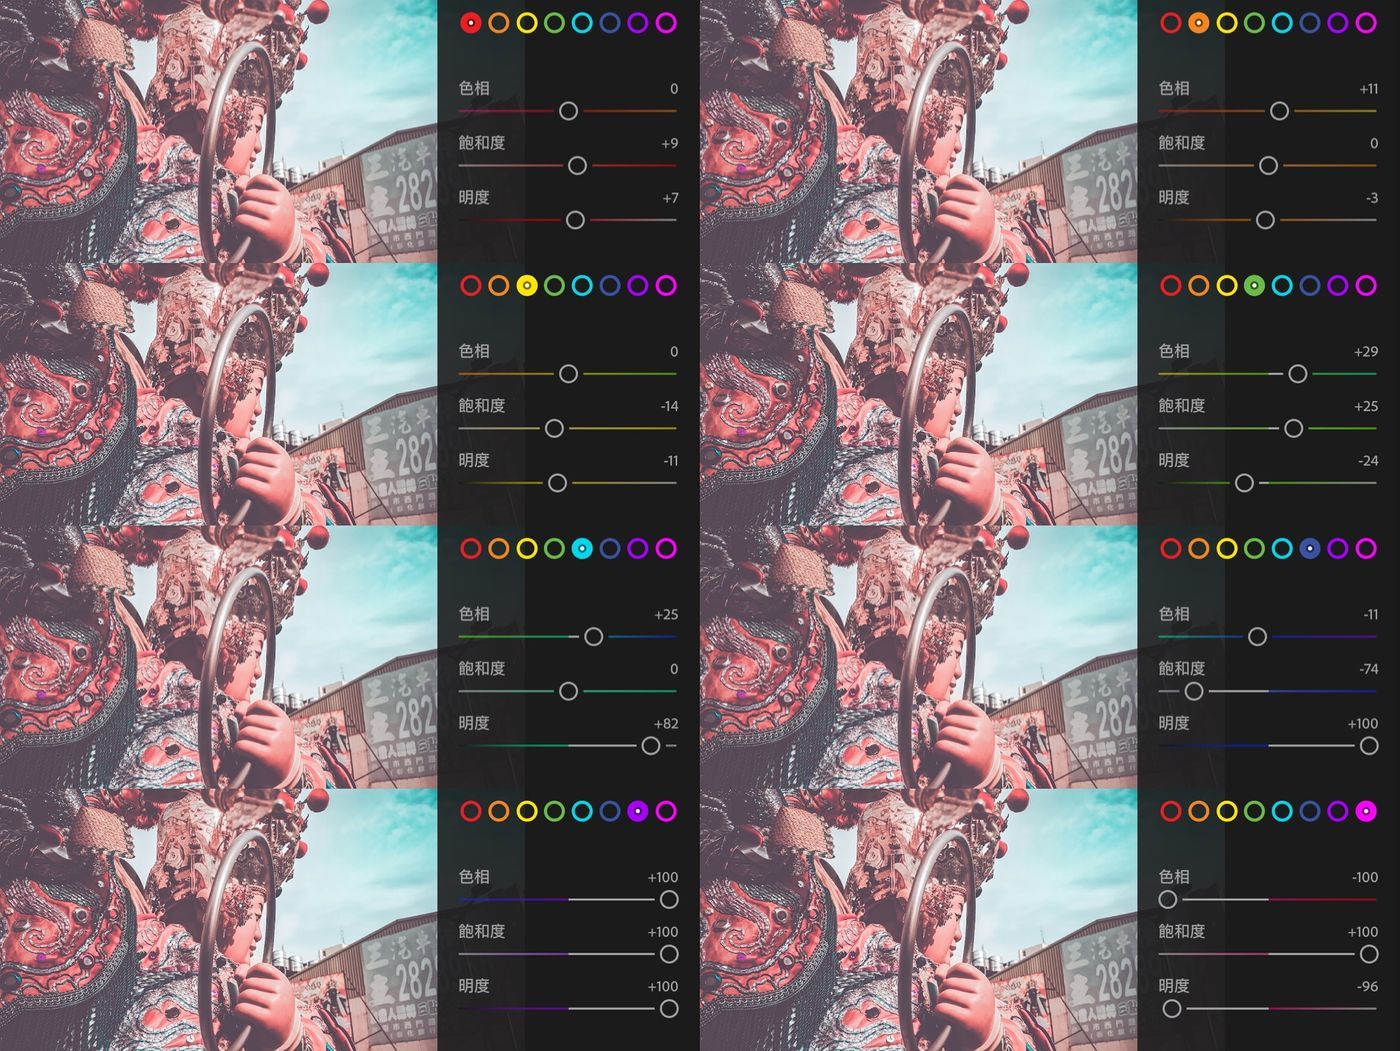
Blending part (color blending here is the part that adjusts the color that appears on the photo)
 Red.[Hue+0 / Saturation+9 / Lightness+7]
Orange.[Hue+11 / Saturation+0 / Lightness-3]
Yellow.[Hue+0 / Saturation-14 / Lightness+11]
Green.[Hue+29 / Saturation+25 / Lightness-24]
Cyan.[Hue+25 / Saturation+0 / Lightness+82]
Blue.[Hue-11 / Saturation-74 / Lightness+100]
Purple.[Hue+100 / Saturation+100 / Lightness+100]
Pink.[Hue-100 / Saturation+100 / Lightness-96]
Effects section
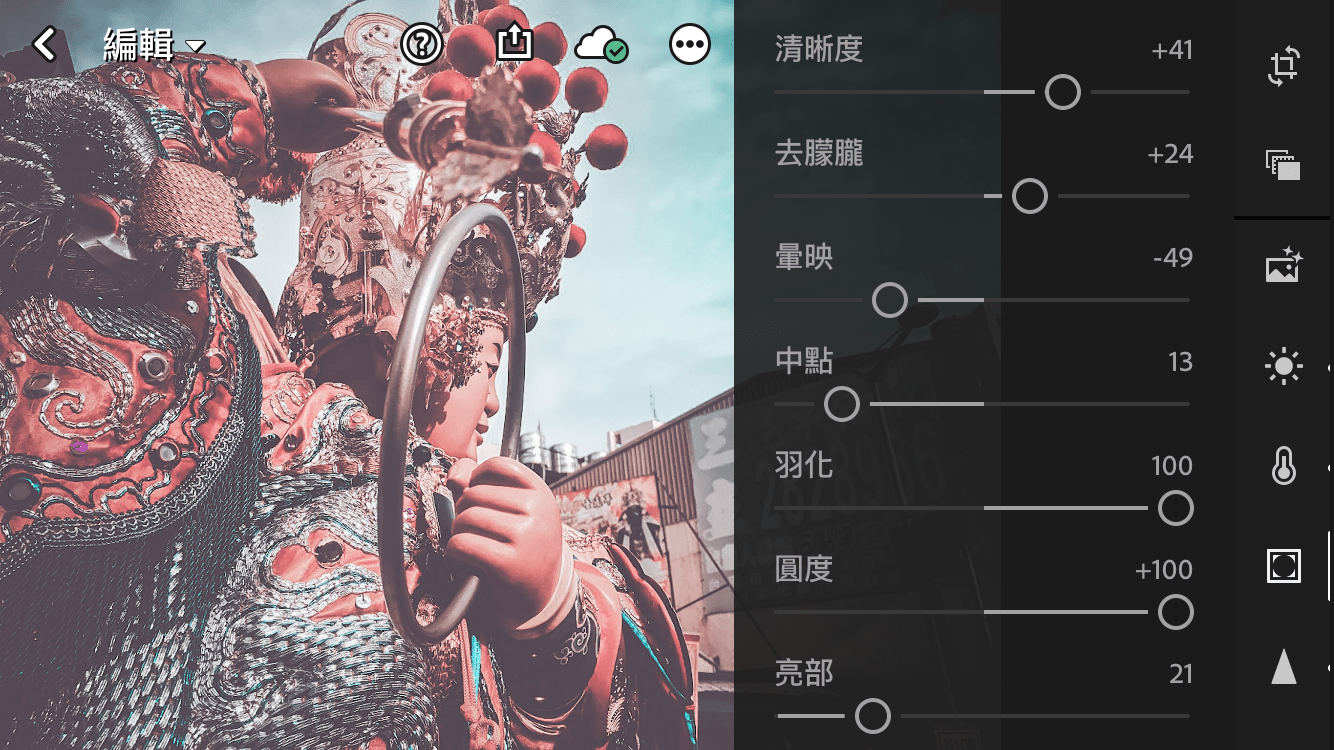
 Texture.[+13]
Clarity.[+41] (Required)
Dehaze.[+24] (Required)
Vignette.[-49] (Personally, the negative direction of adjustment is that there is vignette in the corner of the photo)
Midpoint.[13] (the center point where the vignette appears)
Feather.[100 (Vignette expands inward and outward)
Roundness.[100]
Bright part.[21]
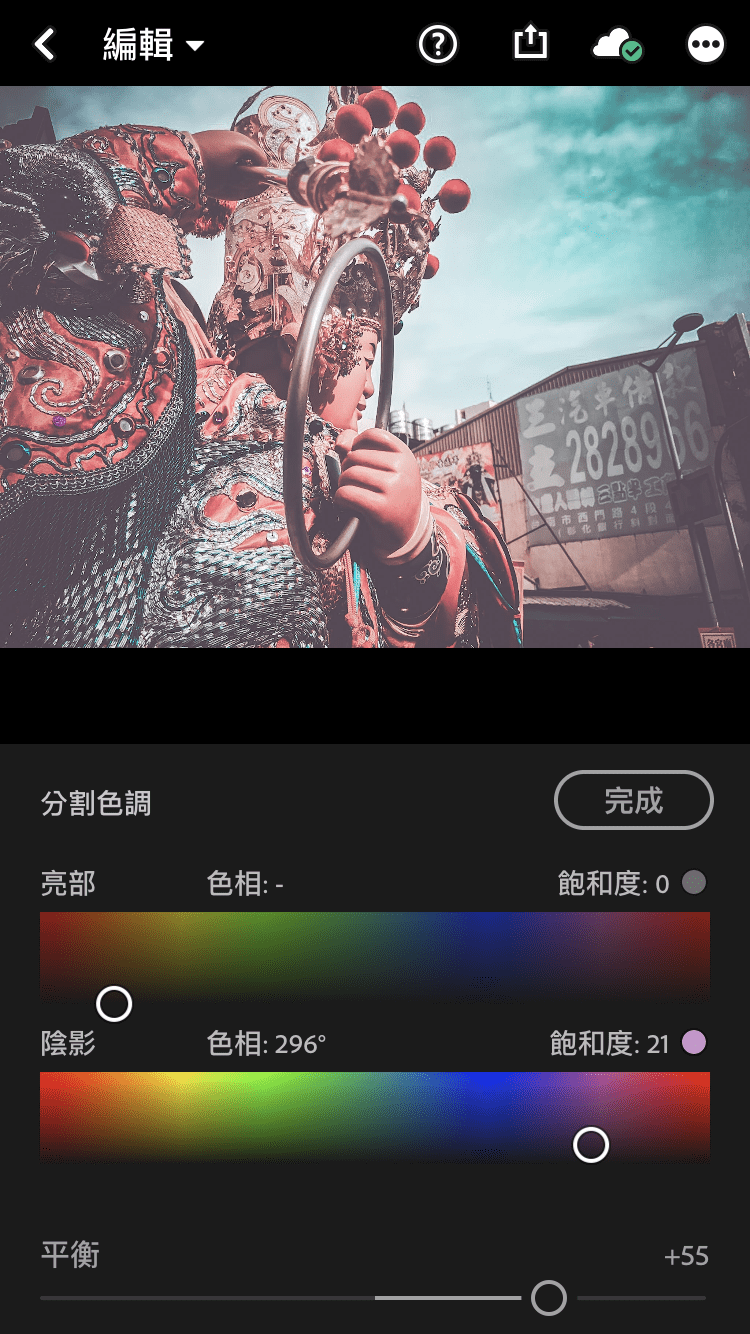
split tone
 Highlights.[Hue 0 / Saturation 0]
Shade.[Hue 296 / Saturation 21]
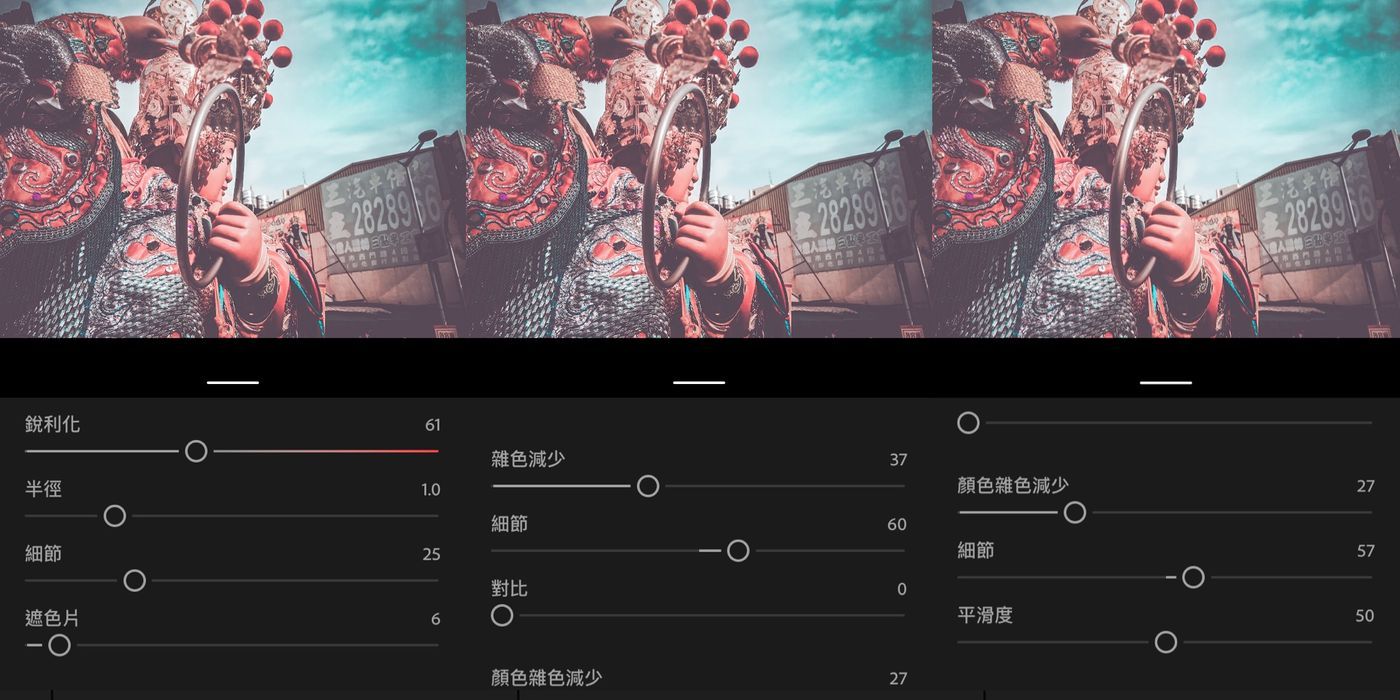
detail part
 Sharpening.[61] (Required. It can be not too high)
radius.[1.0]
Details.[25]
Mask.[6]

Color Reduction.[37] (Required. Reduction removes blurry and grainy details in photos)
details.[60]
contrast.[0]

Color noise reduction.[27]
Details.[57]
smoothness.[50]
The photo is complete and the adjustment is complete.
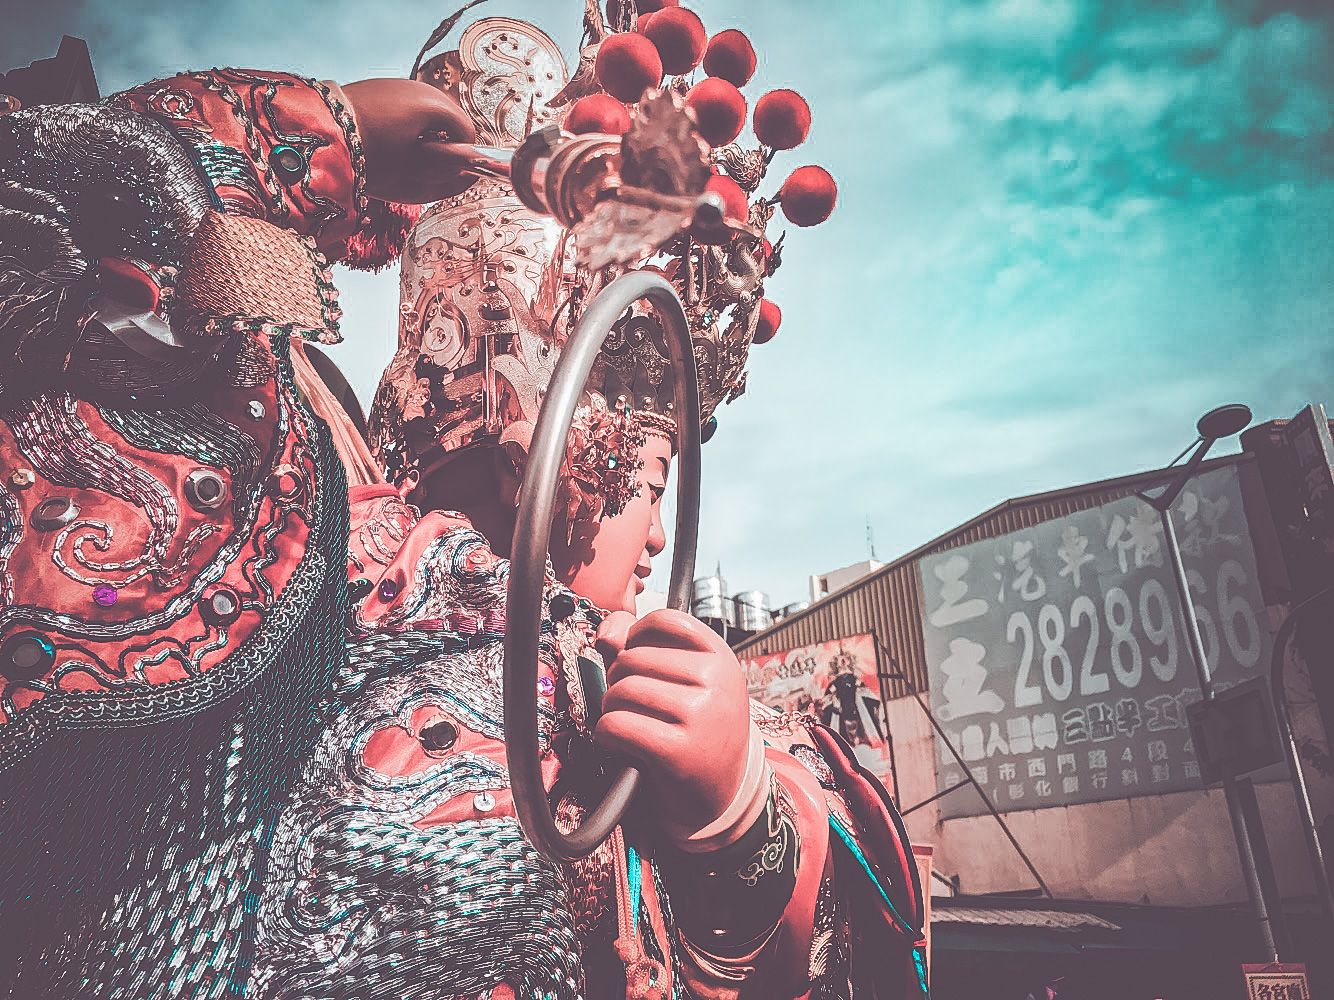
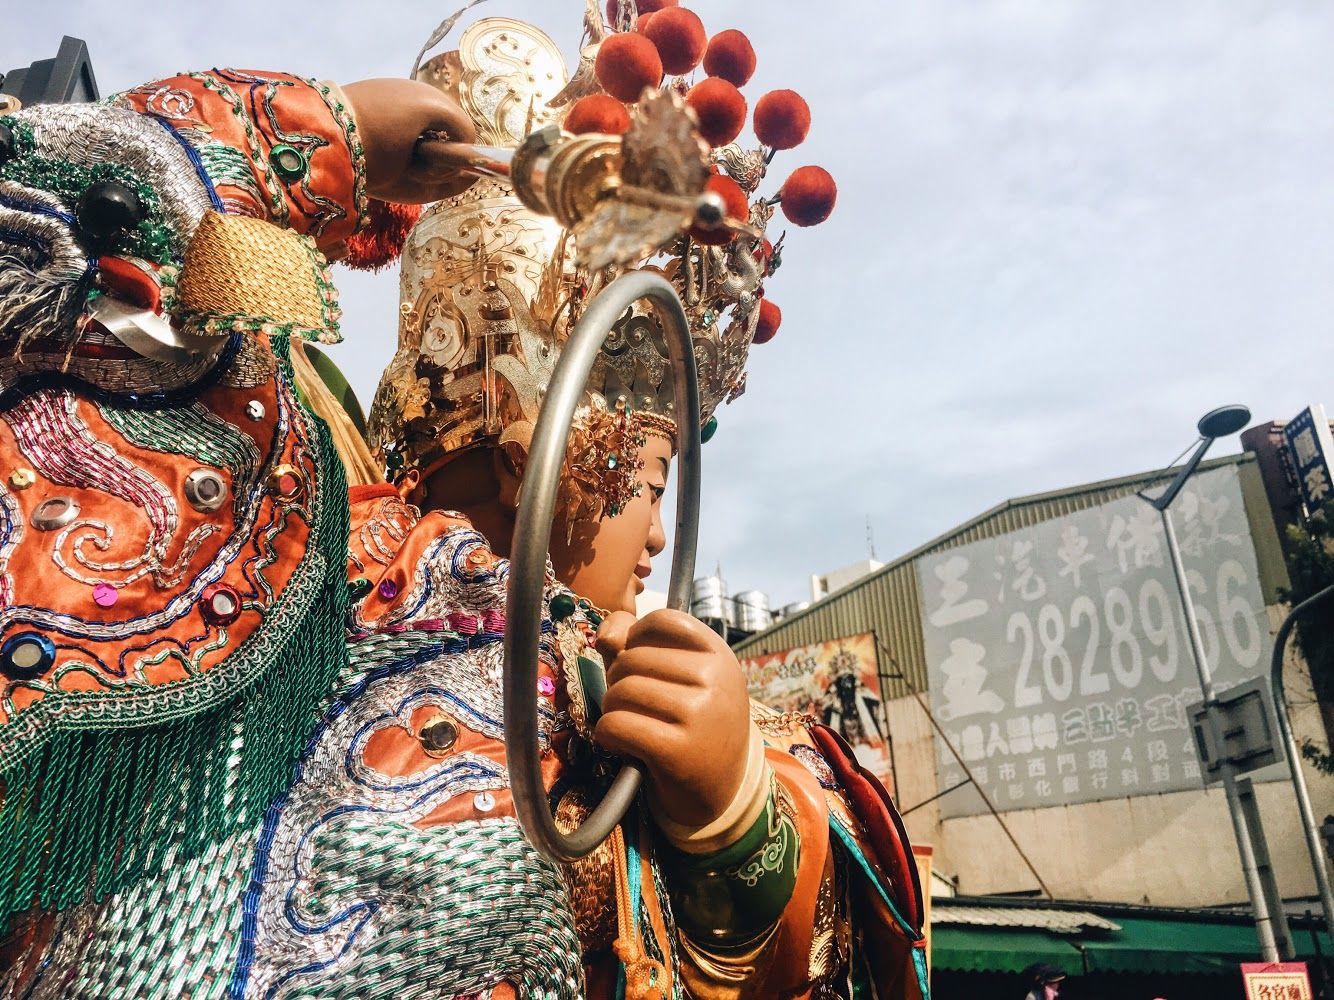
Is it a lot different from the original image? I just started sharing the photo directly with the community after taking the photo
Later, after I learned about the color tone, I found that it would be more comfortable to add some color to the photo.
(However, the style color of this issue is currently the one with the most clicks in my Ig tones, so I want to say that I will use this one to write the article first)
This article is purely personal preference for the tone style. It is not provided for sale on the shrimp skin rack. The LR tone tutorial in this issue is explained here. Feel free to share in this regard)
Huhu... I finally finished typing an article. This is the first time I have typed this kind of article and shared it online.
After all, there are too many people on the Internet who are better than me...
Thank you anyway
If you like this article, please don't be stingy or bother to press 5 Likes manually
This will be the support and affirmation that will give me the motivation to write articles, and even more encouragement!!
Like my work? Don't forget to support and clap, let me know that you are with me on the road of creation. Keep this enthusiasm together!
