Hand-painted to electric painting
On a whim, come and teach.
I like to draw small things, and I also like the imperfection and roughness of hand-painting. Because I don’t have a drawing board, I have been looking for a simple and fast hand-drawn to electric drawing for a while. Share the fastest and most convenient way I currently think.
 you need to:
1. Electronic products with camera function: mobile phone; camera; gopro; scanner.
2. Computer.
3. Photoshop: You need to know some basic operations of photoshop.
If you are very familiar with photoshop, here are the simple steps
- Upload the line art to the computer and open it with photoshop.
- Change the color of the artwork to only black and white, and merge the visible layers.
- select all ctrl+a
cut ctrl+x
quick mask q
paste ctrl+v
quick mask q
Invert selection shift+ctrl+i
Create a layer mask - At this point, you can directly select the mask and color it, or adjust the "Smooth, Contrast, Adjust Edges" of the mask and then color, depending on personal preference, I choose the latter.
1. Upload the work to the computer and open it directly with photoshop.
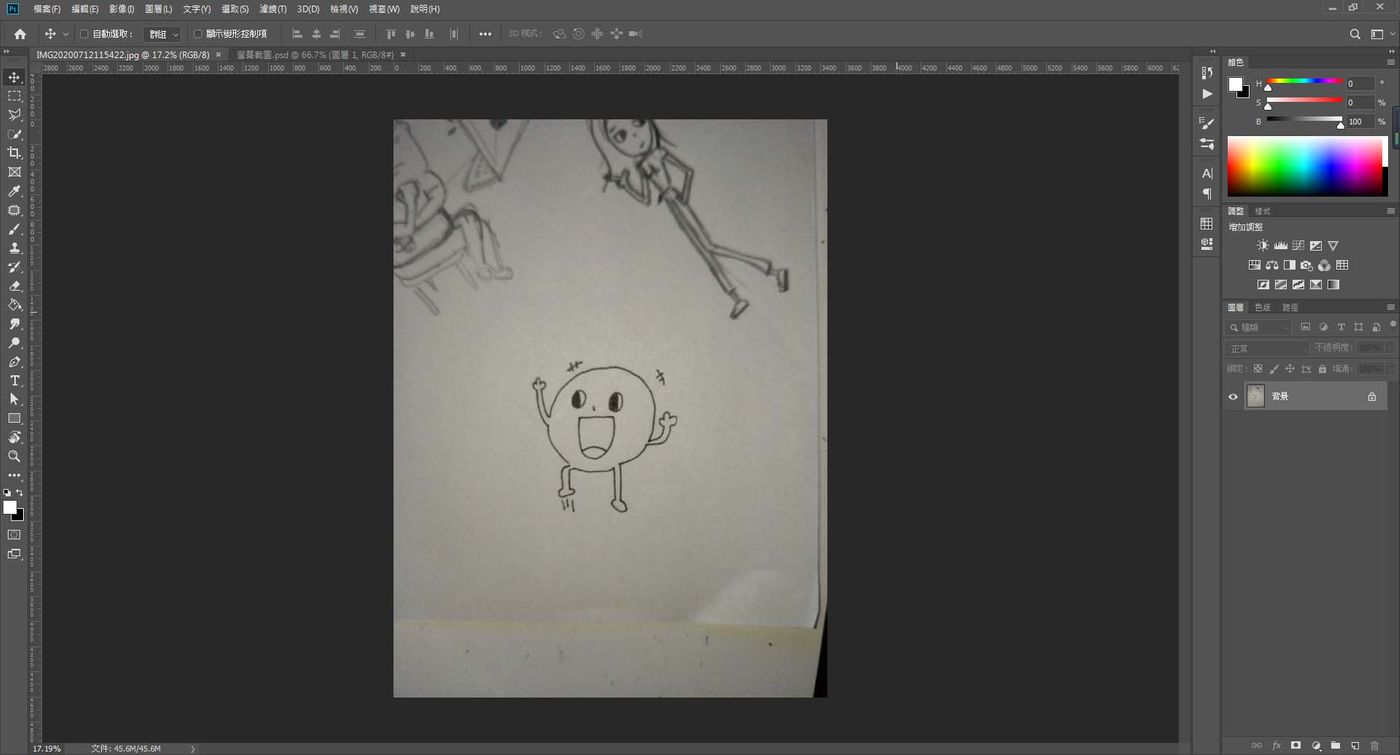
2. Using the crop tool, leave the main image behind.
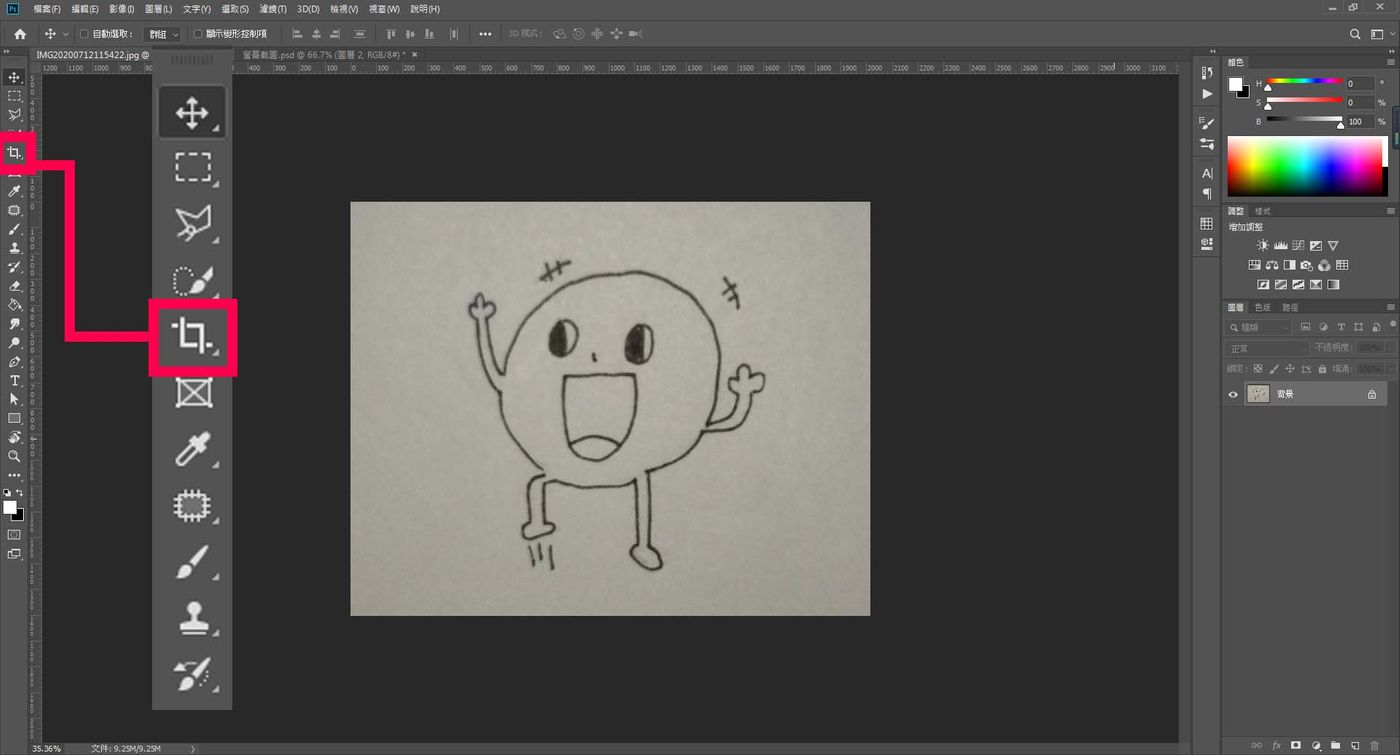
3. Convert the picture to black and white.
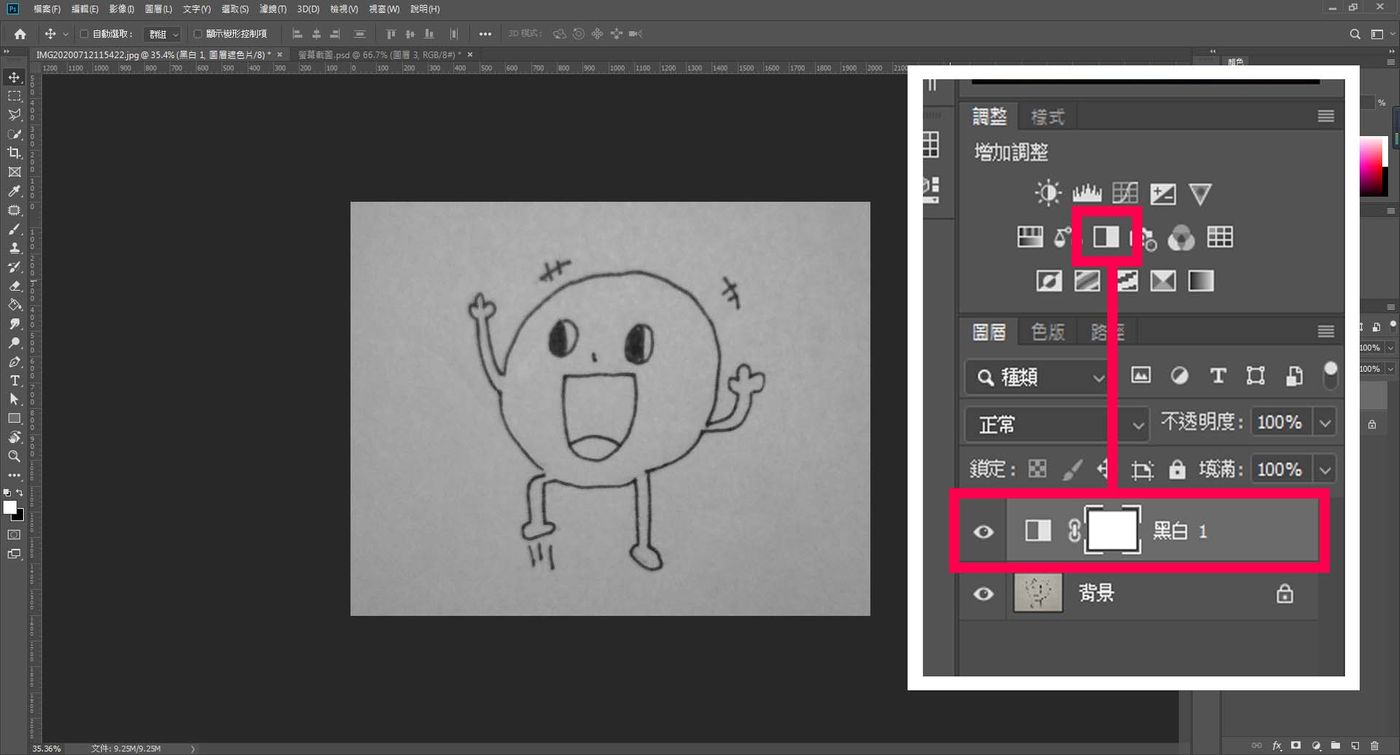
4. Use “Levels and Contrast” to adjust the picture to only black and white. If you find that some places are too bright or too dark, and the overall picture brightness is uneven, you can use the "brighten tool" to adjust.
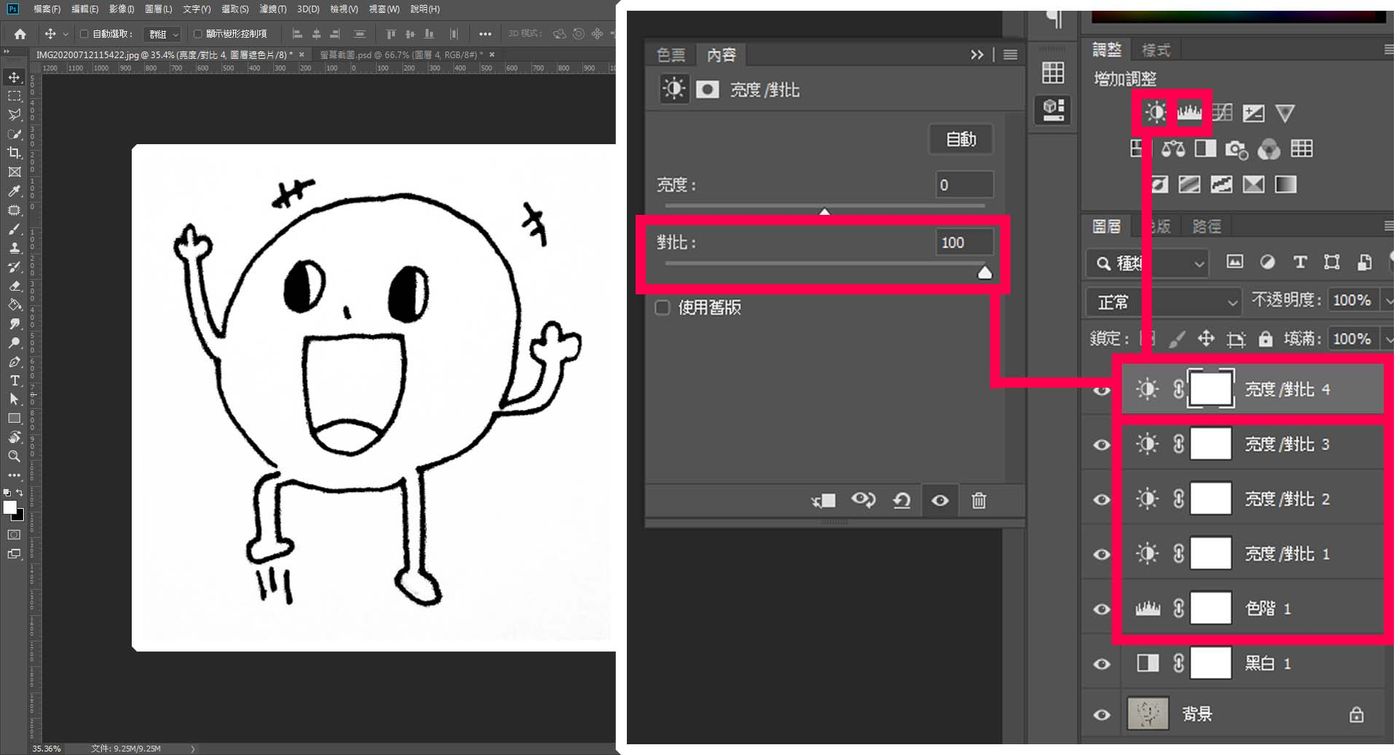
5. Right-click on any layer, and then click “Merge Visible Layers”. You can see that there is only one layer left below, and "Layer 0" is not locked. If it is locked, click the lock to unlock it!
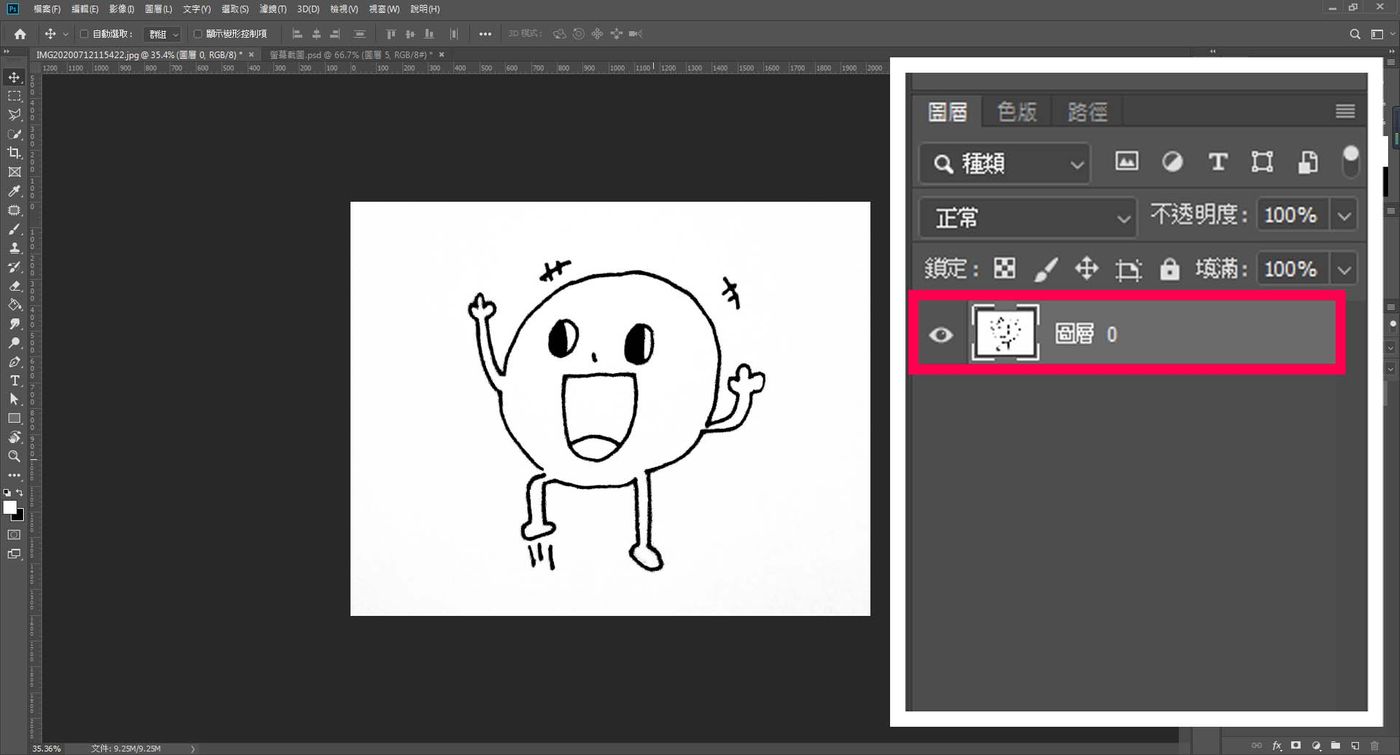
6. Next is a series of command actions
- Select all ( ctrl+a )
- Cut ( ctrl+x )
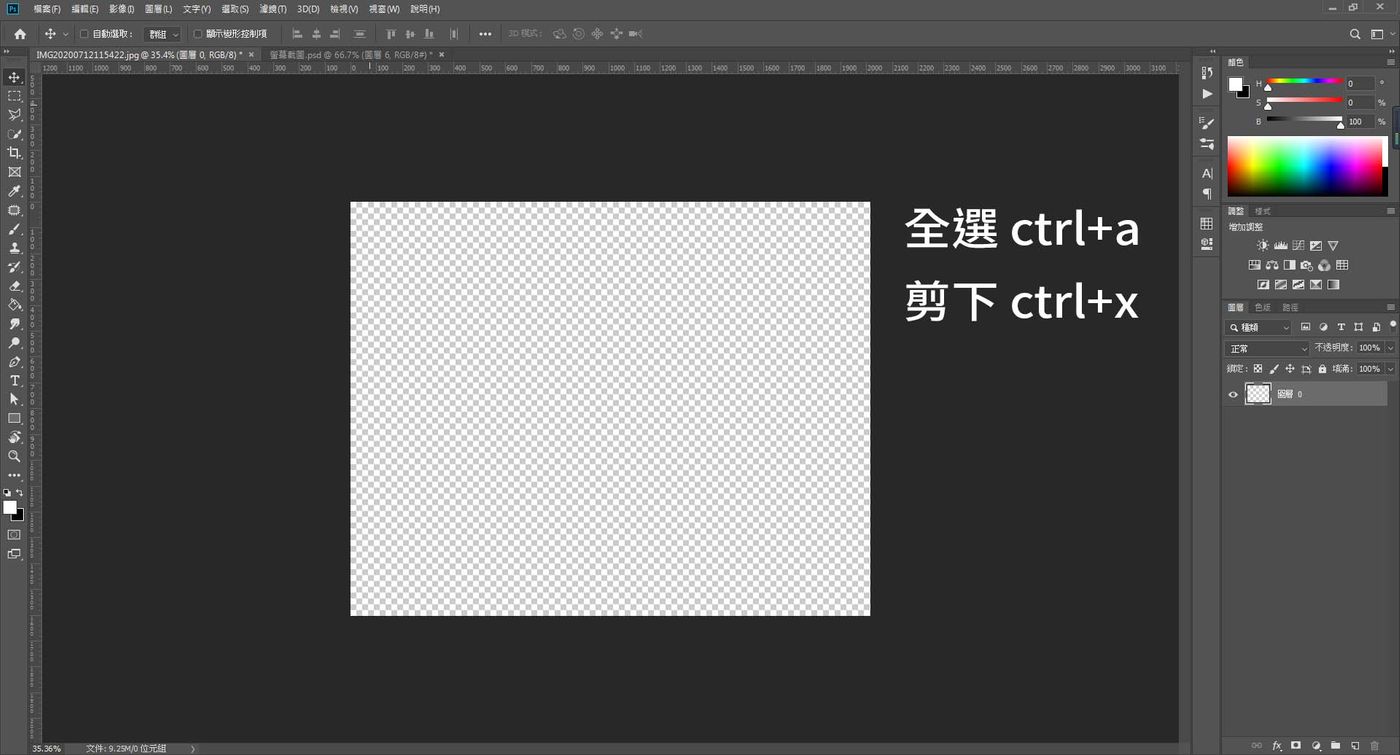
- Quick Mask ( q )
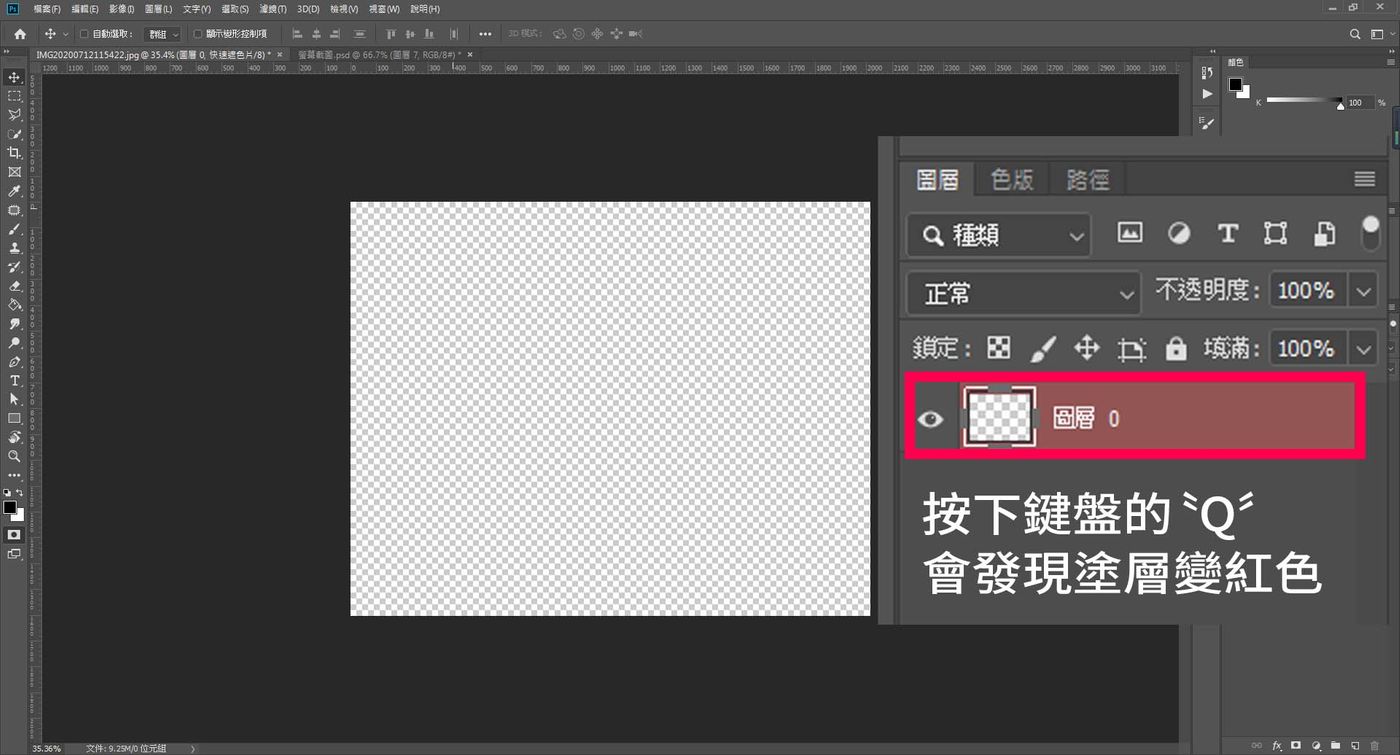
- Paste ( ctrl+v )
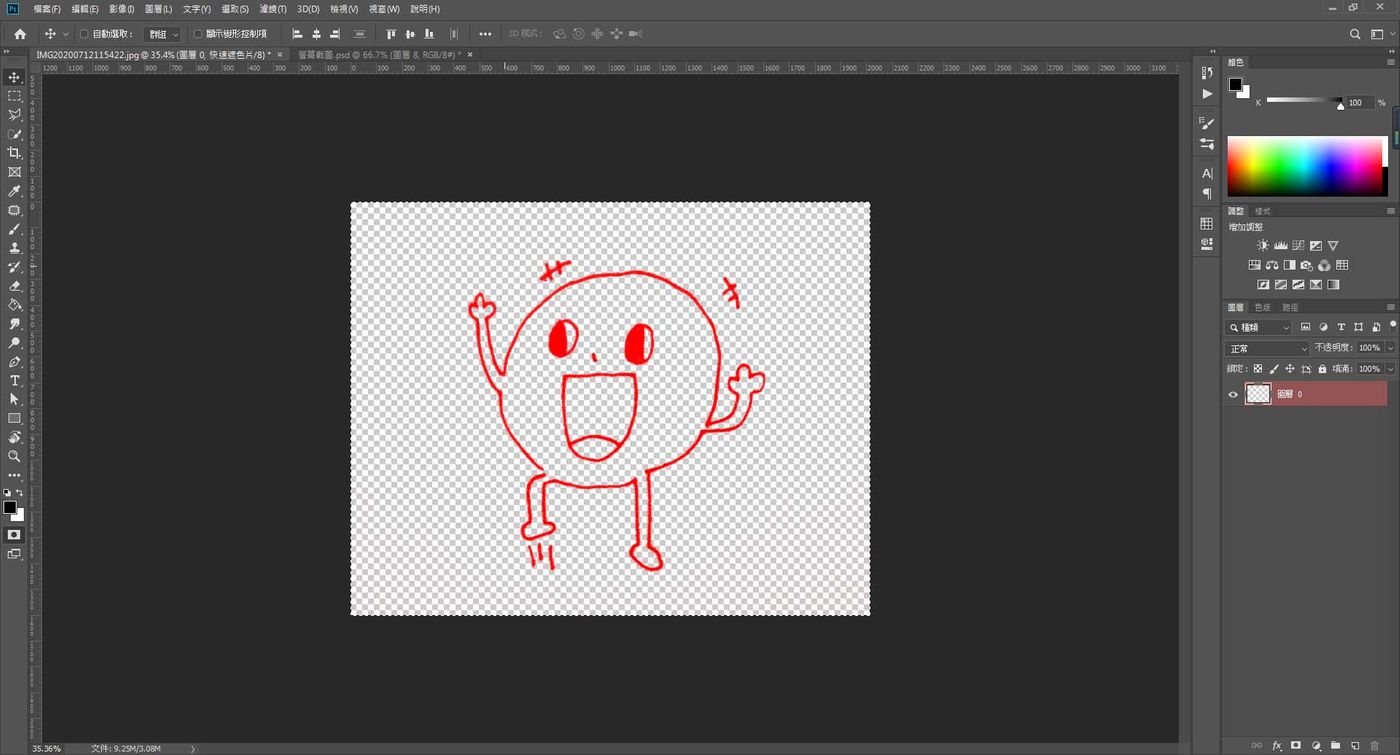
- Quick Mask ( q )
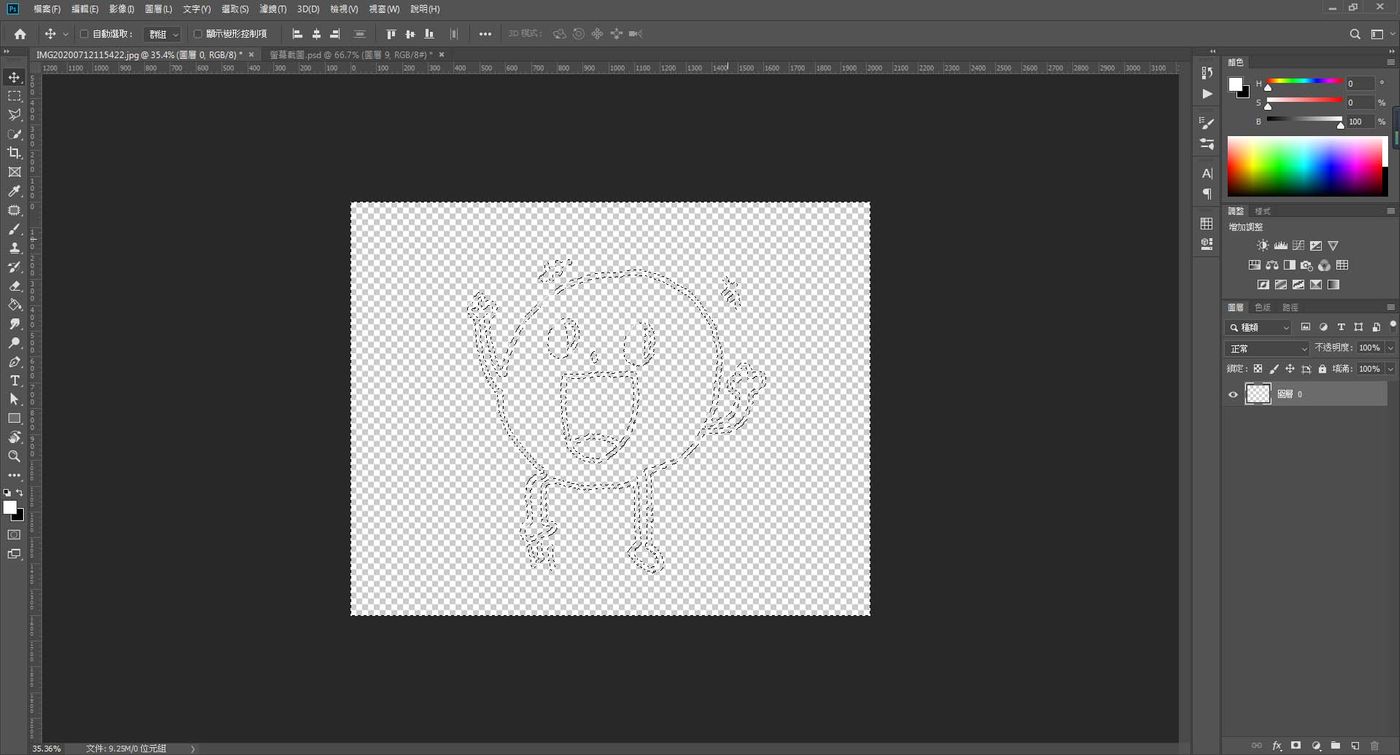
- Invert selection ( shift+ctrl+i )
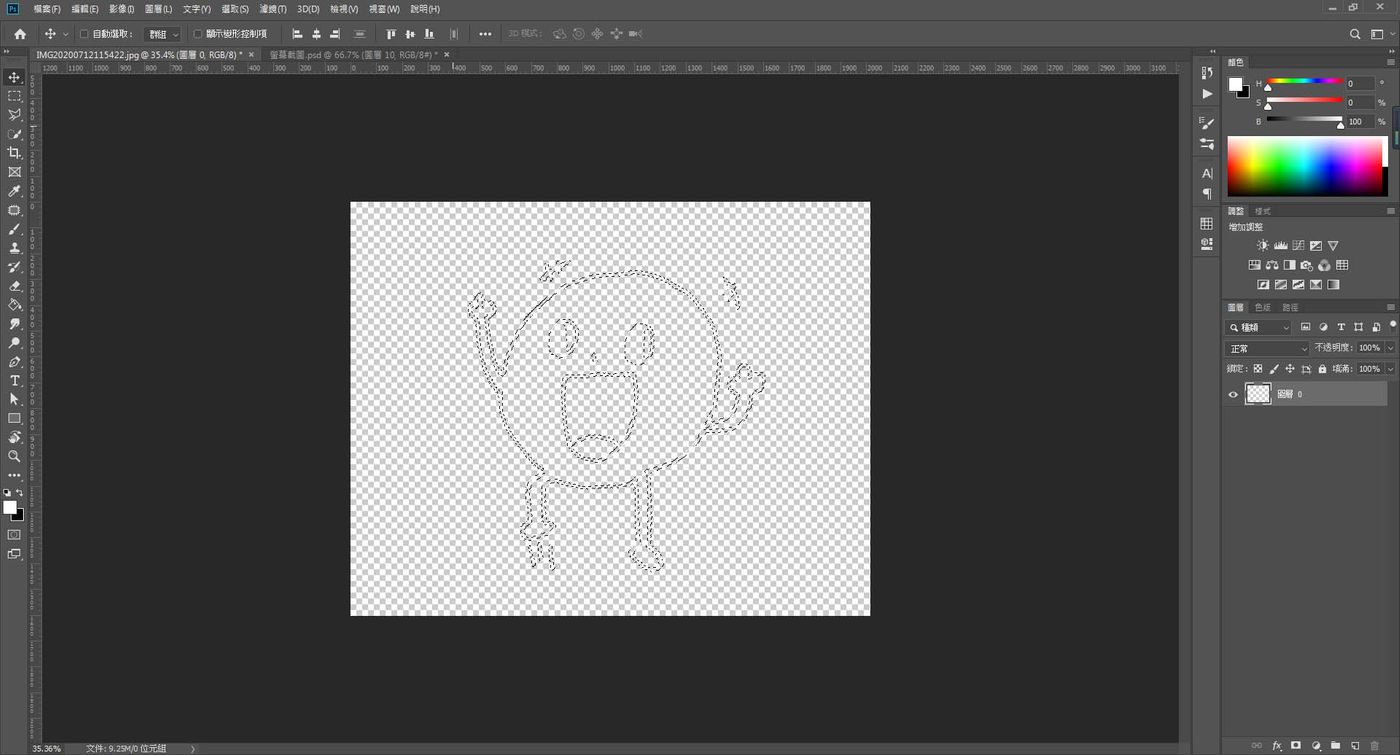
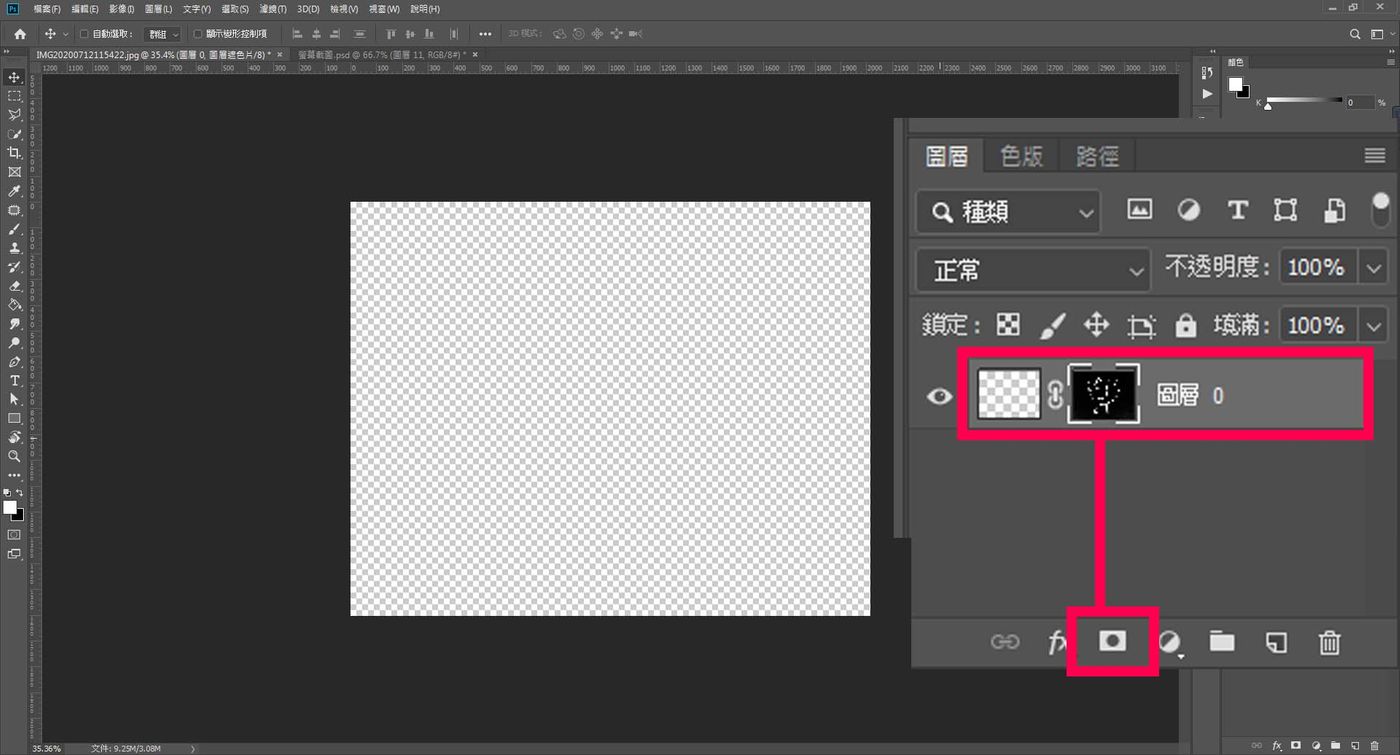
- Create a layer mask
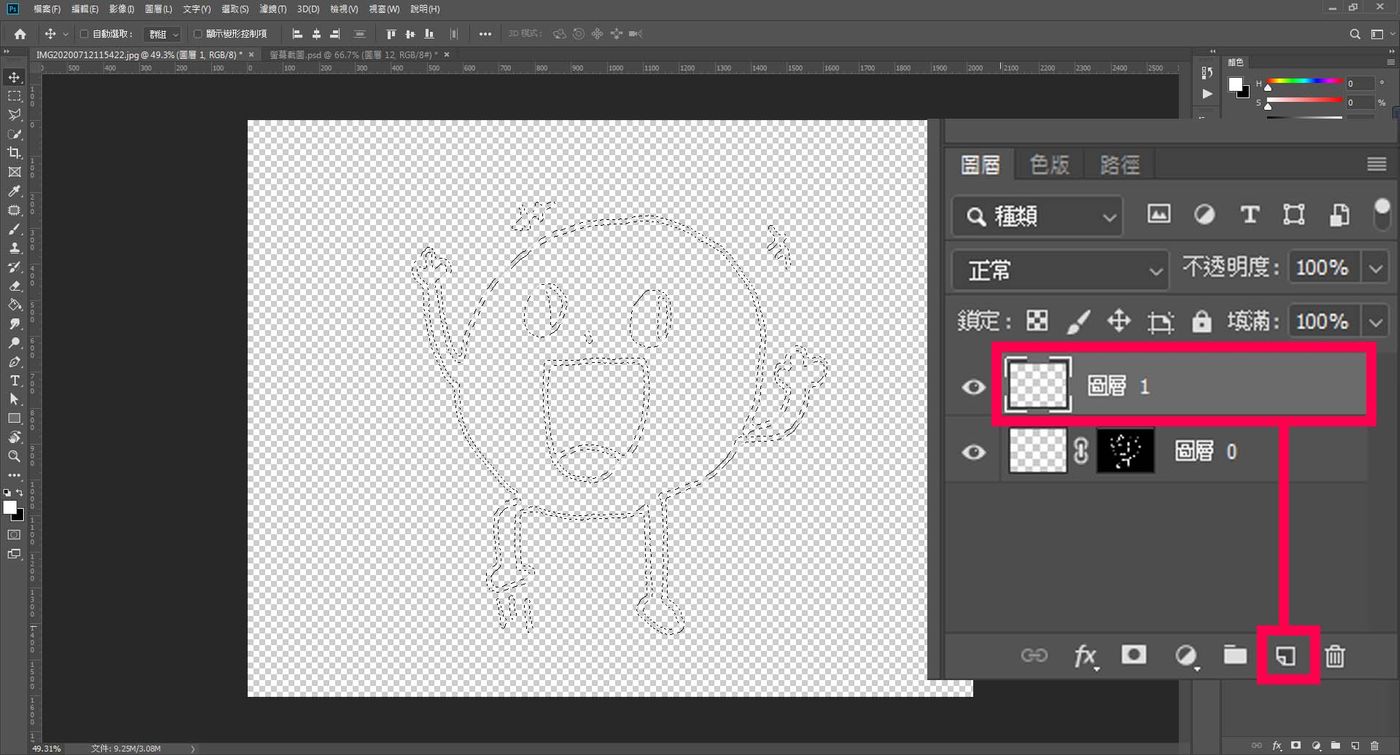
7. If you want to color directly, create a new layer, hold down ctrl and left click to select the mask, the white area of the mask will be selected, as shown below.
8. There are many ways to color, here I will provide a method that will not be a problem. After selecting the range, shift+f5, jump out of the window and then select the color, select the color you want and press OK to pull it!
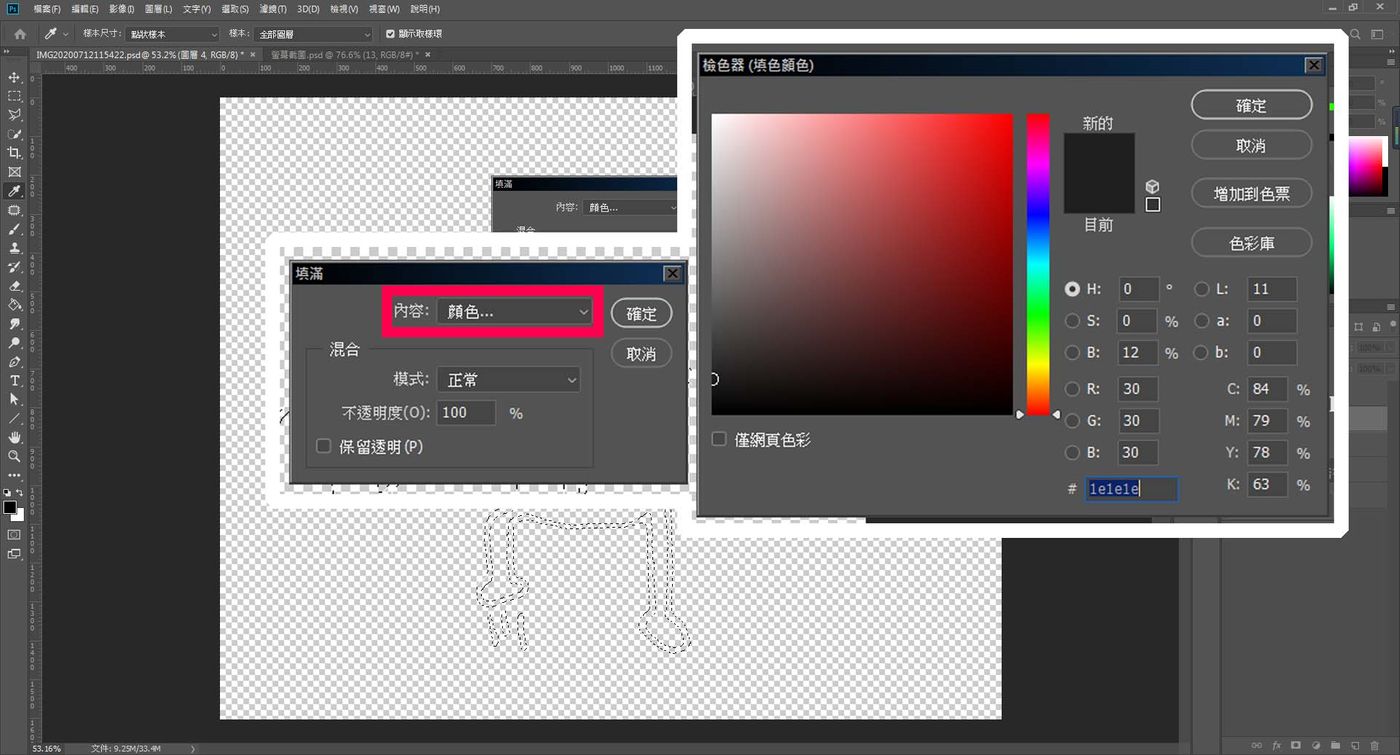
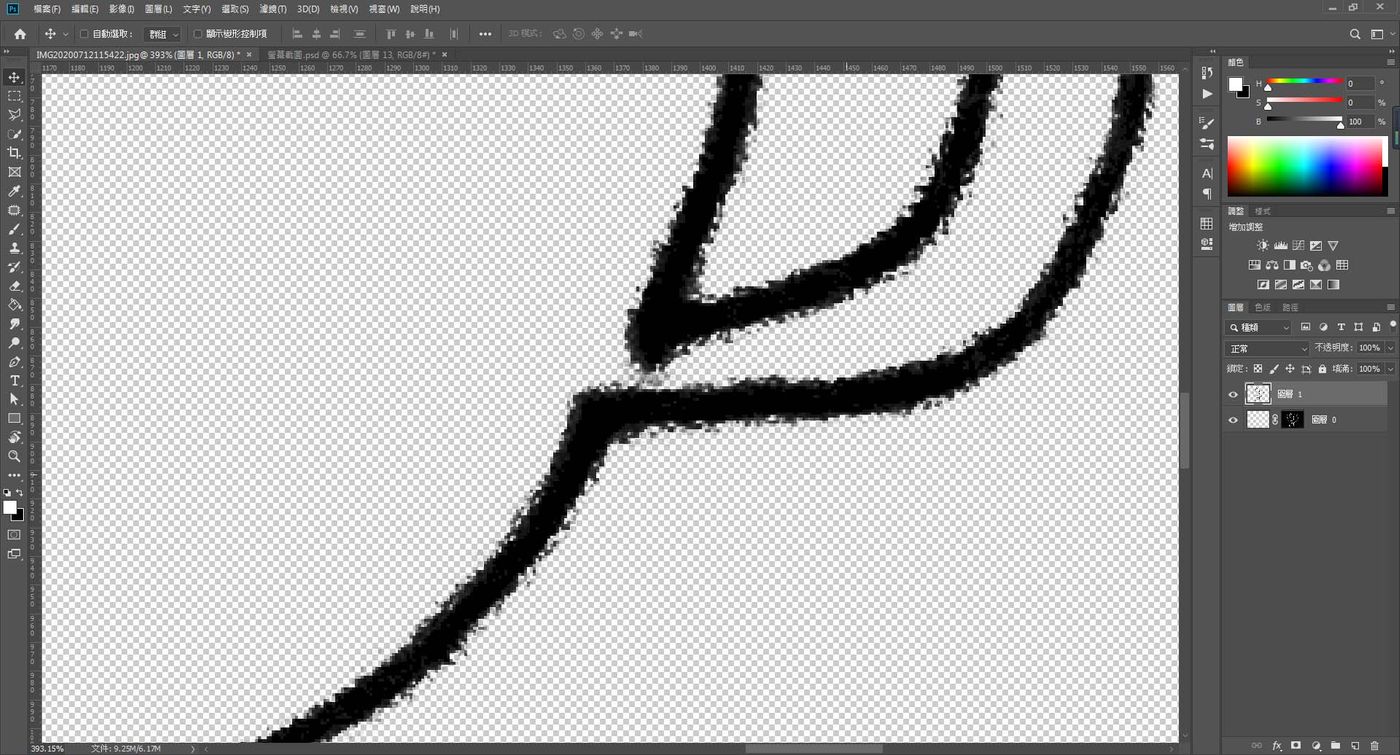
Because I didn't do any trimming, after coloring and zooming in, I found the lines were very rough, which was not what I wanted, and I usually made adjustments.
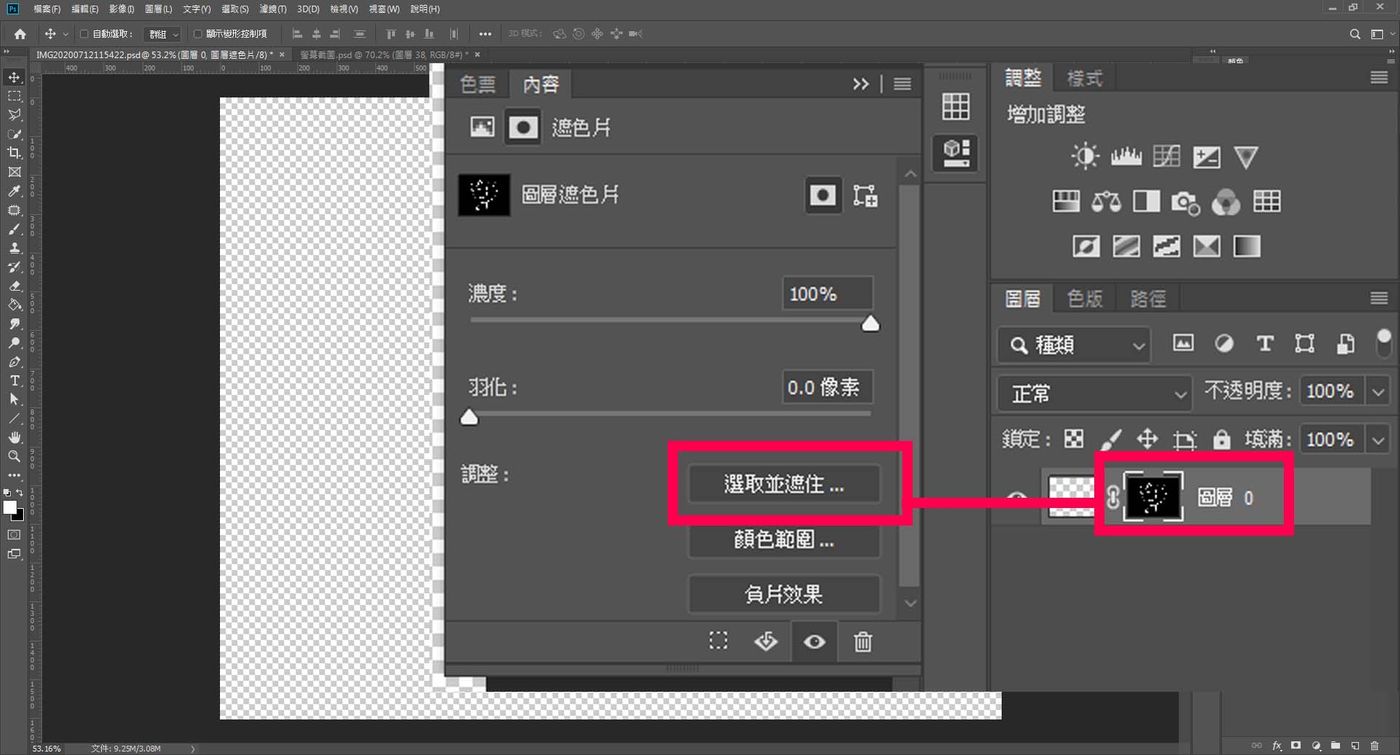
9. Left-click directly on the mask to pop up the content window, and select “Select and Mask”
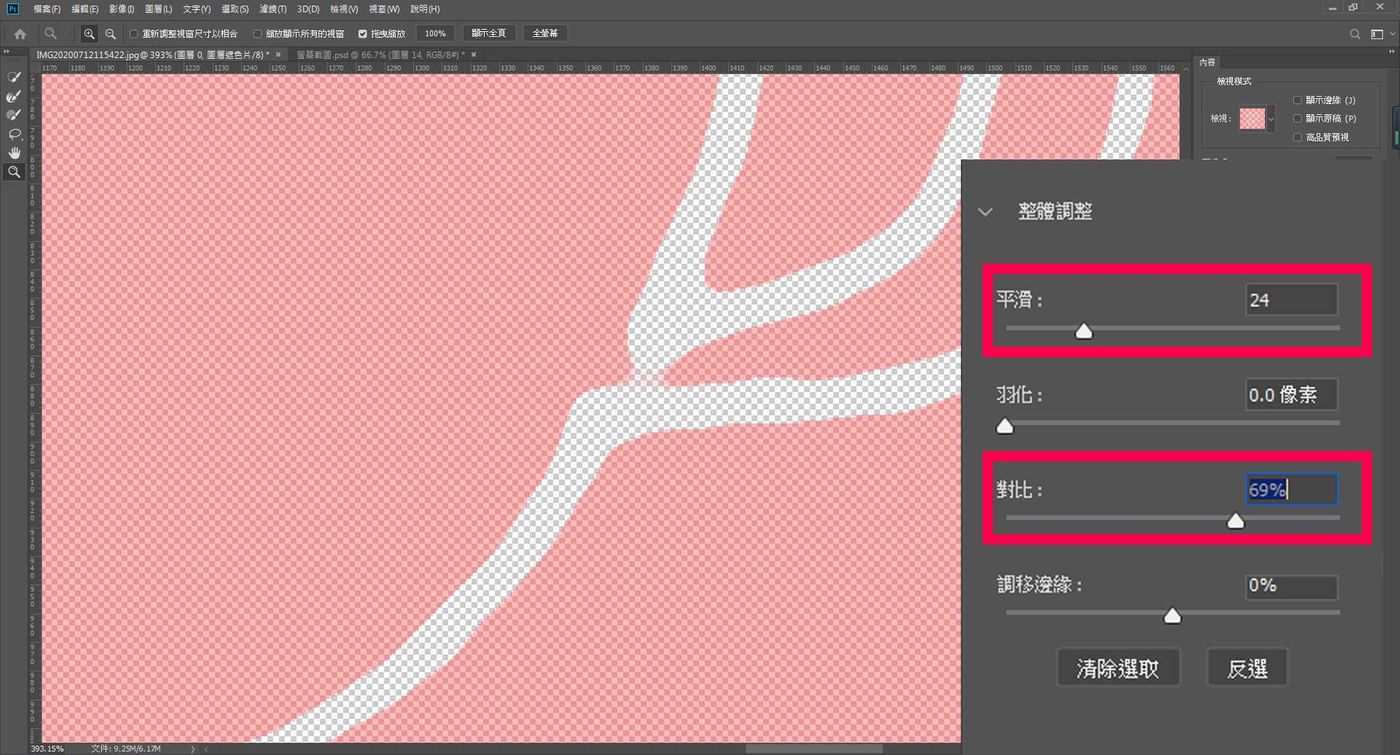
10. Adjust the "Smoothing and Contrast" value is not fixed. "Smooth" is to adjust the smoothness of the line, but it will make the line appear transparent, so you need to adjust the "Contrast" to enhance the clarity of the line.
After the modification is completed, press OK, and directly color the same as step 8, you will find that the lines are much smoother, as shown in the figure below.
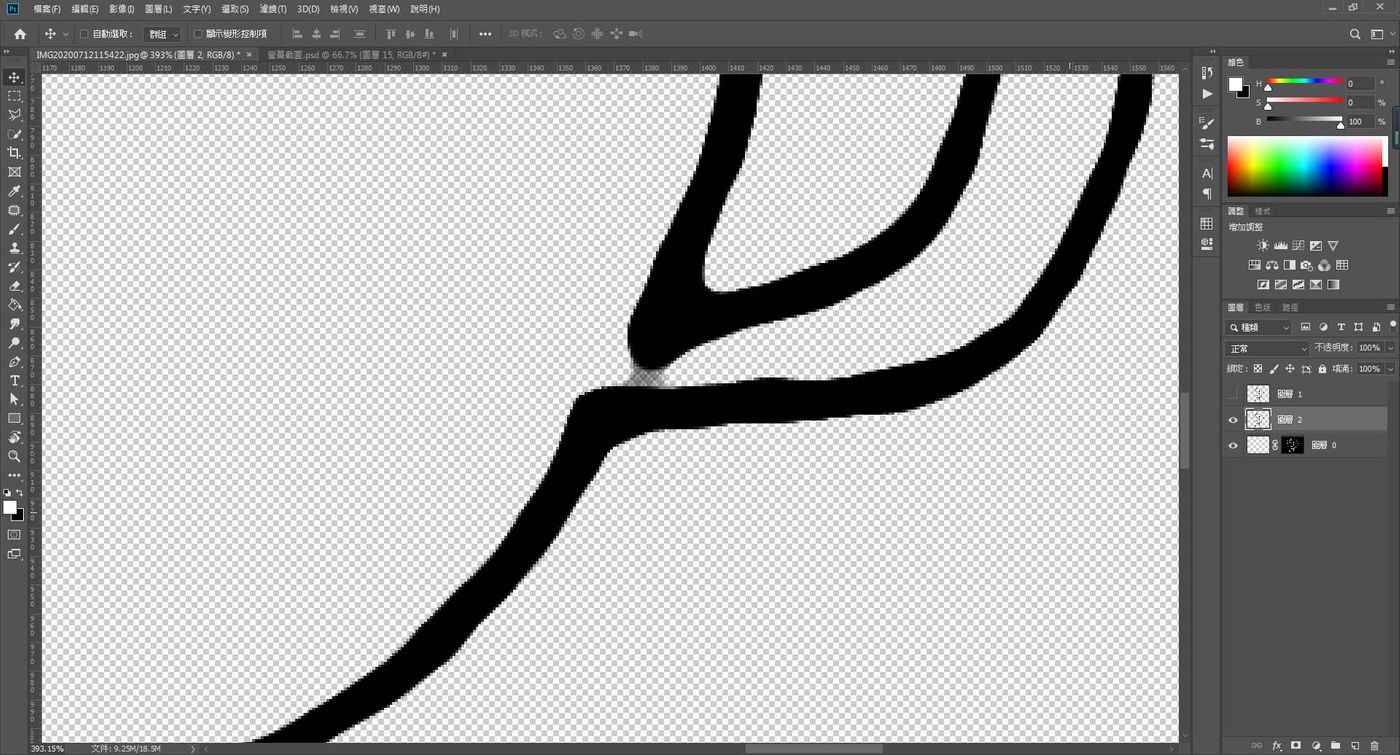
It's almost done here! You can also see which parts of the whole picture need to be modified. If some lines are too thick and squeezed together, you can use an eraser to erase the excessive black blocks.
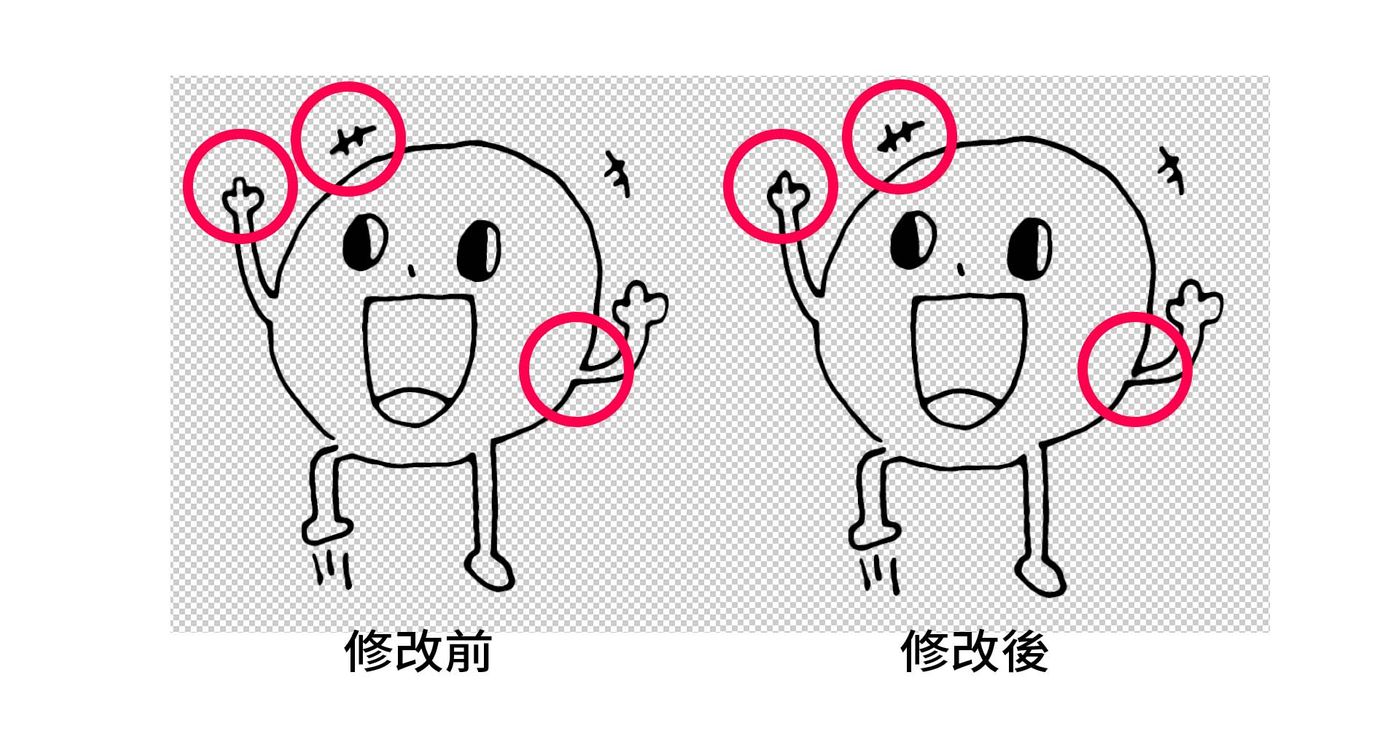
Before I discovered this method, I always put the line art in illustrator, and then used the pen tool to draw slowly, but I found that it took too much time. After discovering this method, I saved a lot of time! If it's just a simple doodle, I use this method.
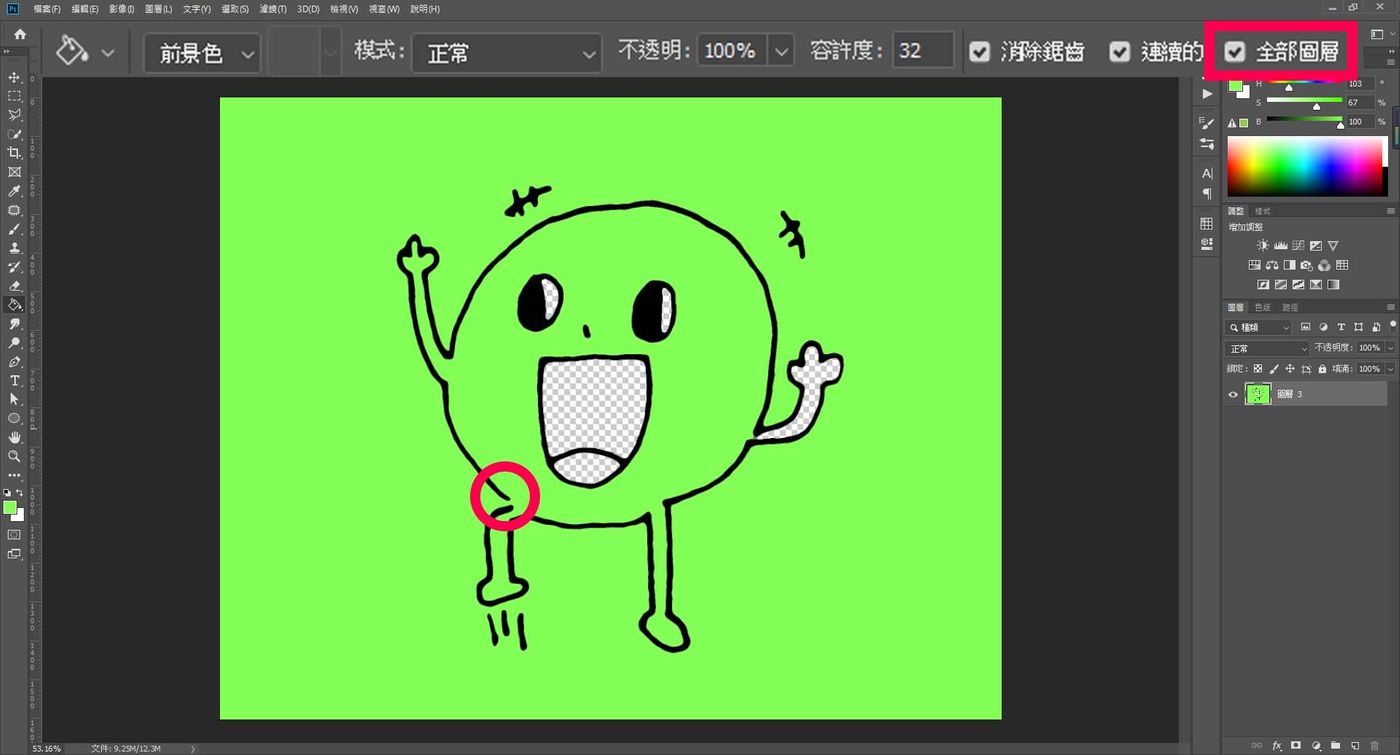
For coloring...the easiest way is to use the paint bucket tool. Note that the "All layers" option is turned on. If you find that the whole picture is colored after coloring, it is because there is a gap (the red circle in the picture below), and it is OK to block the gap!
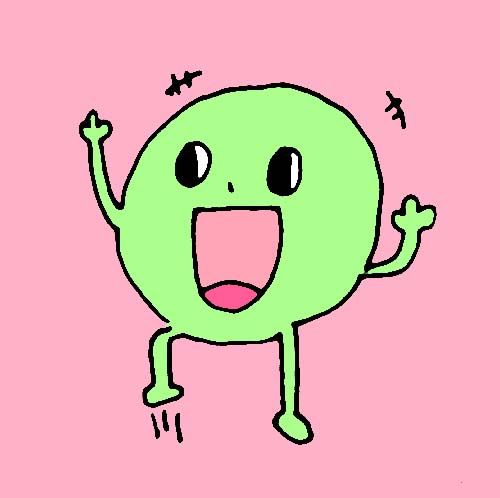
If you have any questions, please leave a message and let me know!
Like my work? Don't forget to support and clap, let me know that you are with me on the road of creation. Keep this enthusiasm together!
