
This is how liberty dies…with thunderous applause.
[Anonymous Internet] Whonix Getting Started Tutorial 1: Introduction, installation and basic use of Whonix.
Zero, some basic concepts:
0.0 Before starting, it is recommended to read:
【How to Hide Your Tracks and Avoid Cross-Provincial Hunts】
https://program-think.blogspot.com/2010/04/howto-cover-your-tracks-0.html
["How to Climb the Wall" Series: Frequently Asked Questions about Tor]
https://program-think.blogspot.com/2013/11/tor-faq.html
【Literacy Operating System Virtual Machine】
https://program-think.blogspot.com/2012/10/system-vm-0.html
0.1 What is Whonix?
Whonix is an operating system installed on a "virtual machine". It lets you anonymously perform sensitive actions (like browsing dangerous websites) without leaving a trace. Its characteristics are as follows:
- Any traffic on Whonix must be forced through Tor, so Whonix is more secure than a normal Tor browser against IP leaks and DNS leaks. This also lets Tor proxy any software installed on Whonix.
- It's "dual virtual machine" and any hacking or virus inside Whonix can't get your real IP.
- Whonix is open source, which means there will be no backdoors on Whonix.
0.2 Why do you need Whonix?
- Provide a secure environment for sensitive operations.
- Browsing the web without leaving a trace, making reactionary remarks, and even the [necessary and not sufficient conditions] for an anonymous tower inside the wall.
- Use Tor as a VPN. This allows you to use the software anonymously and without leaving a trace. For example, you can install Discord on Whonix and it won't know your real device model and IP address.
- Whonix is easier to use than Tails with similar features.
All in all, if you are a dissident in a totalitarian country, or a social activist, then it is recommended that you install Whonix and perform sensitive operations on Whonix. This will be an important tool in your fight against totalitarianism.
1. Download and install VirtualBox .
(Note: This article mainly introduces how to install VirtualBox on Windows systems. The steps for MacOS are similar.)
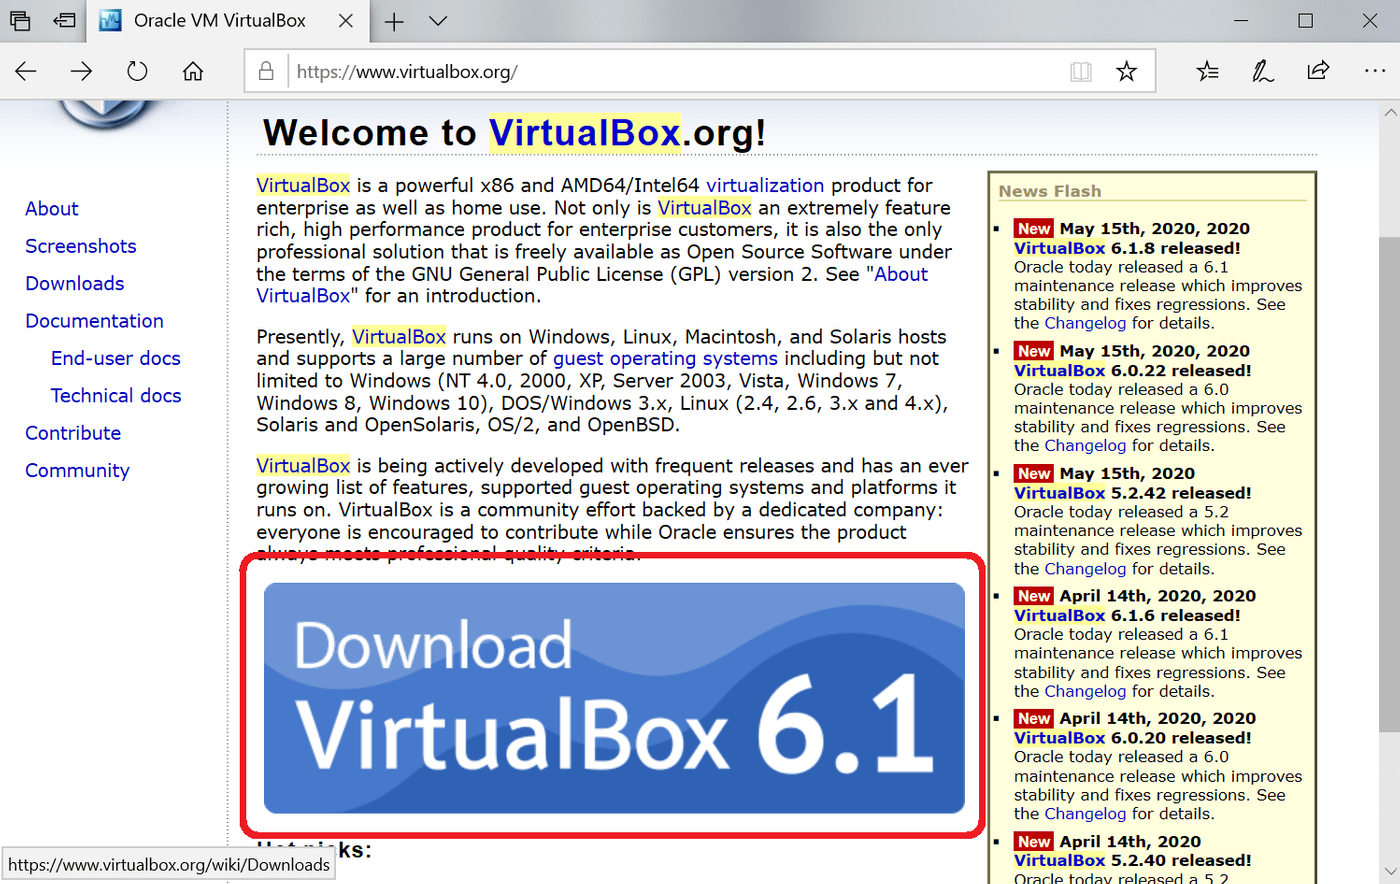
1.1 Open https://www.virtualbox.org/ on your browser. Click "Download VirtualBox XX".
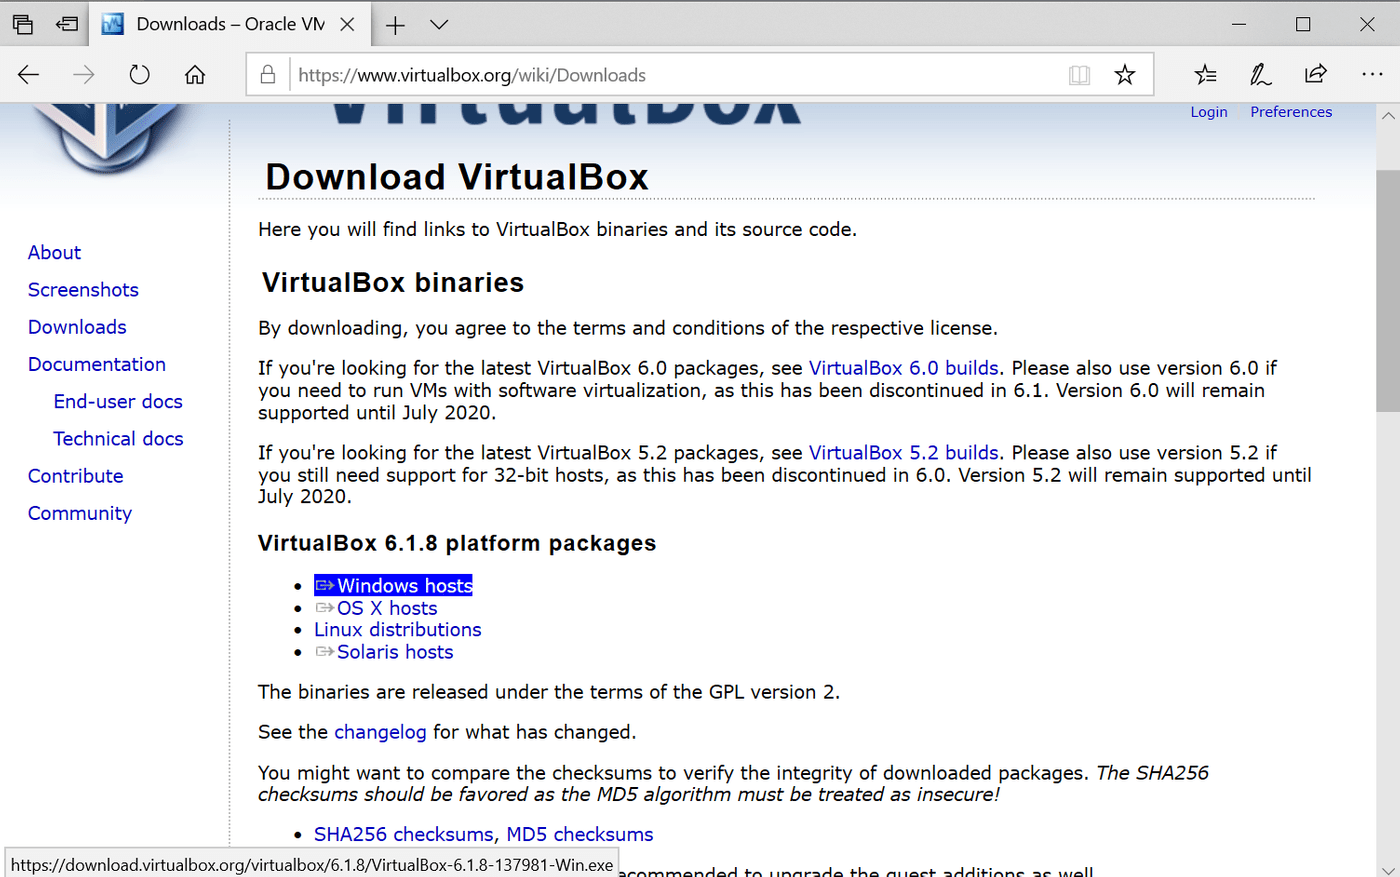
1.2 Click "Windows hosts", if you are a MacOS system, click "OS X hosts", after clicking, it will start to download the VirtualBox installation package.
[Optional] 1.3 After the download is complete, verify the integrity of the file/whether it has been tampered with. This step is not explained in detail in this tutorial.
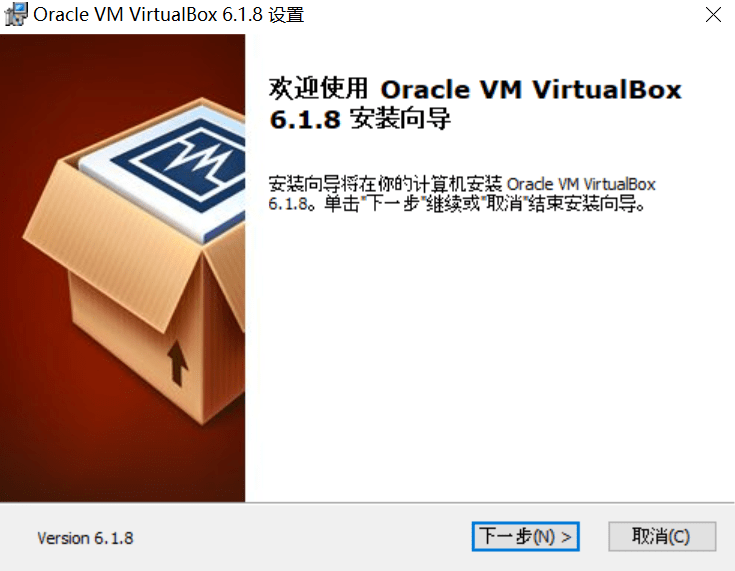
1.4 Open the installation package: click "Next"
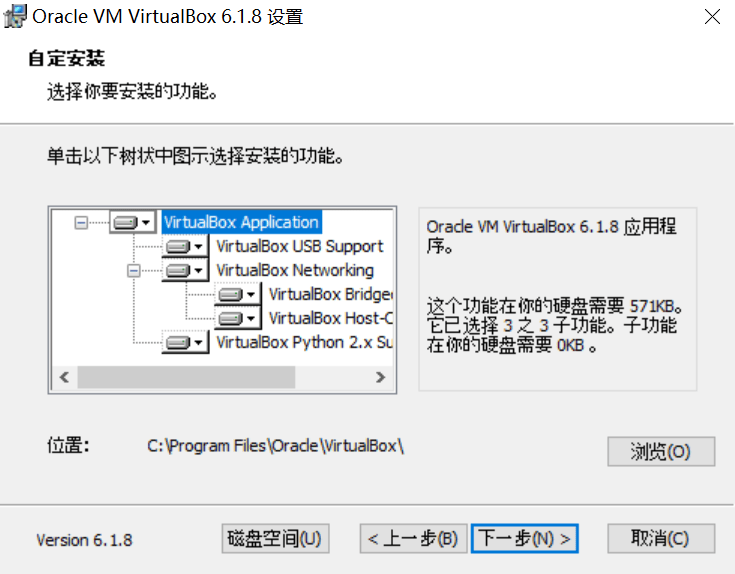
1.5 Continue to click "Next", but if you want to change the installation path, click "Browse" and select the installation path you want, then click "Next".
1.6 Click "Continue". If you don't want it to create icons in the menu/desktop/navigation bar, you can uncheck the first three items. It is recommended to keep the fourth item.
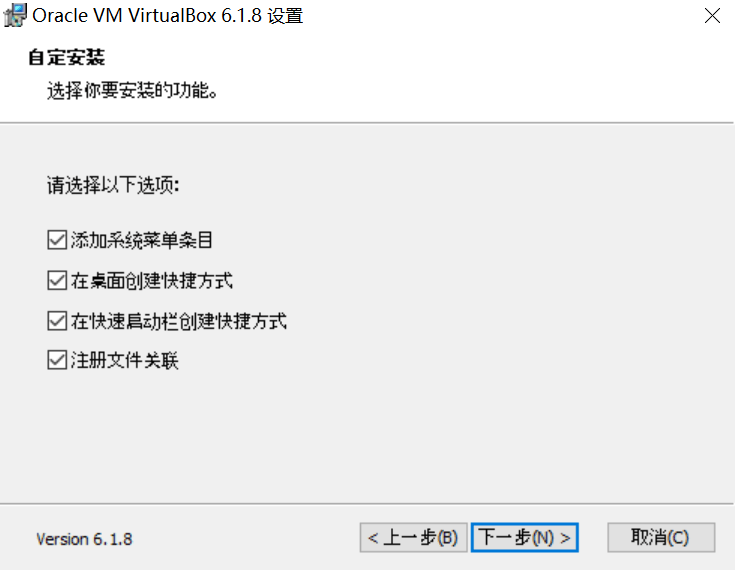
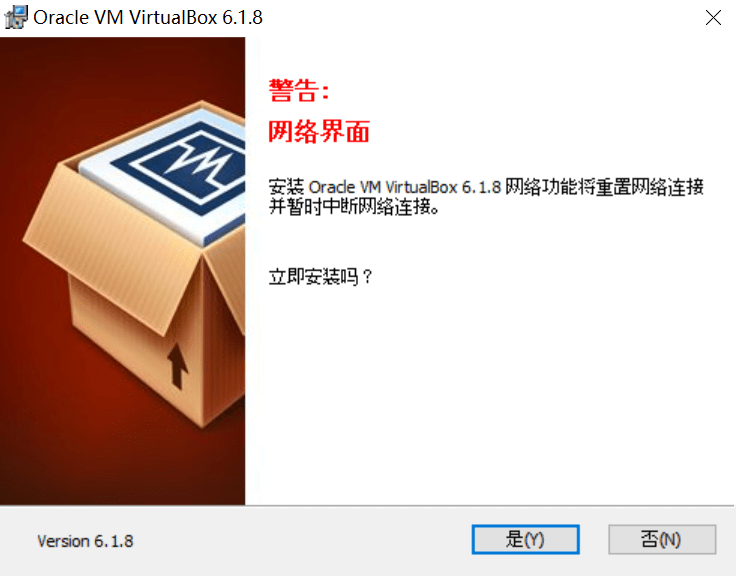
1.7 Click "Yes".
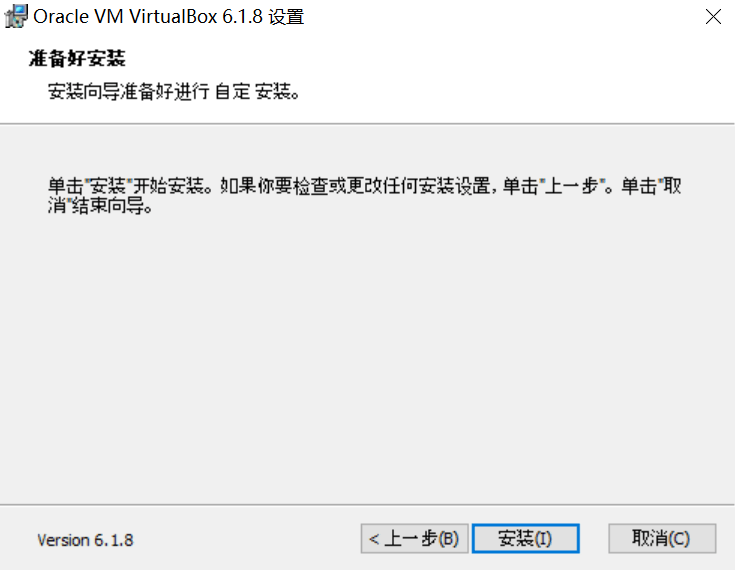
1.8 Click "Install" to start the installation.
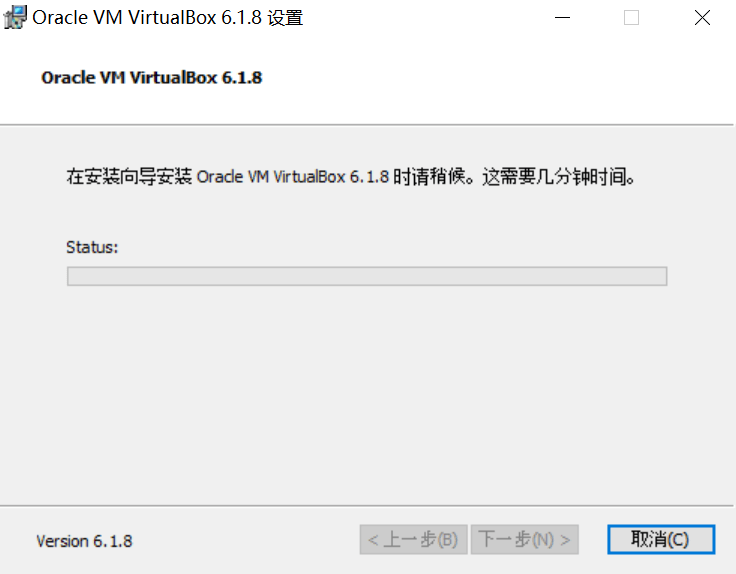
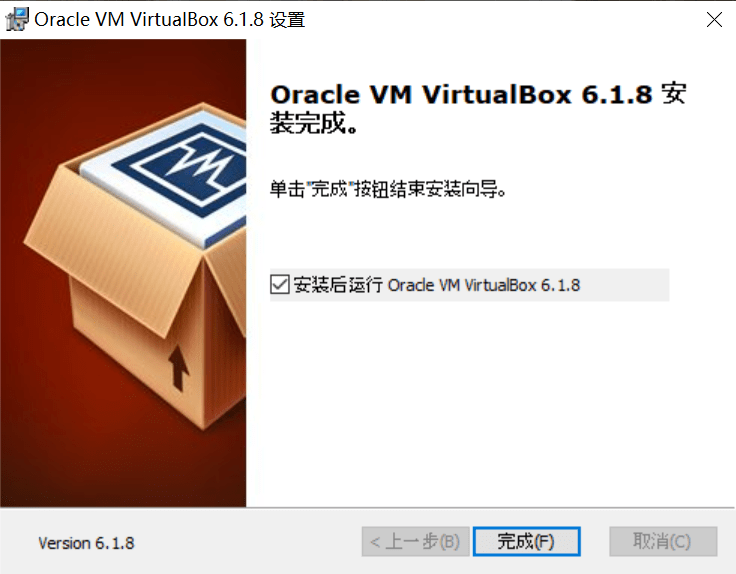
1.9 After the installation is complete, click "Finish" to exit the installation wizard.
2. Download and install Whonix.
2.1 Open https://www.whonix.org/wiki/VirtualBox/XFCE on your browser . To be on the safe side, it is recommended to open this link on the Tor browser and download the Whonix installation package.
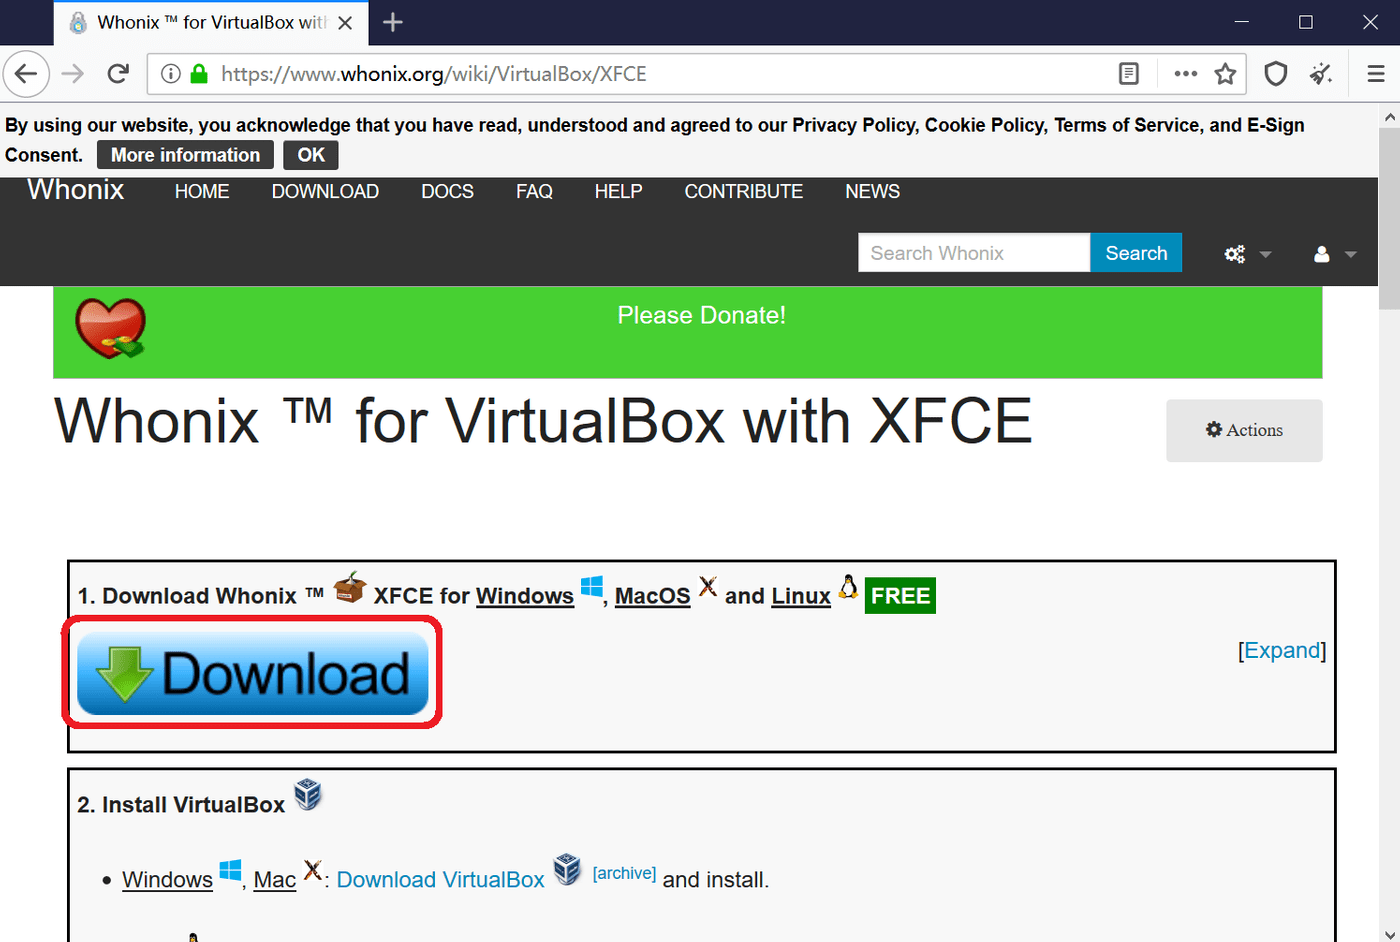
Click "Download" and the browser will start downloading the Whonix installation package.
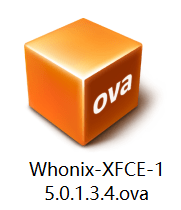
2.2 The download is complete. Whonix installation package is a file similar to this:
[Optional] 2.3 Use GPG to verify whether the file has been tampered with. Since the operation is relatively complex, this tutorial will not explain it in detail.
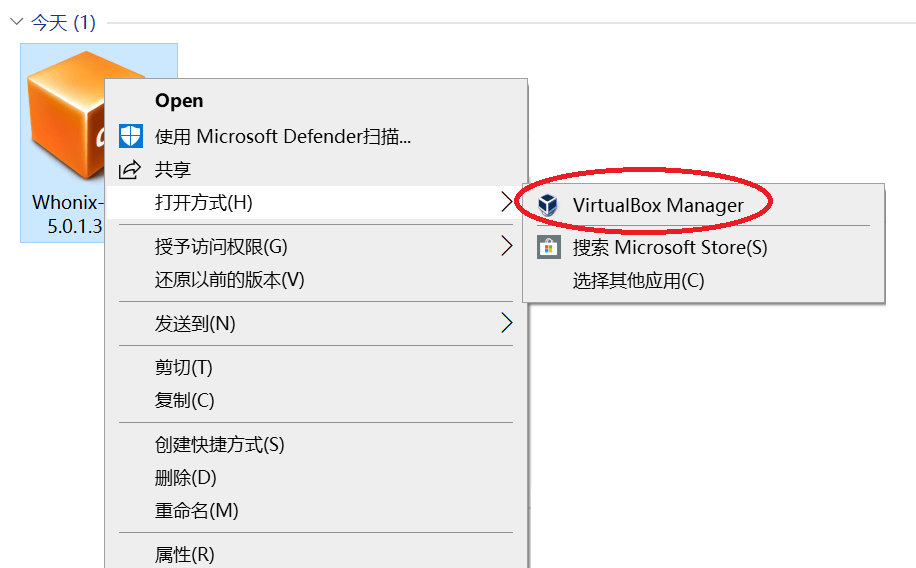
2.4 Right-click on the Whonix installation package, select Open with, and select (click) "VirtualBox Manager".
2.5 Then a window like this will pop up. Click Import.
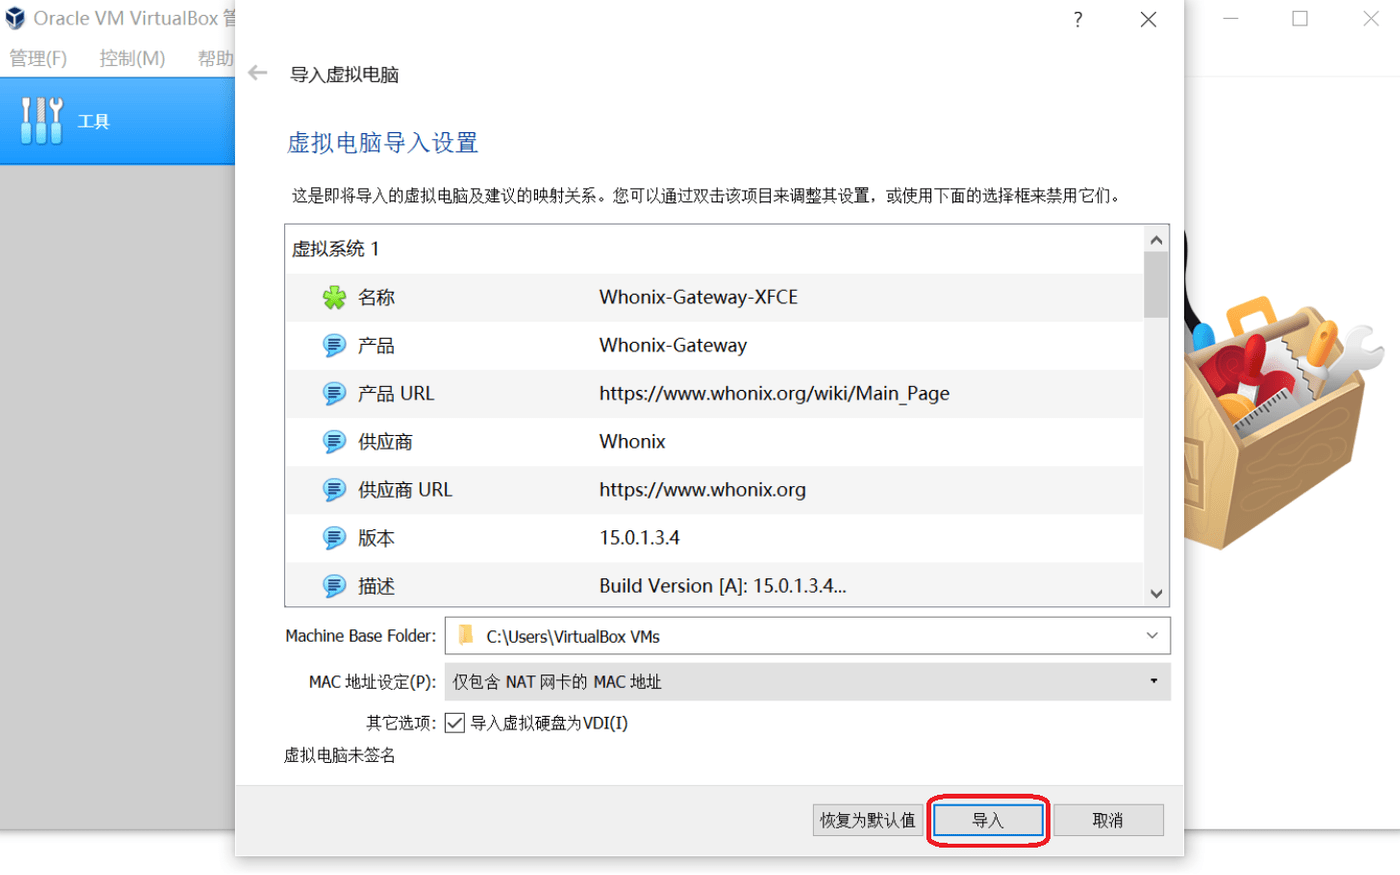
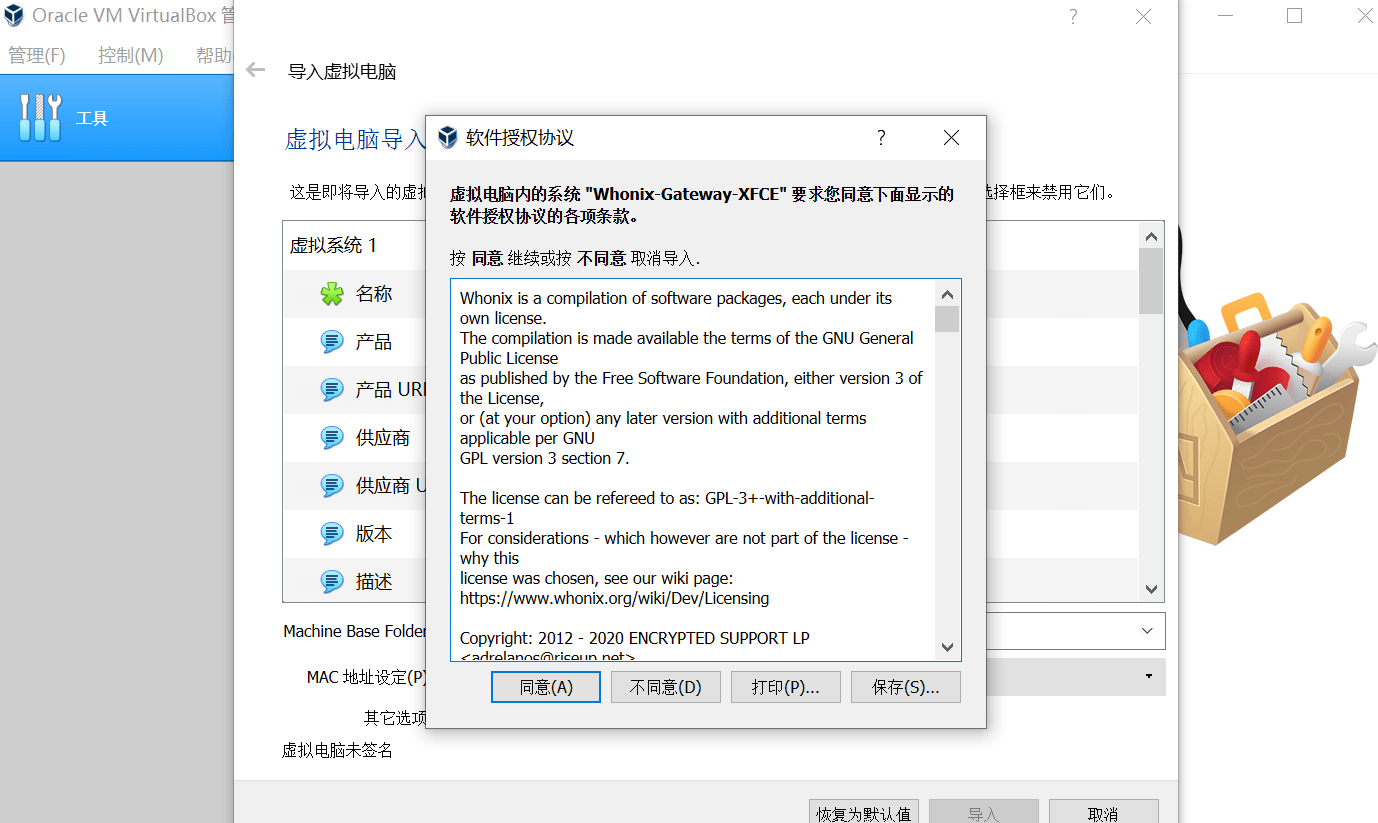
2.6 Click "Agree"
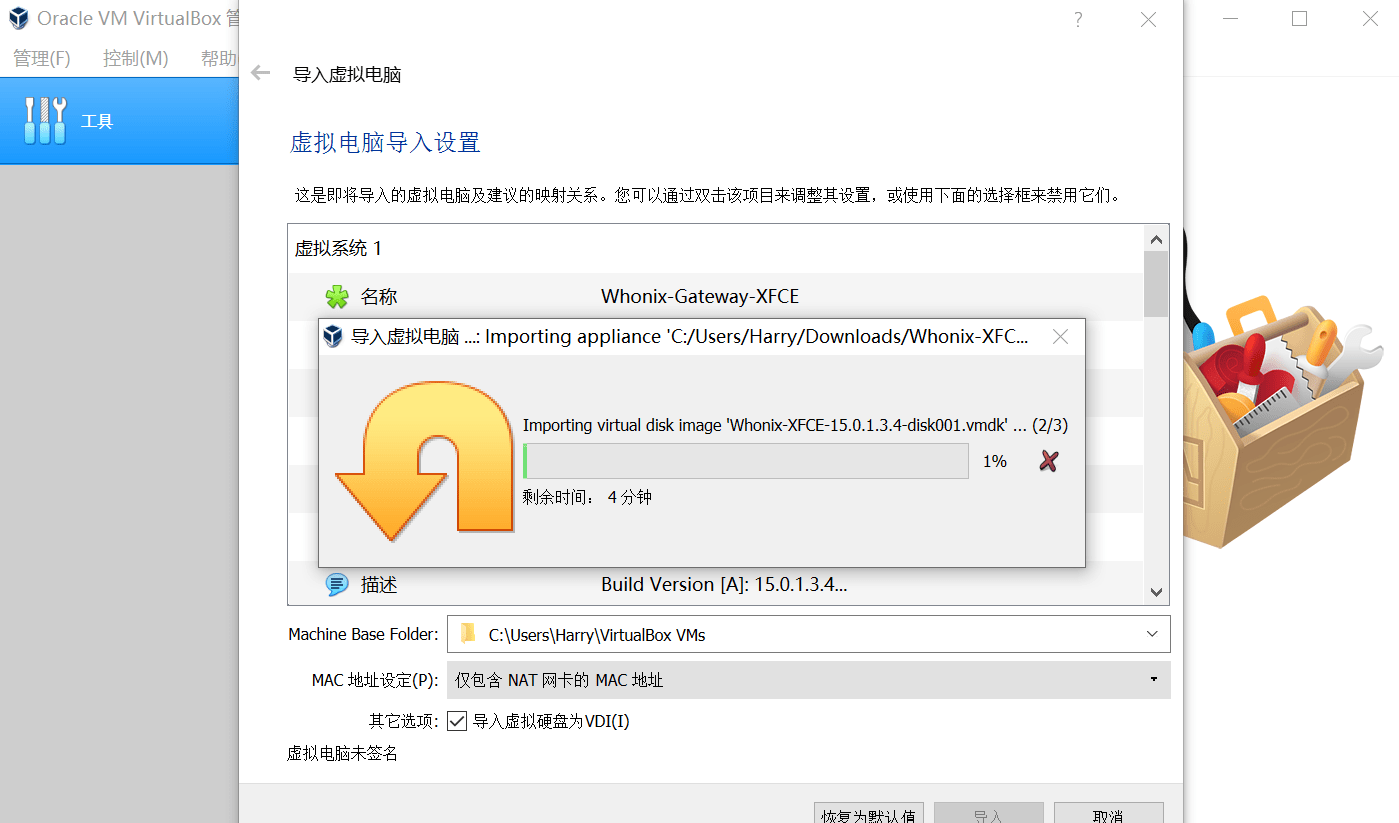
2.7 will then start importing the Whonix virtual machine.
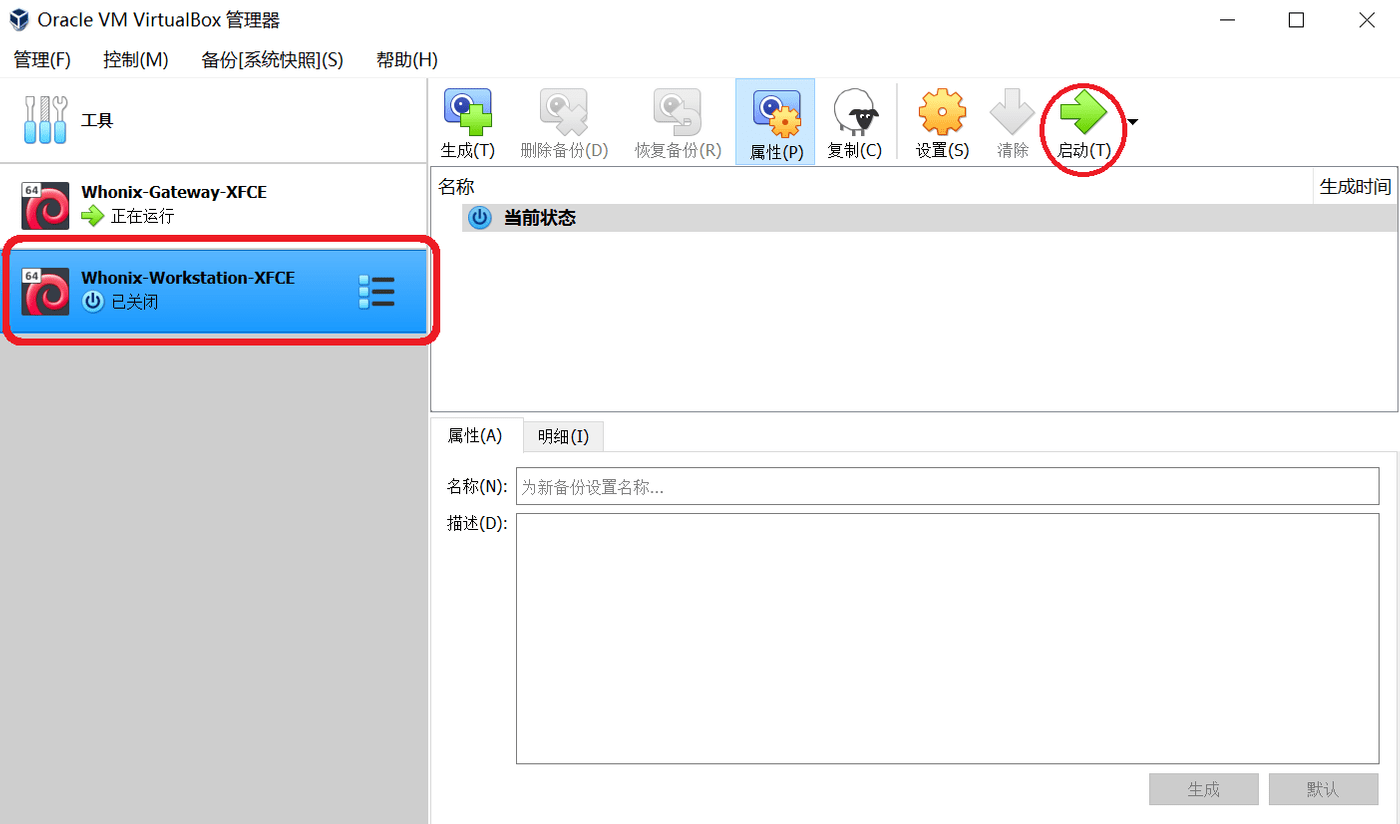
2.8 After the import is complete, two virtual machines will appear on VirtualBox. To start Whonix, first click on "Whonix-Gateway-XFCE" and click Start.
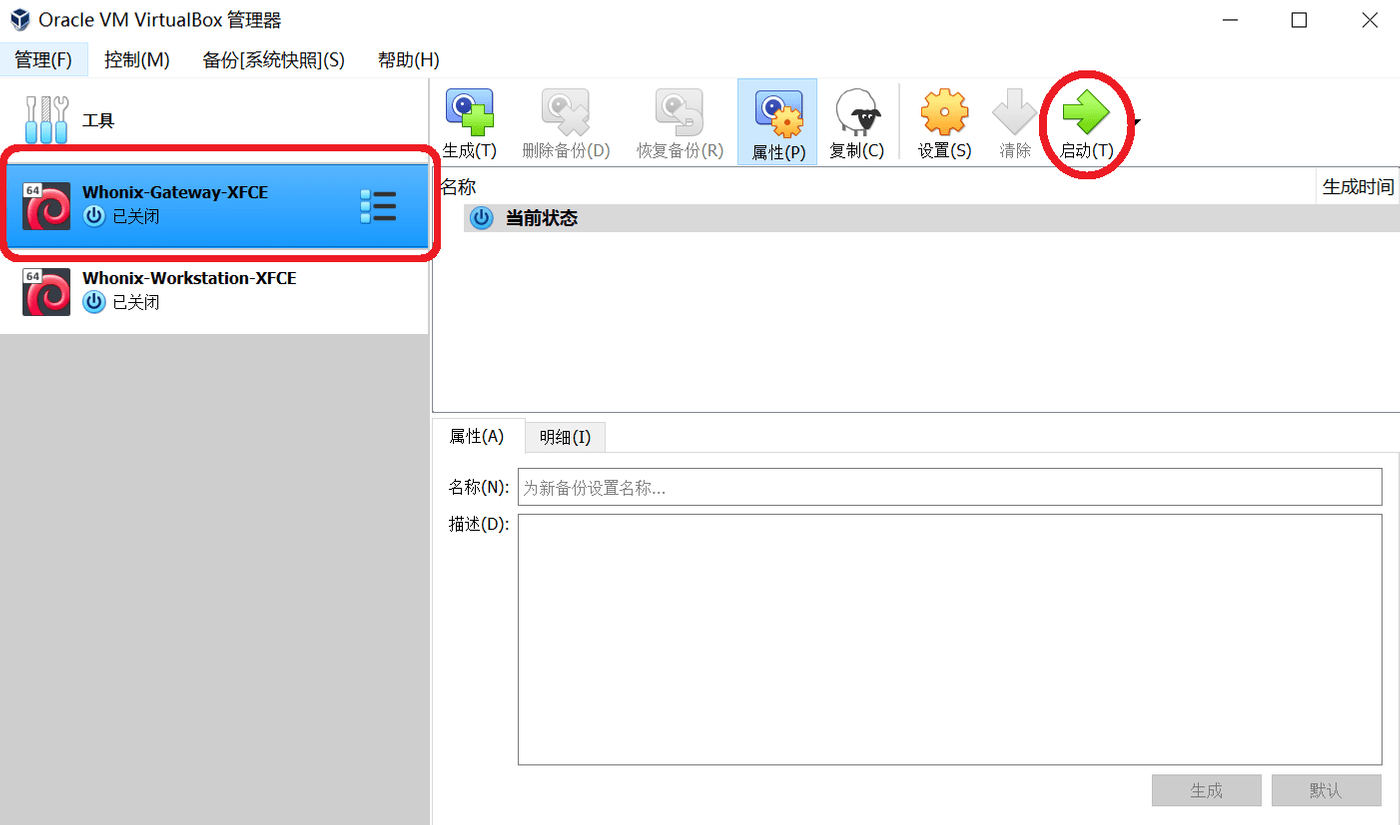
2.9 Then click "Whonix-Workstation-XFCE" and click Start.
3. Start using Whonix.
3.1 Wait for Whonix to start. You don't need to do anything when Whonix starts.
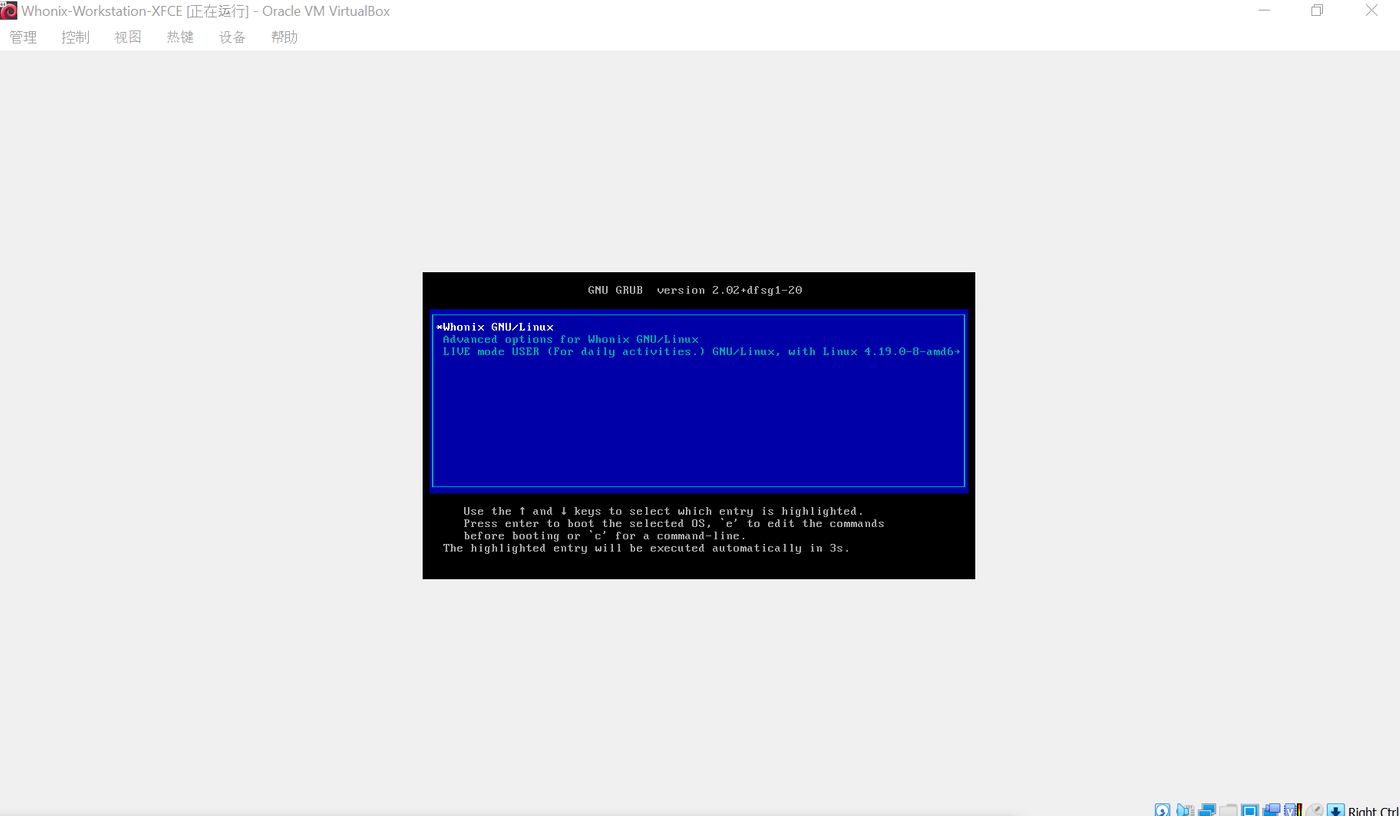
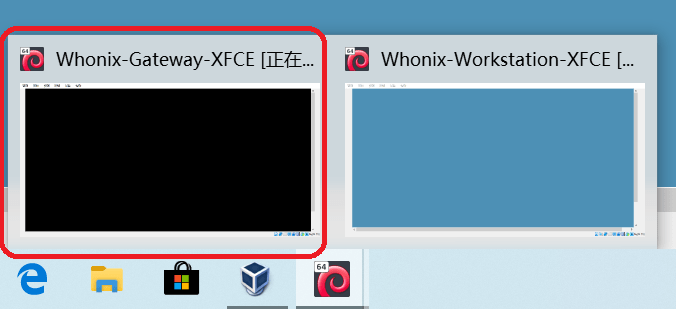
At this time, two Whonix will appear on the Windows 10 taskbar. After waiting for Whonix to start up, click Whonix-Gateway-XFCE first.
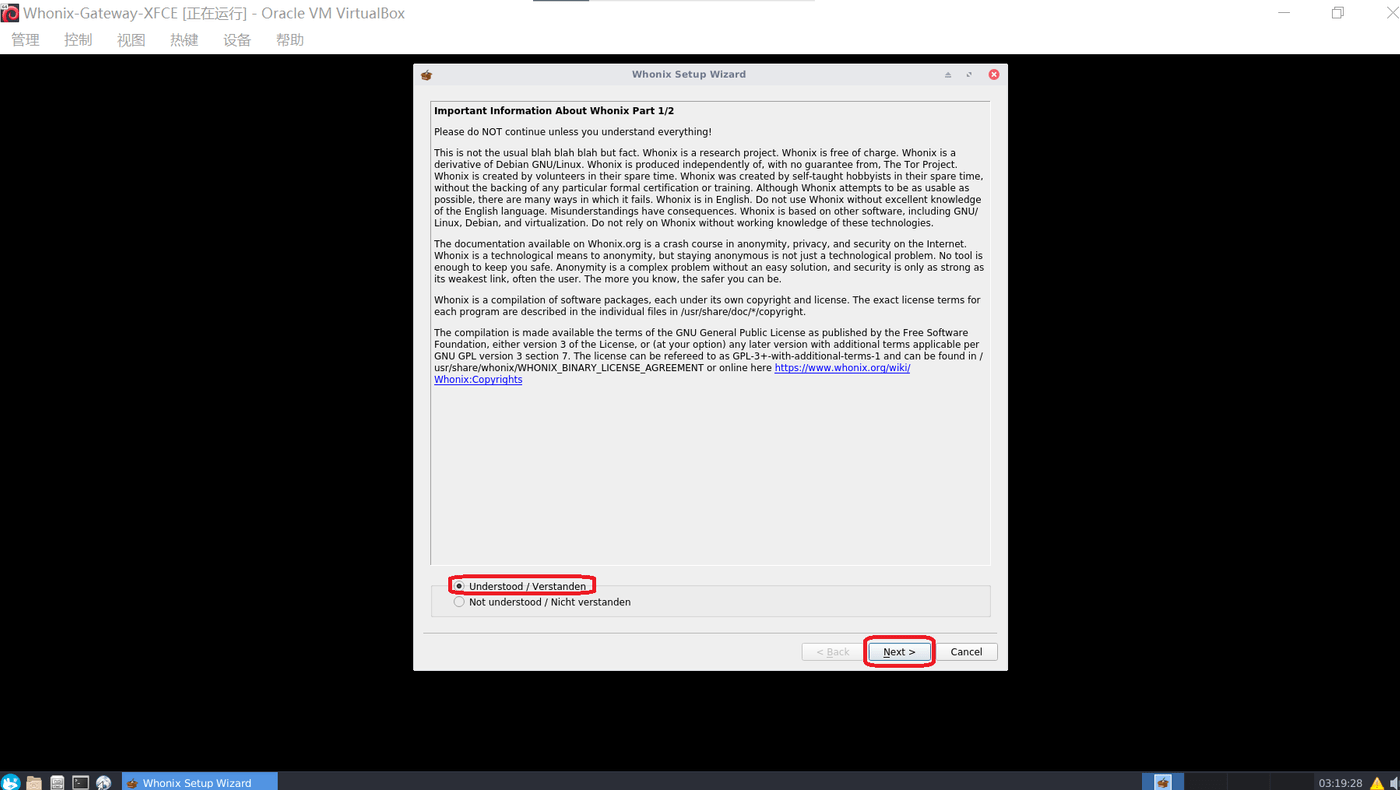
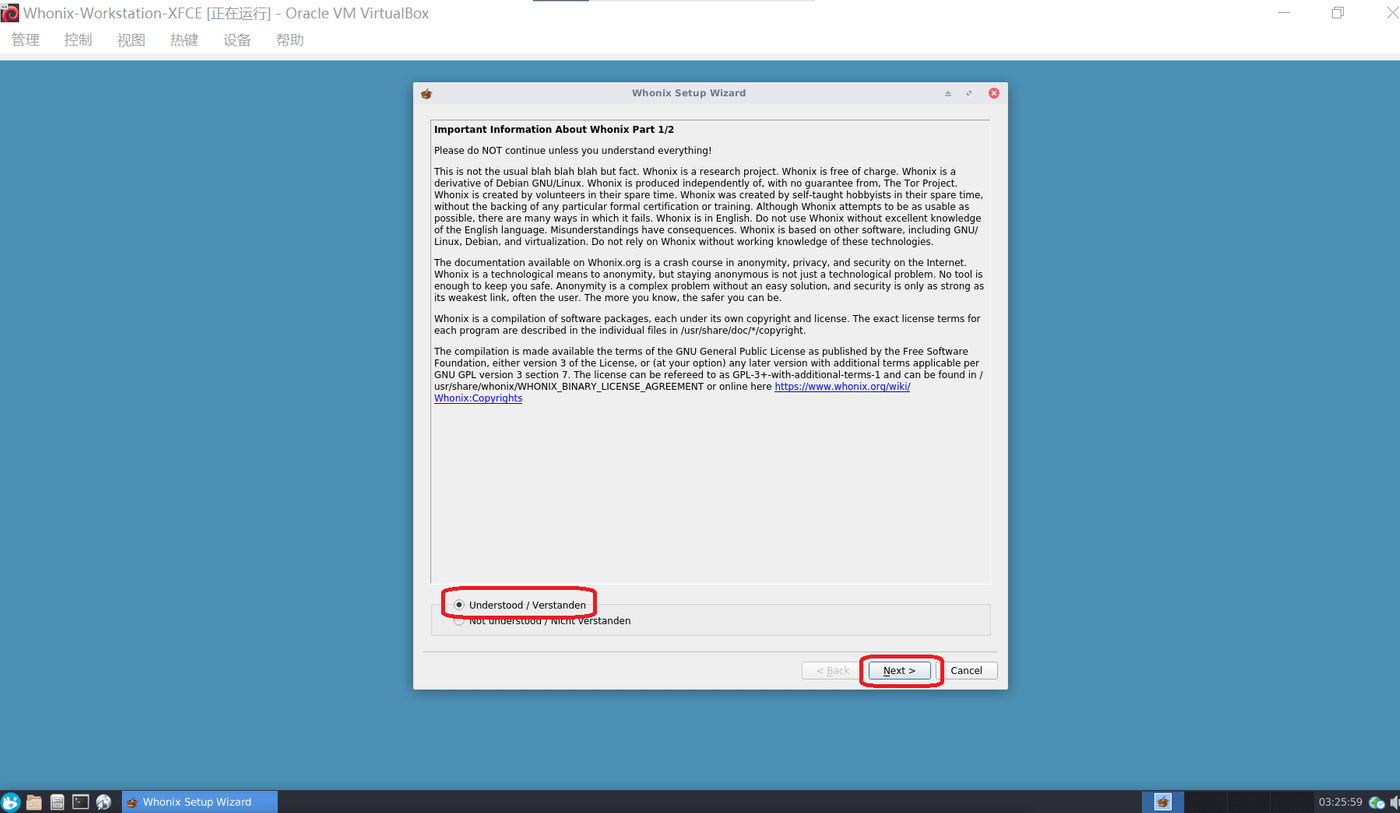
3.2 Click "Understood/Verstanden" and then click "Next".
(Note: If the Whonix window is not displayed normally at this time, don't worry, the Whonix window will return to normal the next time it is started.)
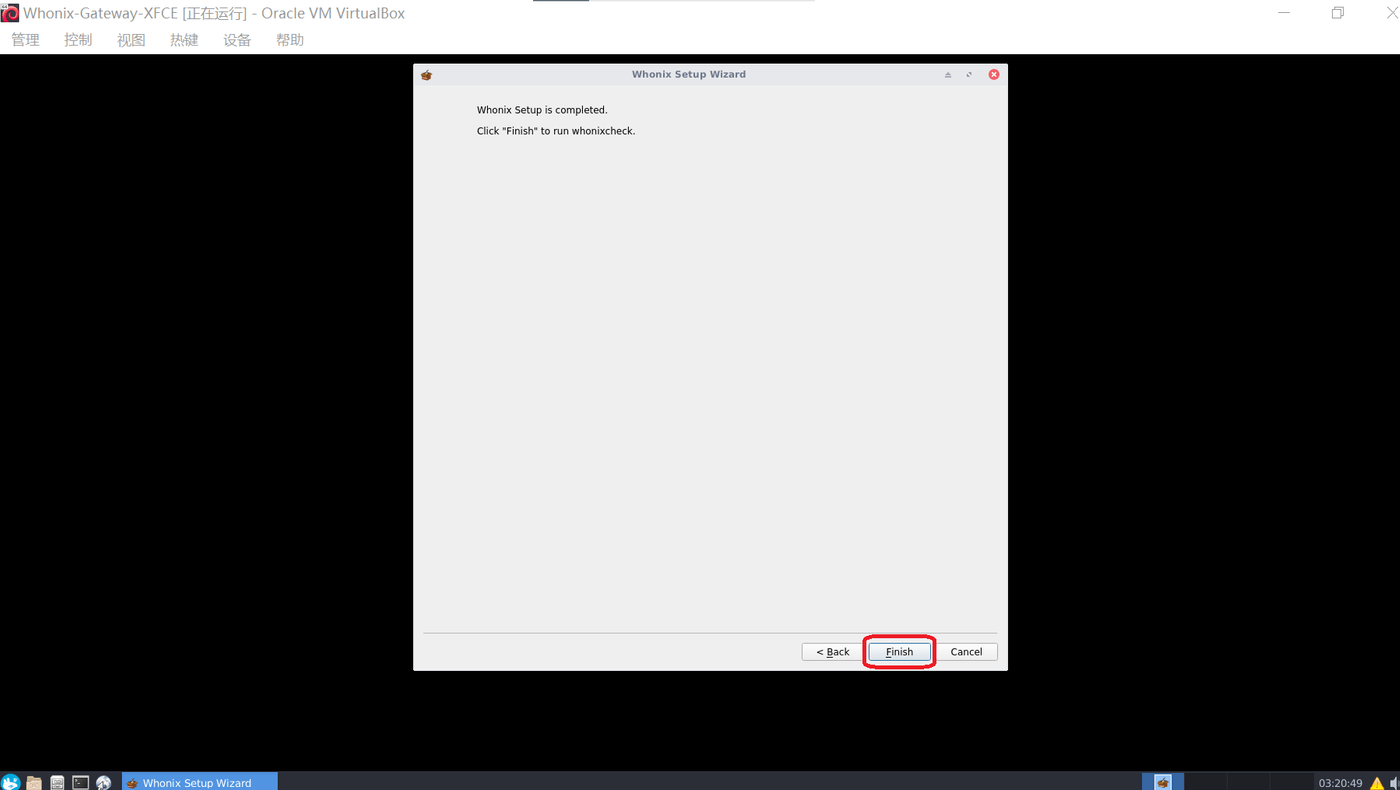
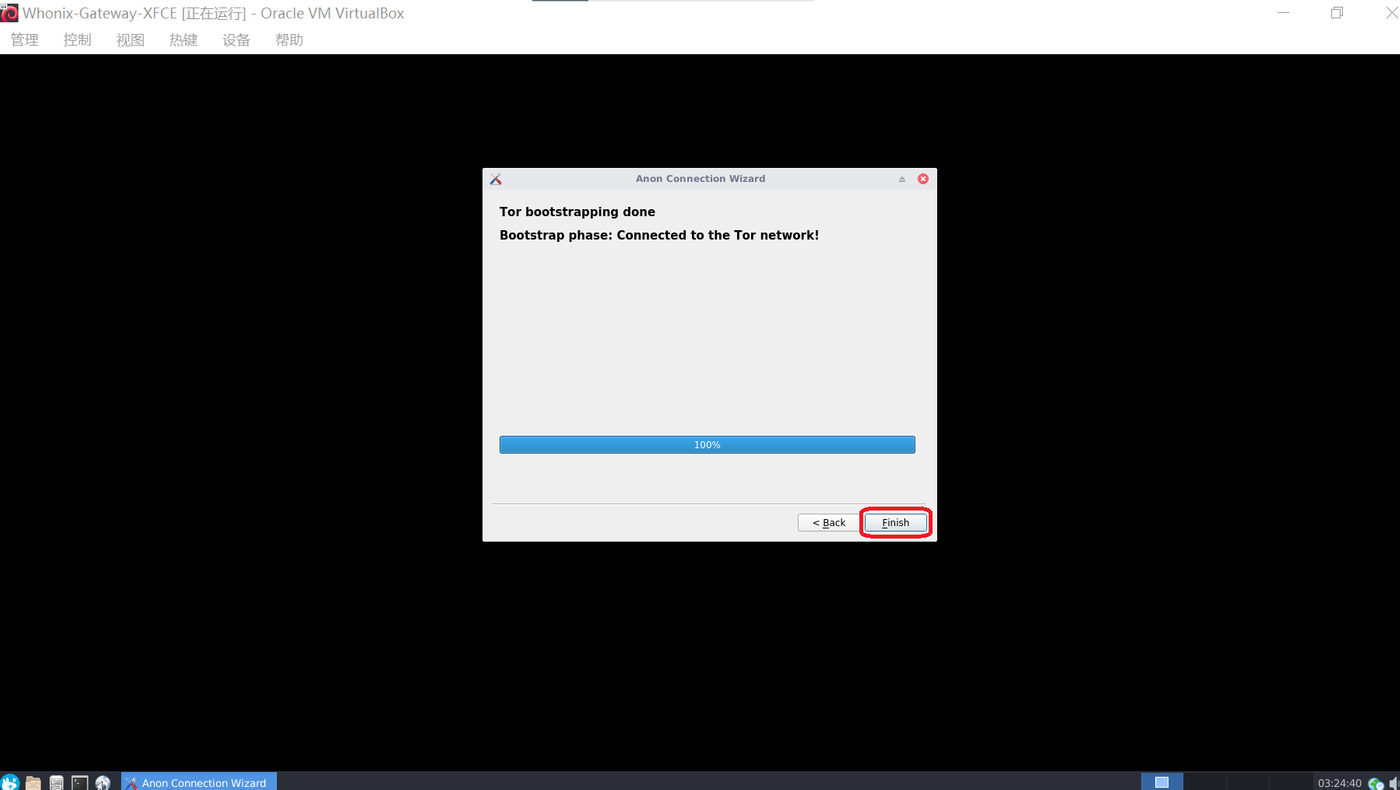
3.3 Click "Finish".
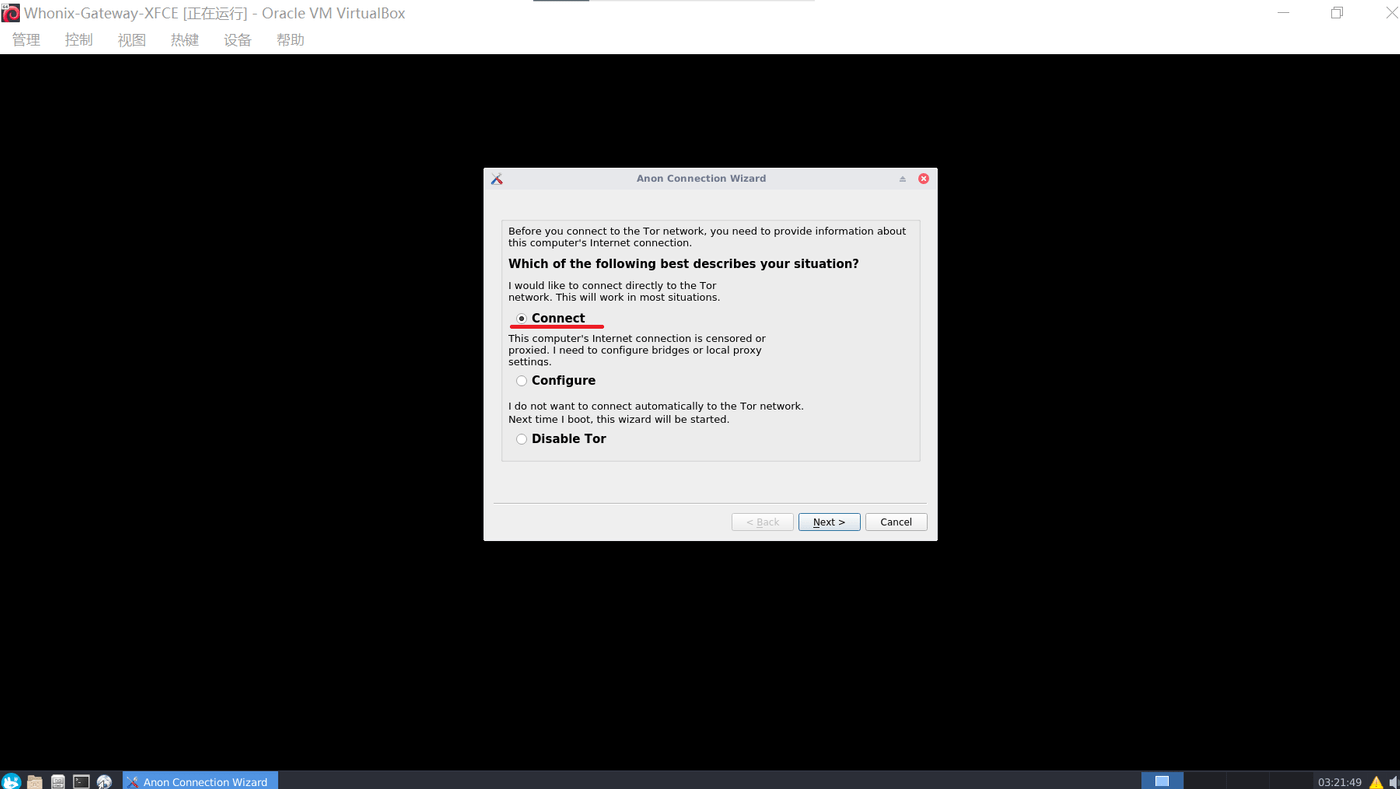
3.4 If the VPN has been enabled on your computer (Host OS), you can select "Connect" and then click "Next", and skip to step 3.7. (Note: V2Ray, Shadowsocks and other over-the-wall tools [not] VPN.)
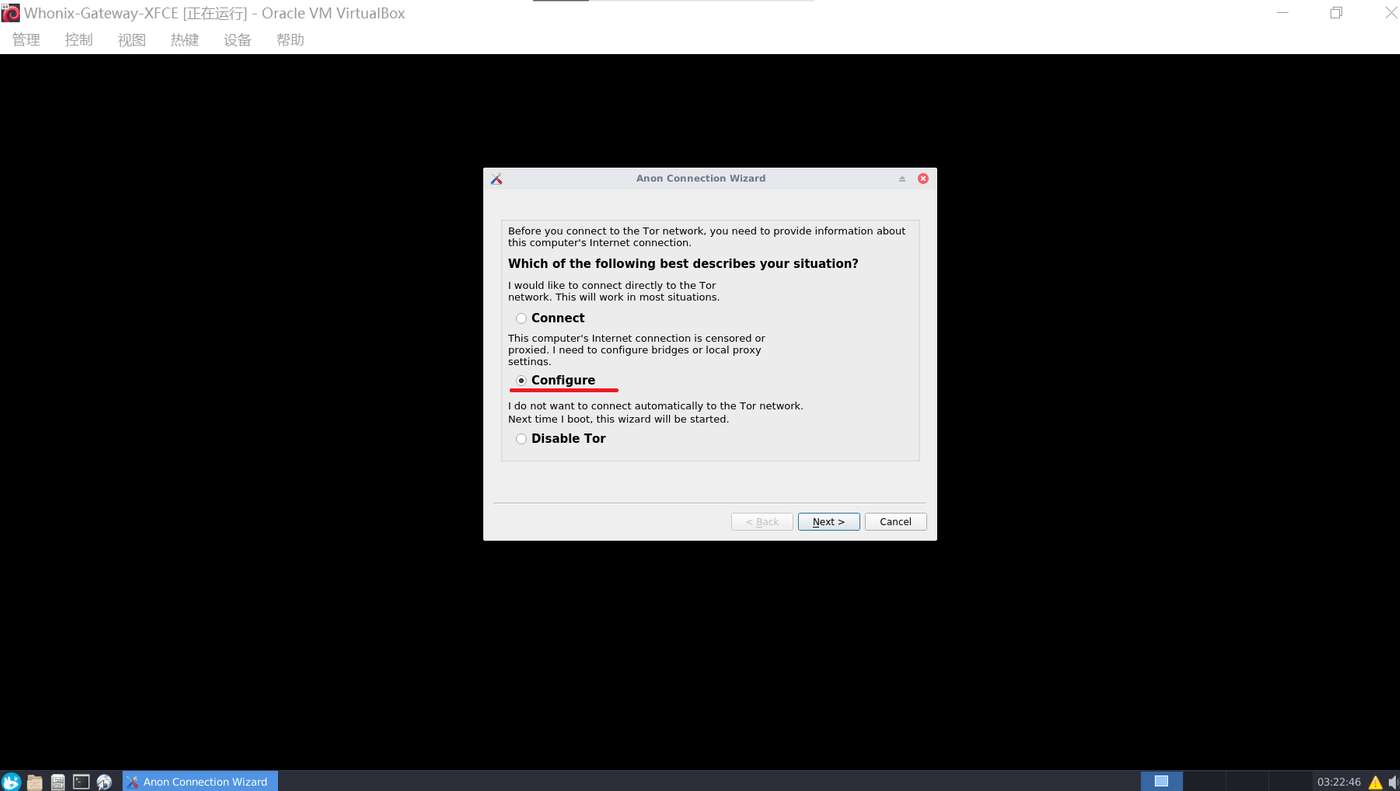
3.5 If there is no VPN on your computer, then you can select "Configure" and click "Next".
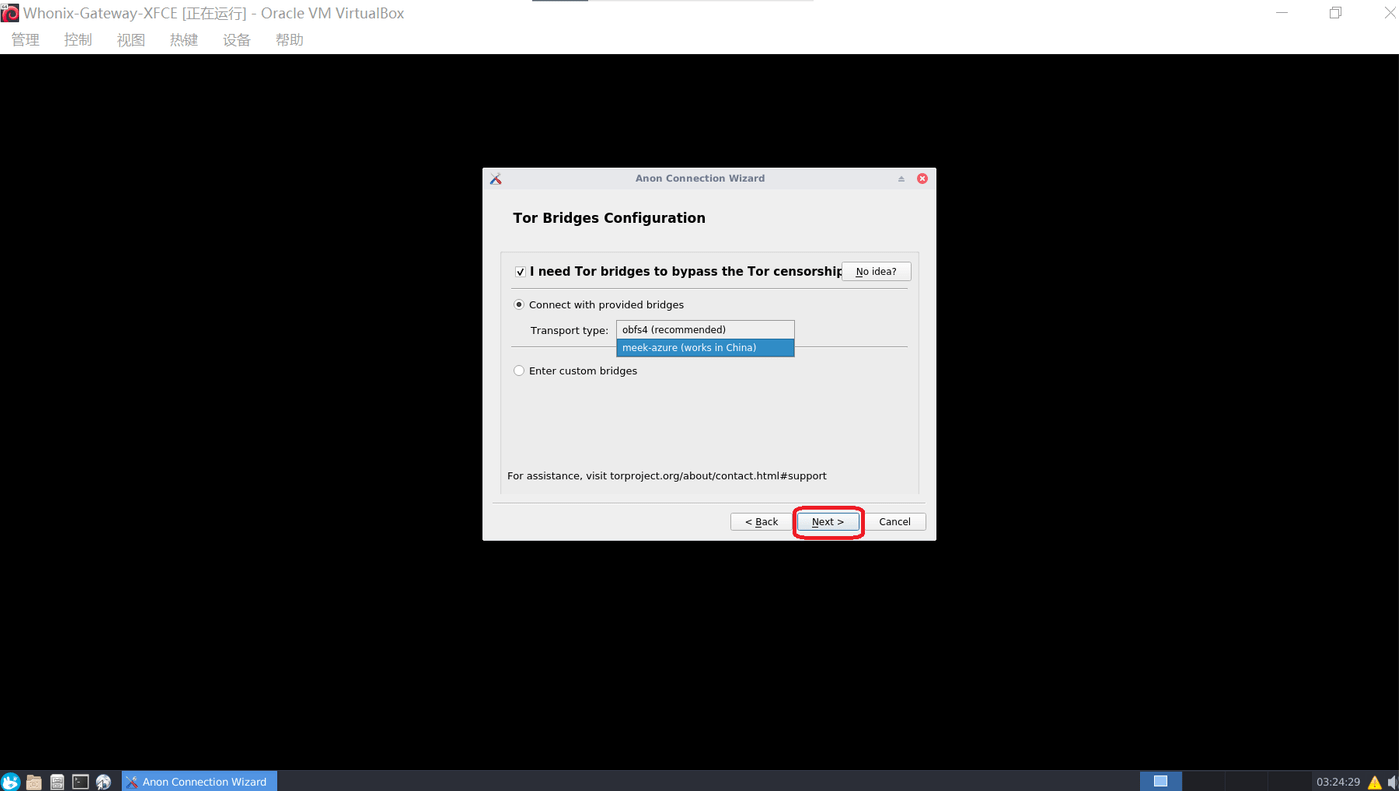
3.6 Tick "I need Tor bridges to bypass the Tor censorship", select "Connect with provided bridges", and then click "Next".
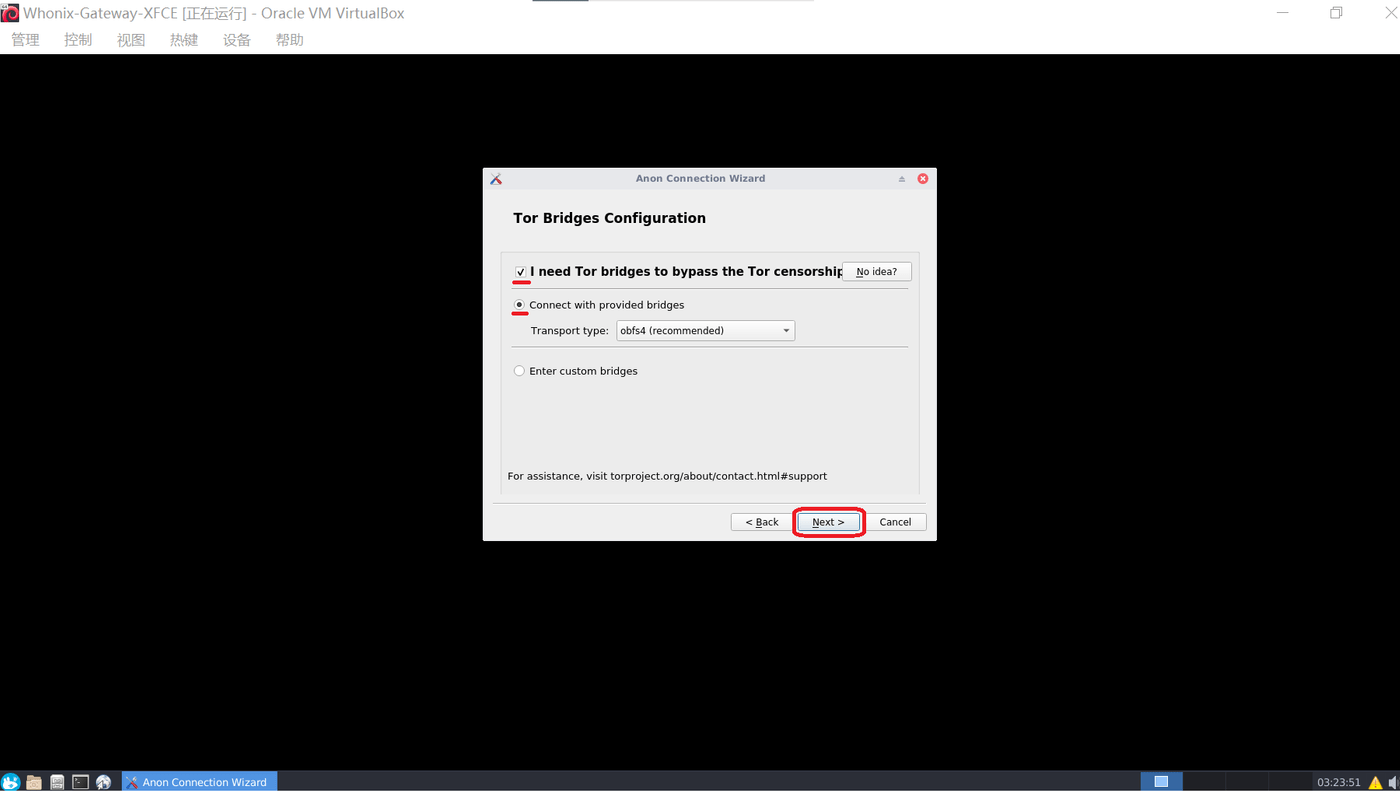
You can also choose a different connection method here, choose between "obsf4" and "meek-azure". Then click "Next".
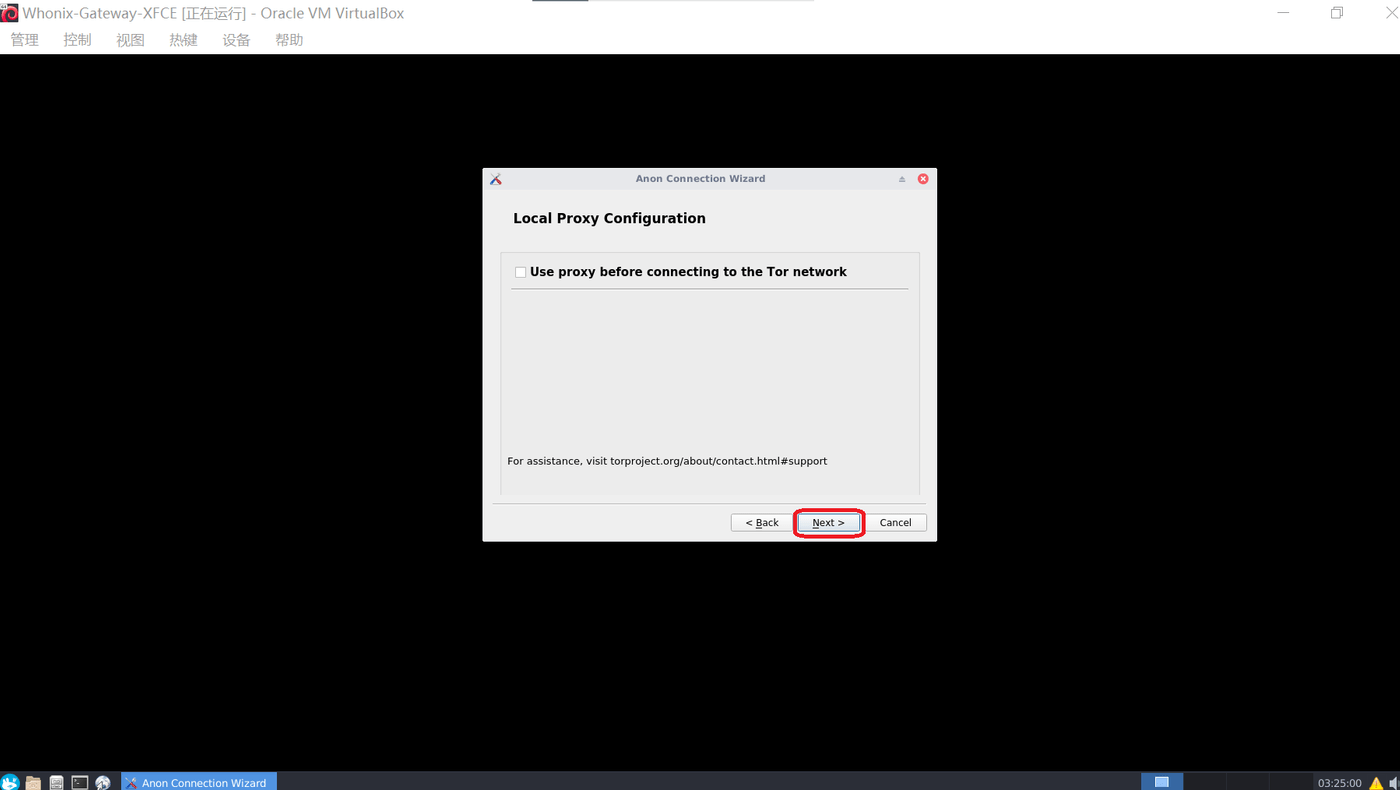
3.7 Continue to click "Next".
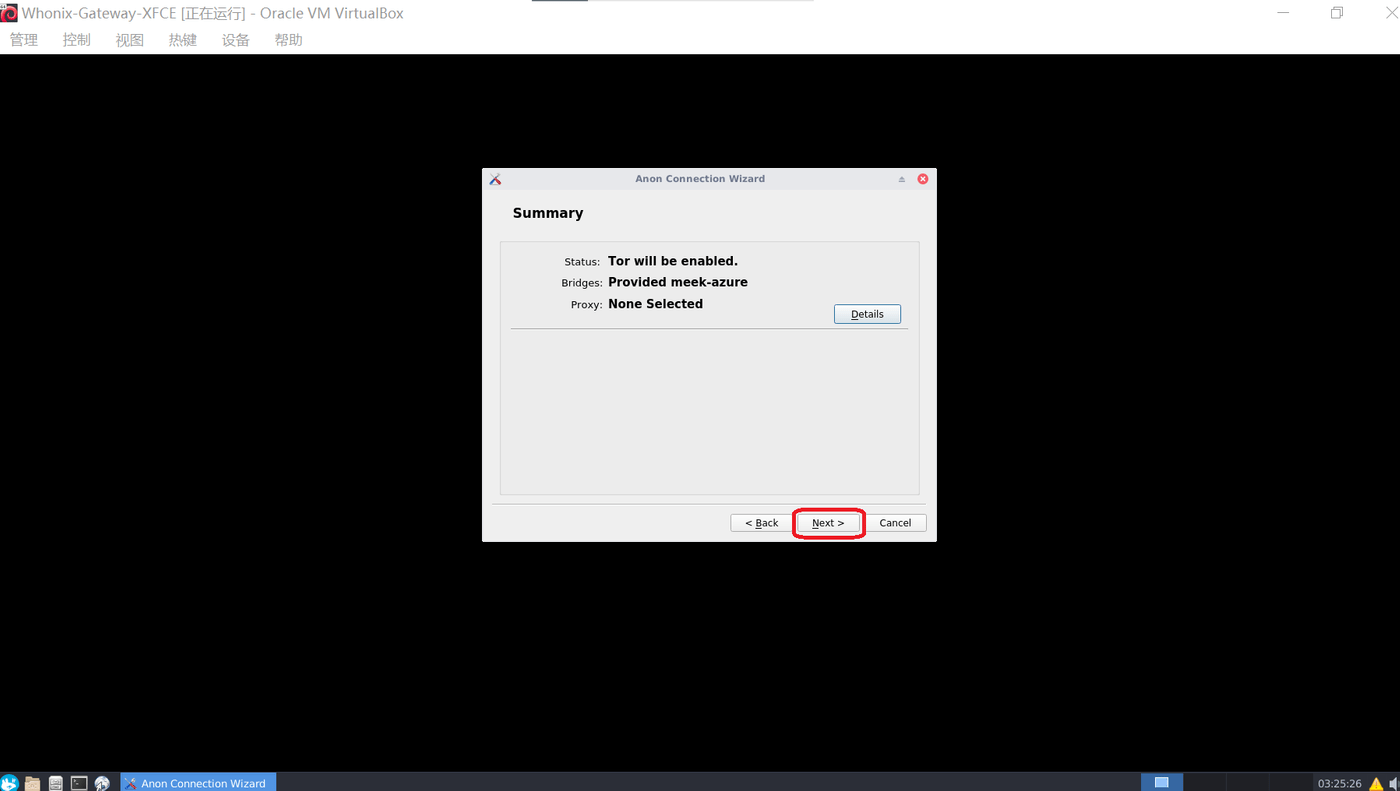
3.8 At this time, the Tor connection is established.
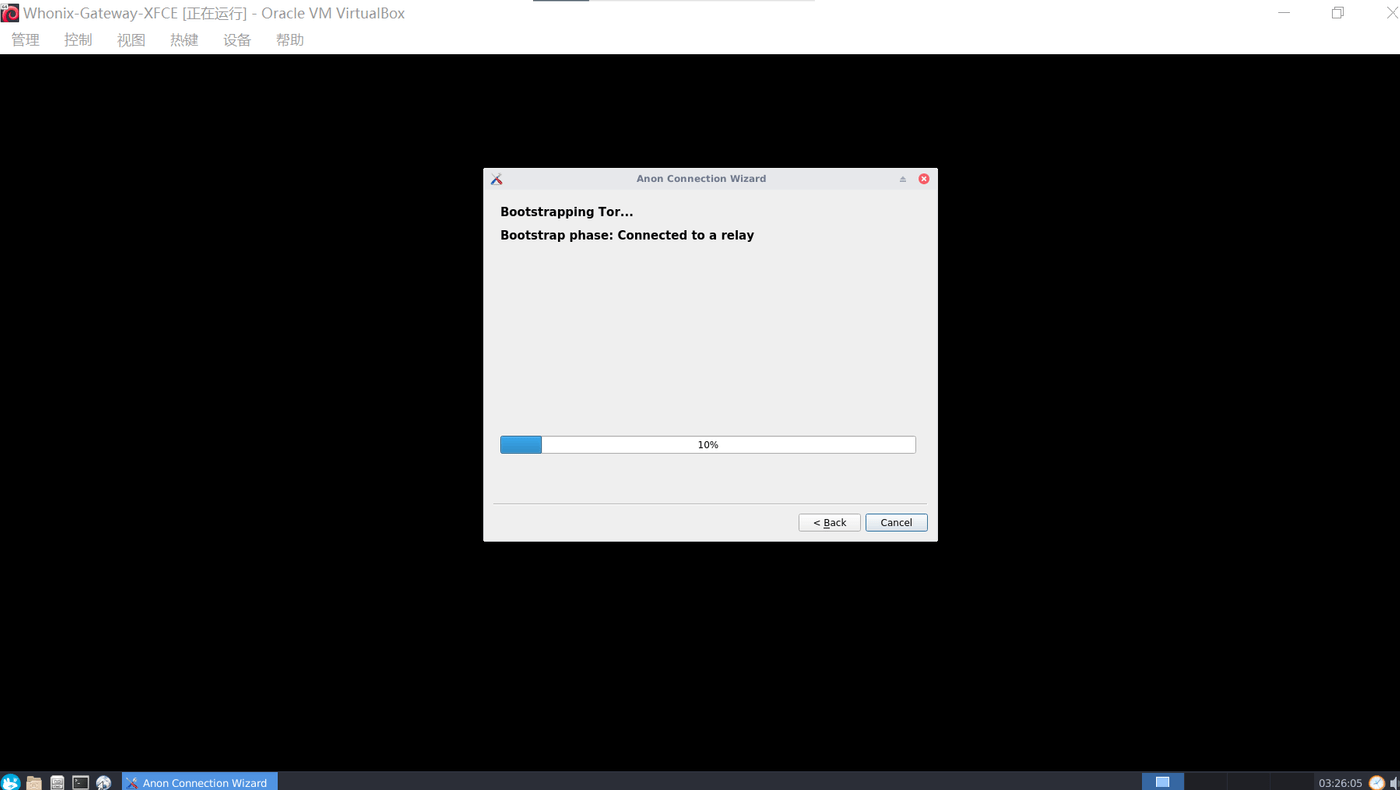
connection succeeded. Click Finish to close the dialog.
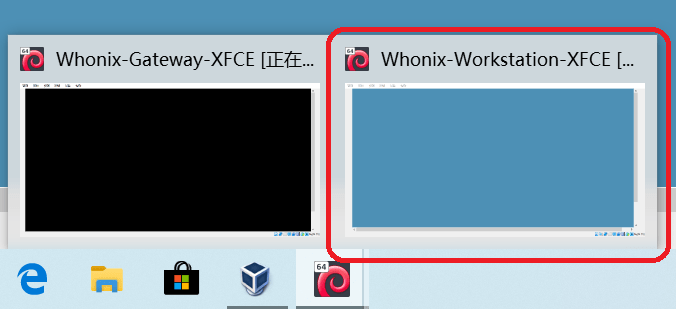
3.9 Next, open "Whonix-Workstation-XFCE" on the Windows 10 taskbar.
3.10 Same as step 3.2, click "Understood/Verstanden", and then click "Next".
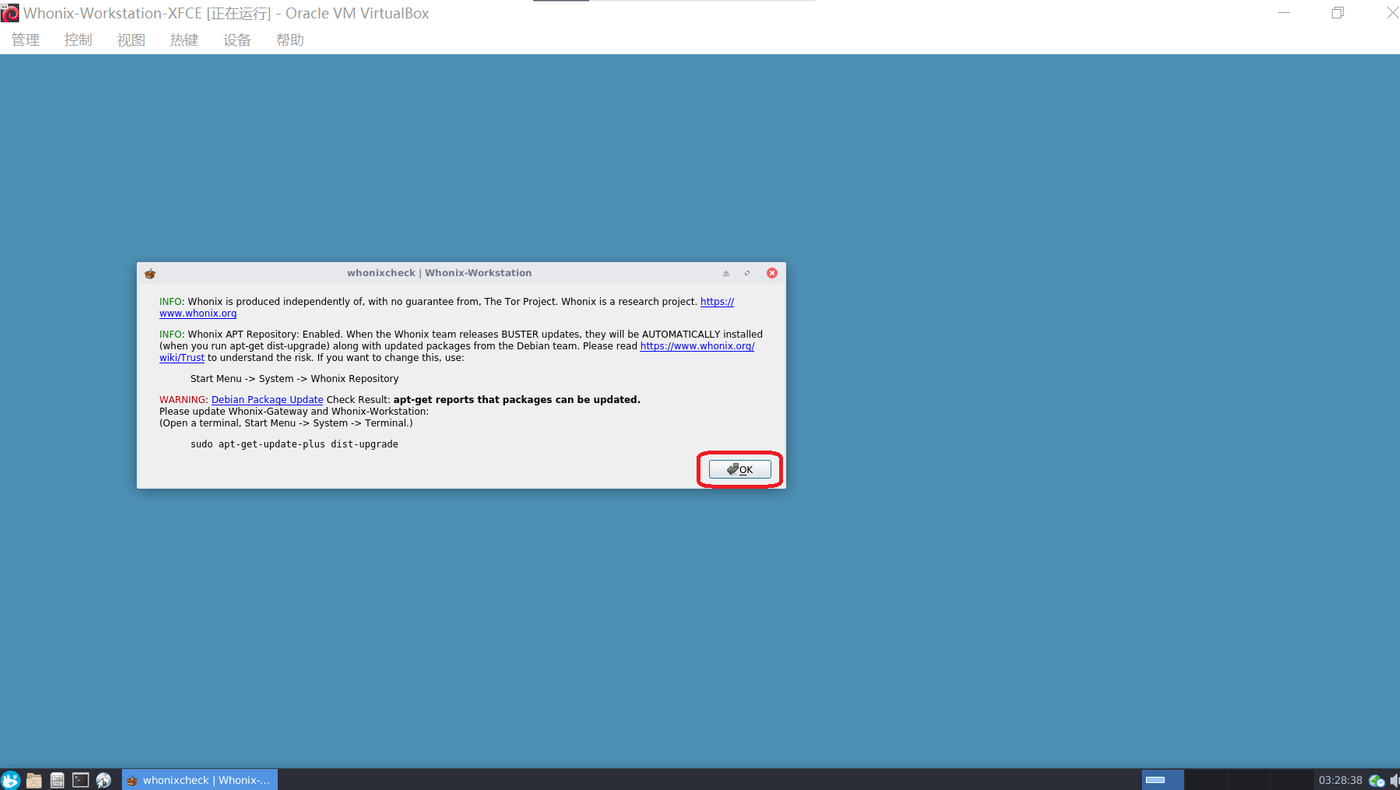
3.11 Whonix will check itself the first time it starts up.
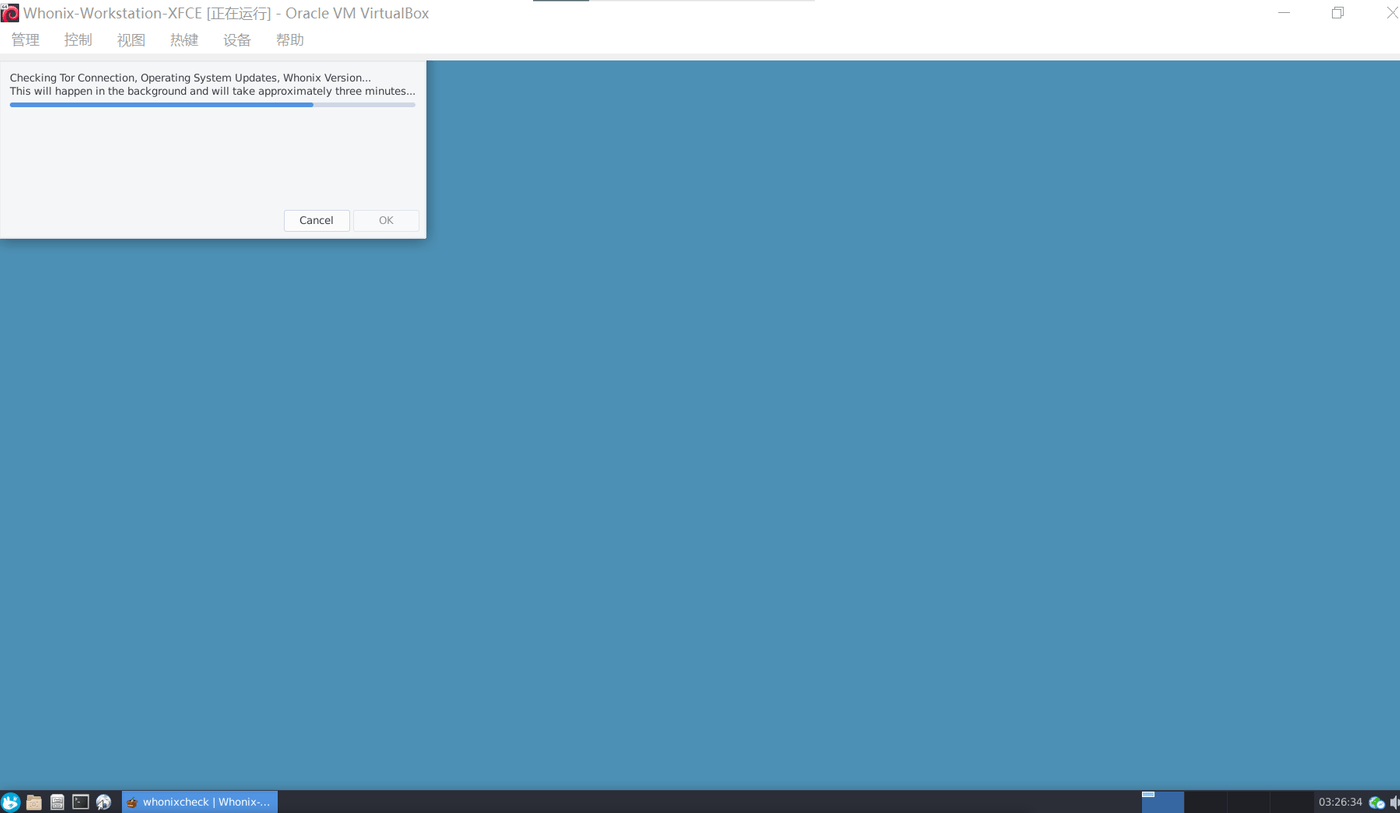
After checking is complete, click "OK".
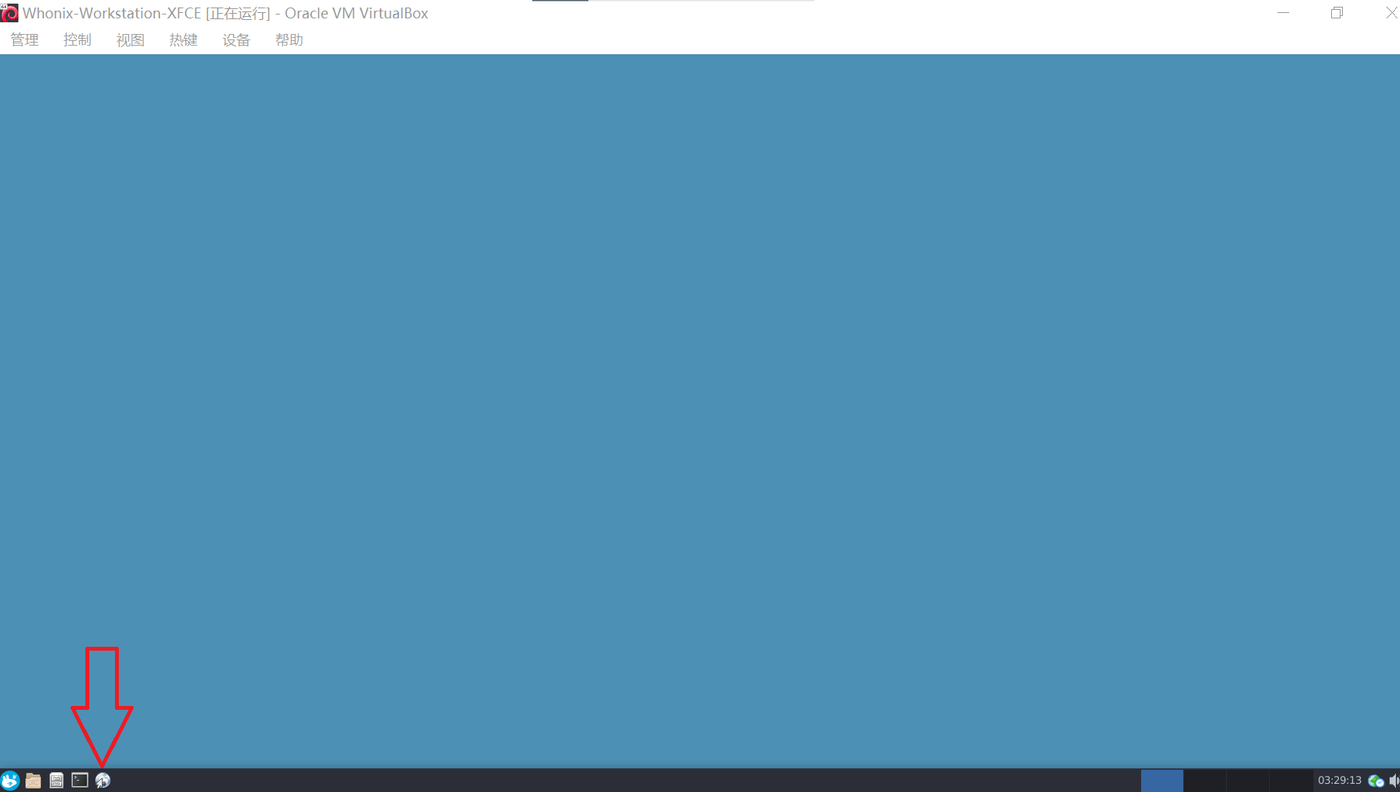
3.12 Open the browser in the lower left corner.
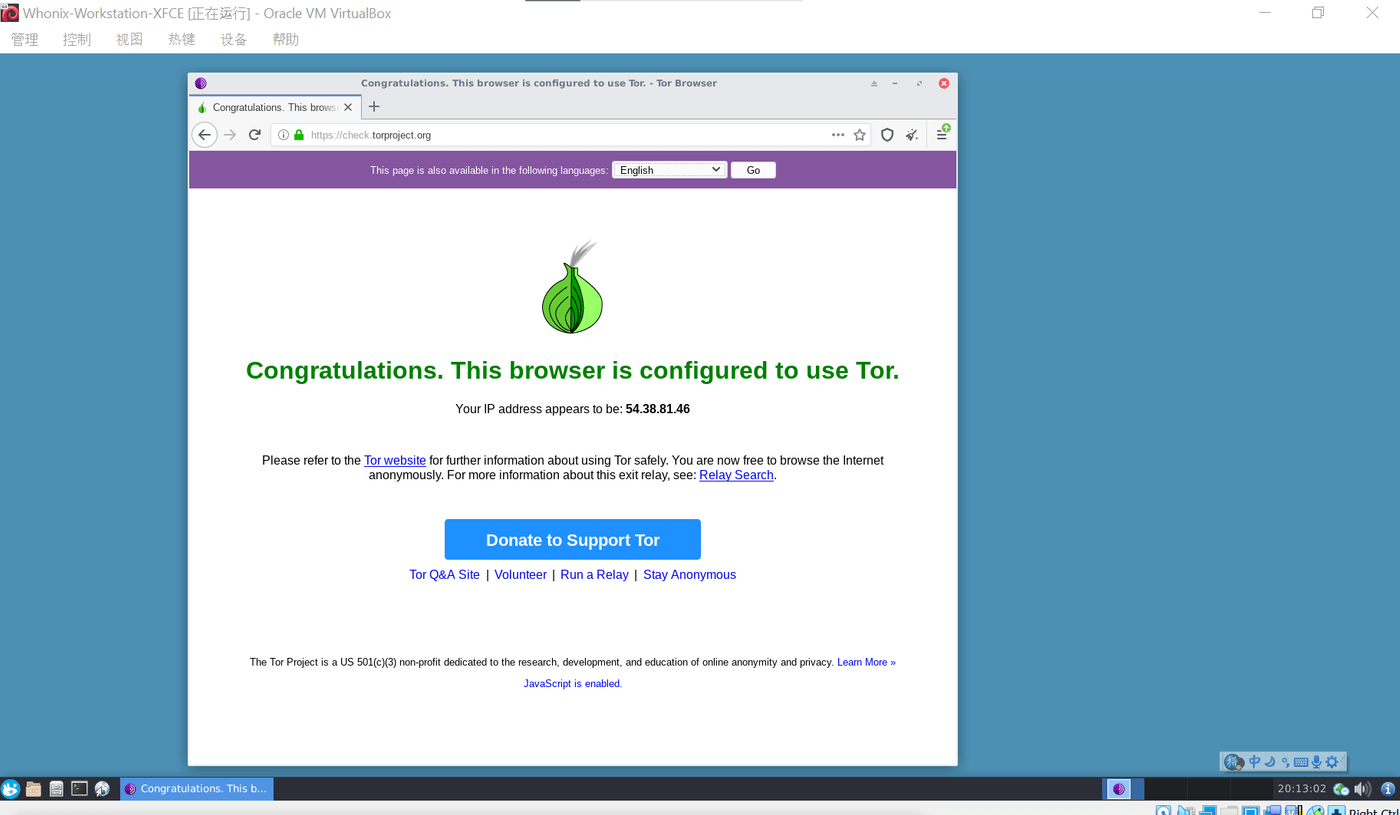
[Optional] 3.13 Open check.torproject.org on the browser to verify the Tor connection. If a green onion appears, it means that Tor has been connected successfully.
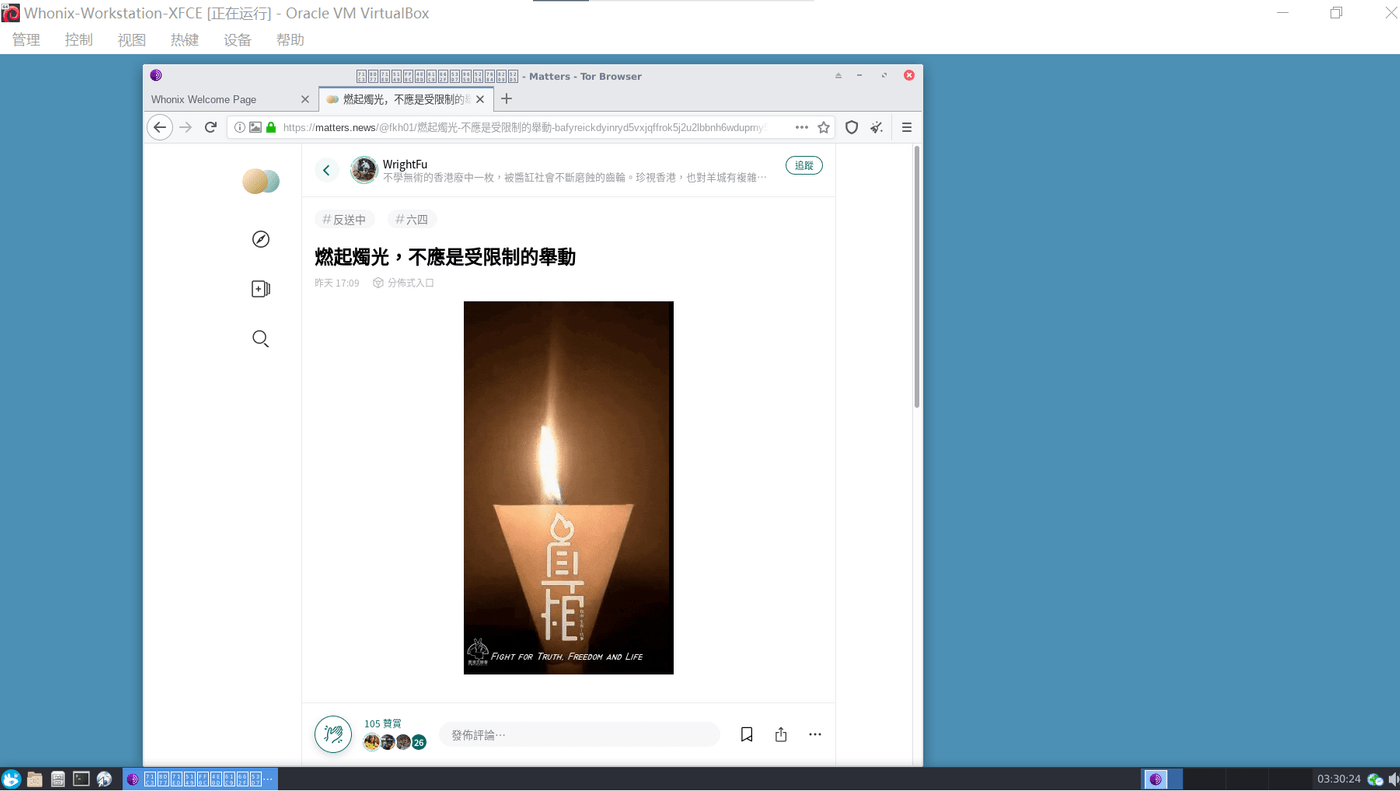
3.14 You can now browse the Internet anonymously. Even if there is a hacker attack, it will not know your real IP address. But it must be remembered that sensitive operations (such as making reactionary remarks, etc.) are [only] in Whonix-Workstation-XFCE, not [not] in Whonix-Gateway-XFCE.
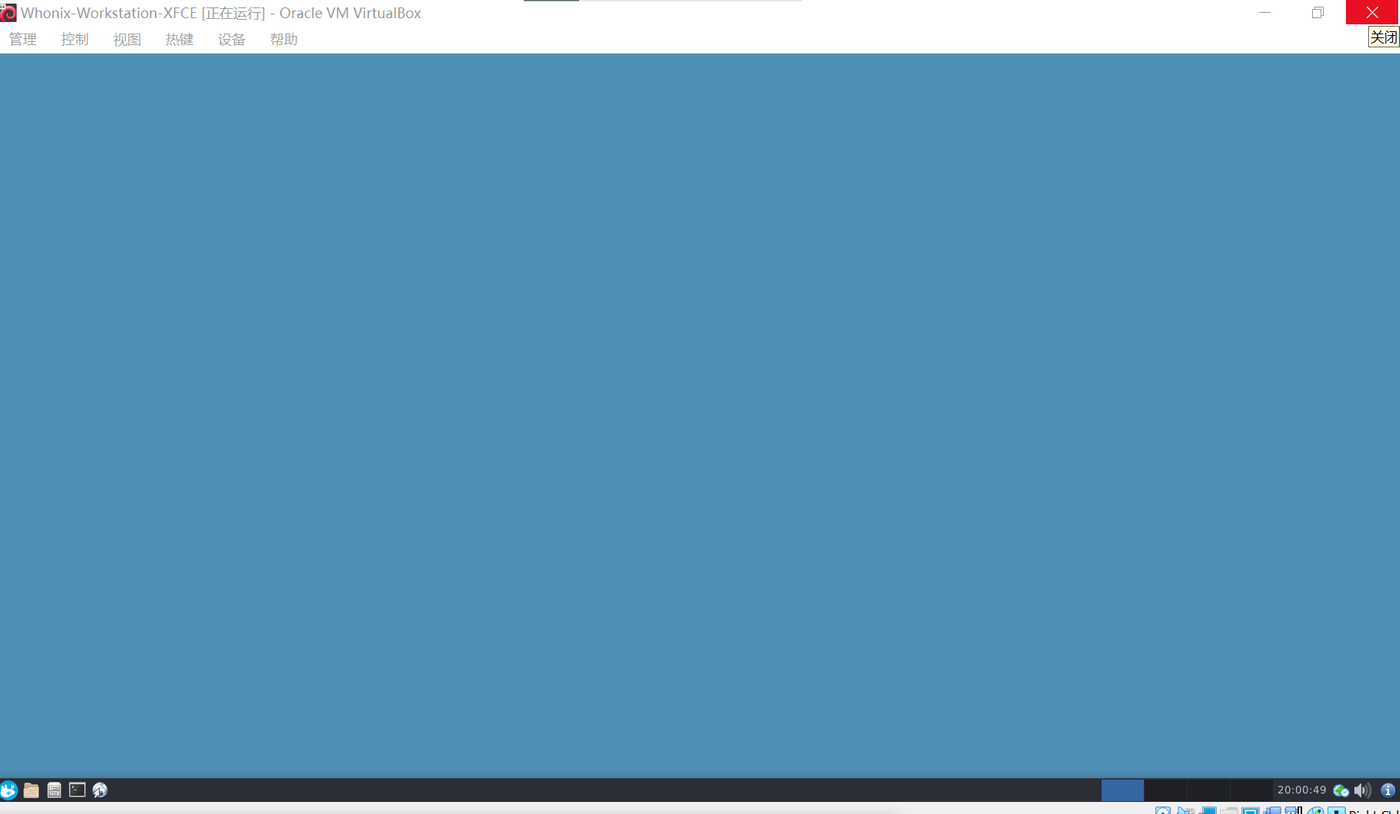
3.15 If you want to close Whonix, click ❌ in the upper right corner of the window.
Select Graceful Shutdown and click OK.
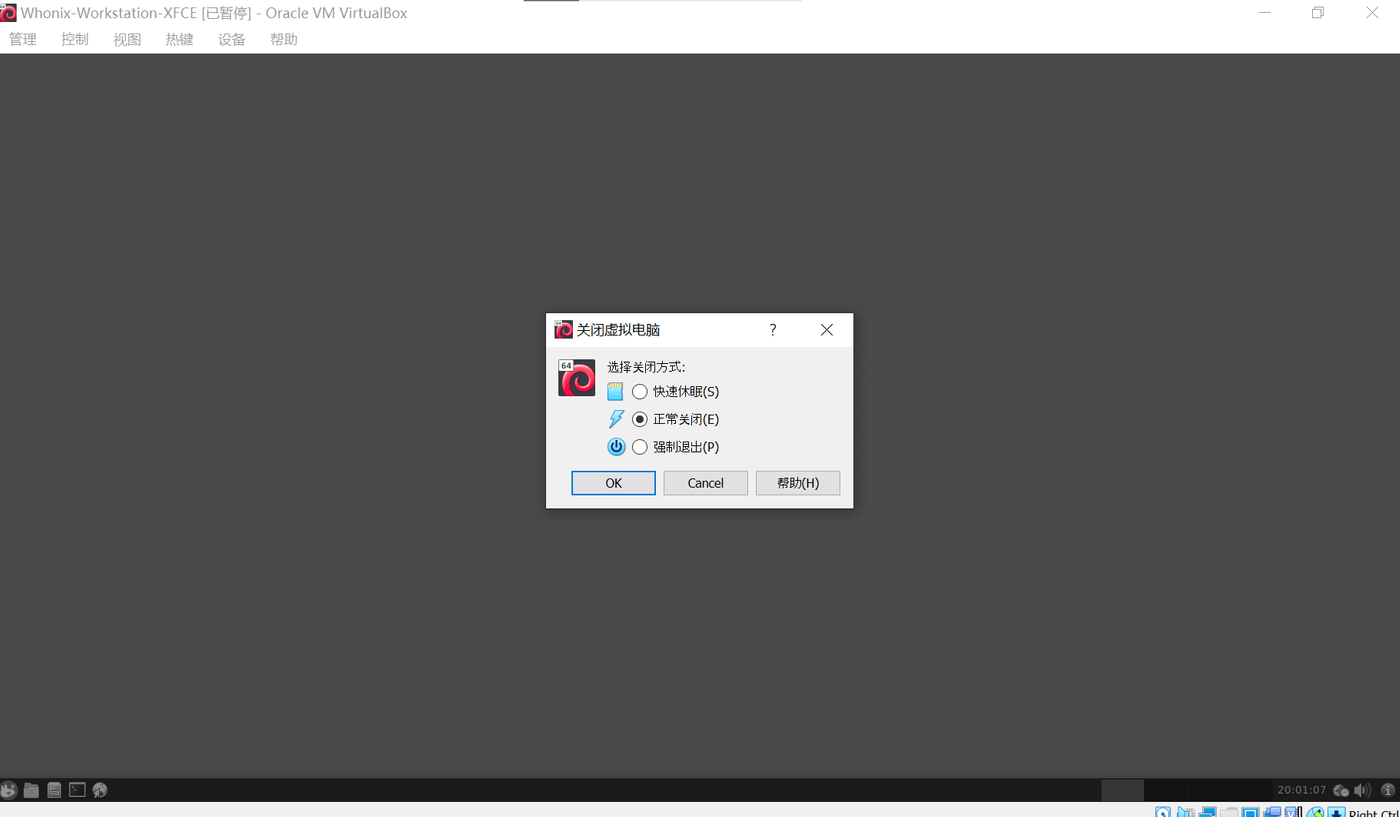
3.16 Since Whonix is a dual virtual machine, you need to shut down the other virtual machine Whonix-Gateway-XFCE. Repeat step 3.15 to close Whonix.
As you may have noticed, Whonix's default interface is in English, which is very unfriendly to people who don't understand English. In the next tutorial, I will talk about how to install Chinese fonts on Whonix, set the Whonix interface to Chinese, and install Chinese input methods on Whonix.
Addendum: "Frequently Asked Questions About Whonix" https://www.whonix.org/wiki/FAQ (in English)
Like my work?
Don't forget to support or like, so I know you are with me..
Comment…